by Gordon Macdonald •
The warmer months see a noticeable increase in the number and variety of pelagic species in our bluewater environment. Numerous billfish species including black, blue and striped marlin, as well as sailfish are caught – with the occasional spearfish as well. Additionally, desirable pelagics such as wahoo, mackerel (Spanish, spotted, shark and school), mahimahi, yellowtail kingfish, cobia and tuna (yellowfin, longtail, mack and striped) are all also on the agenda. These as well as many demersal species, all prey predominately on baitfish species – so using whole fish baits for these species is a wise choice. Rigging these baits well will make them more enticing and natural in appearance, which increases your chance of a solid connection to the attacking predator – due to more aggressive strikes and prominent hook positioning.
Anglers commonly use baitfish species such as yakkas, scad, cowanyoung, slimey mackerel, garfish, pike, and pilchard, as these are the species most likely to be preyed upon by pelagics and numerous demersal species in our area. Rigging, for each of these baits, is a fairly similar process – though it will depend on the target species and the location being fished, whether the baitfish will be alive or dead. Greater consideration needs to be given to live offerings, as you still need good hook coverage yet want to minimise damage to the baitfish to guarantee it is still swimming strong and healthy until a predator engulfs it.
Although experienced anglers all have their own preferences for rigging baits for certain species and situations; following are a few of the ways I rig baits for fishing throughout Southern Queensland. The first picture instructs the rigging of live bait for either slow trolling or dropping back into a baitfish school or adjacent to a structure. This rigging is especially popular with anglers targeting billfish in open waters where the bait is scattered. In this scenario, the billfish are usually cruising around plucking off what they can from what’s on offer. The rigged baitfish is slowly trolled (1-2 knots) with plenty of stopping to allow the bait to slowly sink down. Also, when large baitfish balls are located (these are formed when lurking predators condense the bait into a tight conglomeration), anglers will commonly use a bait jig to secure a few live baits out of the school, then rig the baitfish in the following way, and feed it back into the school.
These are just a few basic rigs, which can be used when targeting bluewater adversaries with whole live or dead fish baits. Many anglers have preferences for one or the other, and this will just expand from your personal experiences over time. However, this basic grounding in rigging of your baits will hopefully give you a decent idea, encouraging you to try some live baiting when you’re next out on the bluewater.
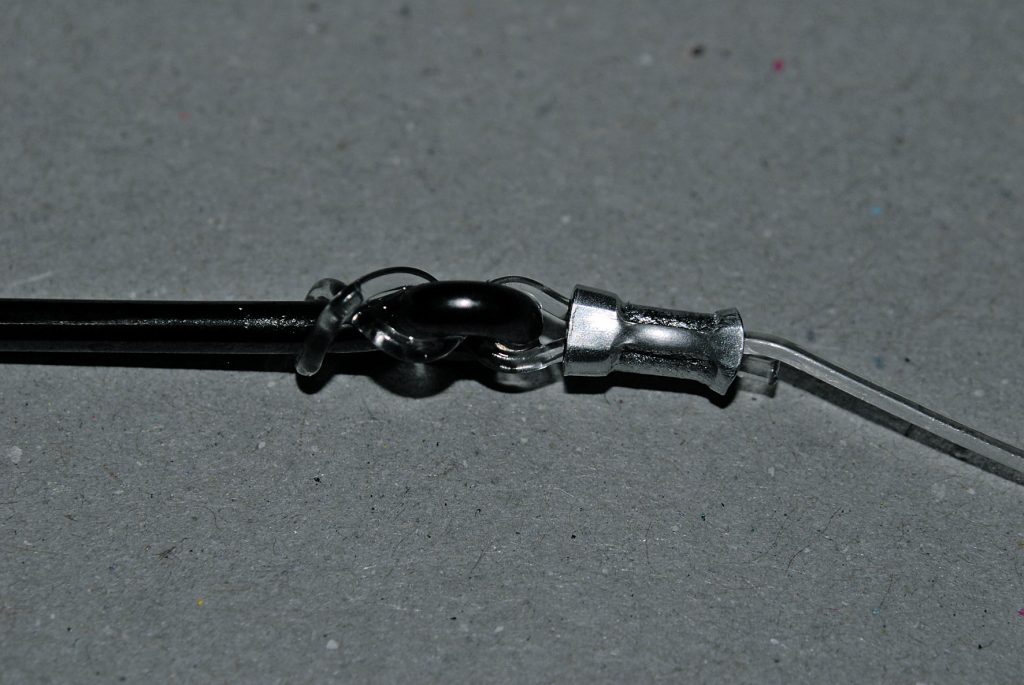
The basic rig for deploying a live-bait generally consists of a leader (60lb-100lb) around a metre long, with a no. 5 to no. 7 ball sinker secured about 30cm up from the hook with a crimp. A small loop is crimped in the other end to allow easy attachment to the ball-bearing snap swivel on the wind-on-leader. In-line (not offset) circle hooks are commonly used, as they secure the hook sets in the corner of the jaw, while not encourage bait spinning when trolled.
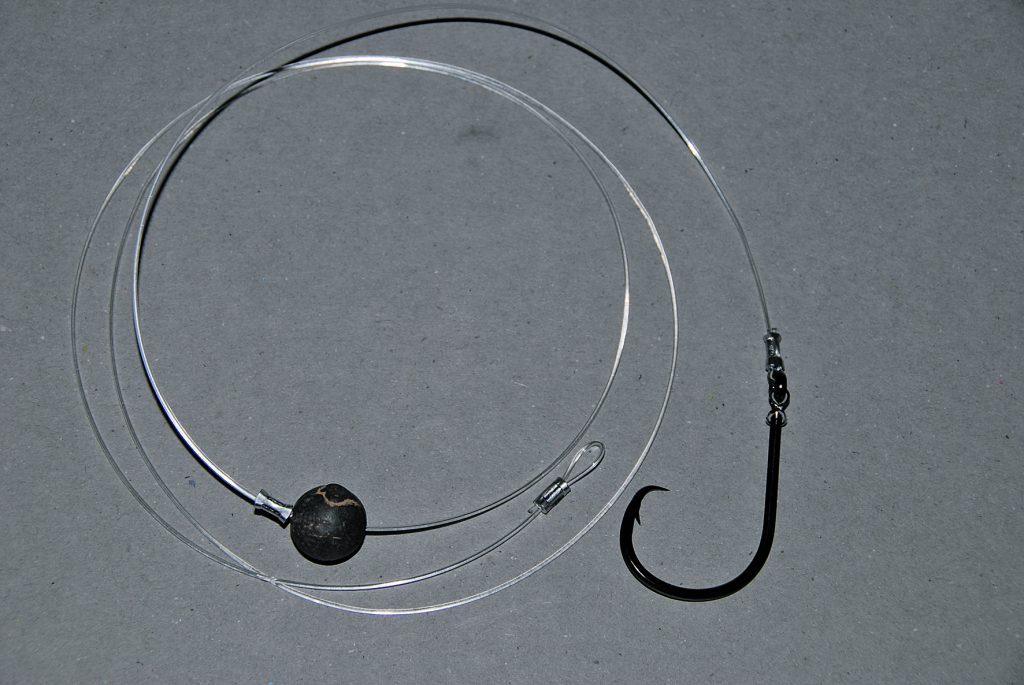
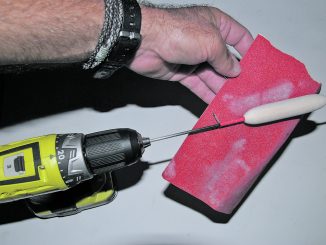
It has been proven using circle hooks will work better when attached to the leader with a stiff connection. This is achieved by passing the leader through one side of the hook eye, wrapping it around the hook shank at least once, then passing it back through the other side of the eye and then crimping close to the hook eye. Rubber bands are commonly used for attaching the hook to the baitfish, but another option is the clear poly hair bands – these bands are tough, clear and less affected by heat when stored for long periods. For rigging baits, you’ll need a pull-through bait needle, which has an open-sided loop on one end, and are commonly made from stainless steel wire.
Loop the rubber band over the hook shank (a no. 16 will do for most baits). If preparing rigs before the trip, you can use a clove hitch knot to keep the band on the hook – so they’re ready immediately when needed.

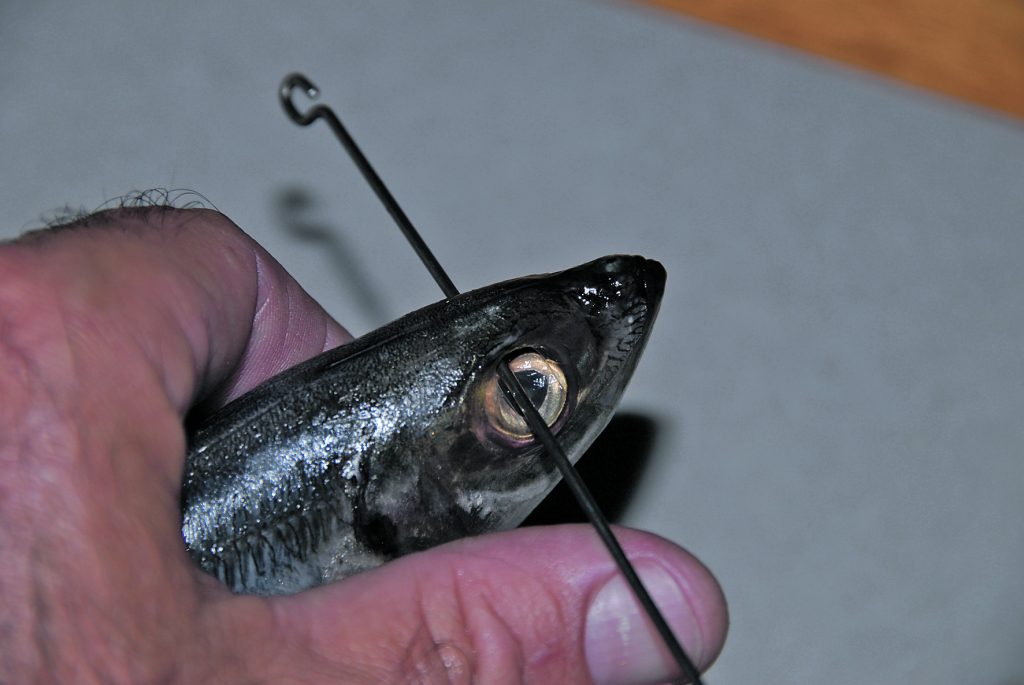
Holding your live slimy mackerel or yakka securely, push the loop side of the needle up through the top of the eye socket from one side through to the other. There is a recess in the top of the eye socket and the needle will push through quite easily, while doing little damage to the live bait.
Loop the rubber band over the eyelet in the needle, then pull the needle back through so that the rubber band is now fully through the eye socket with a loop on each side.
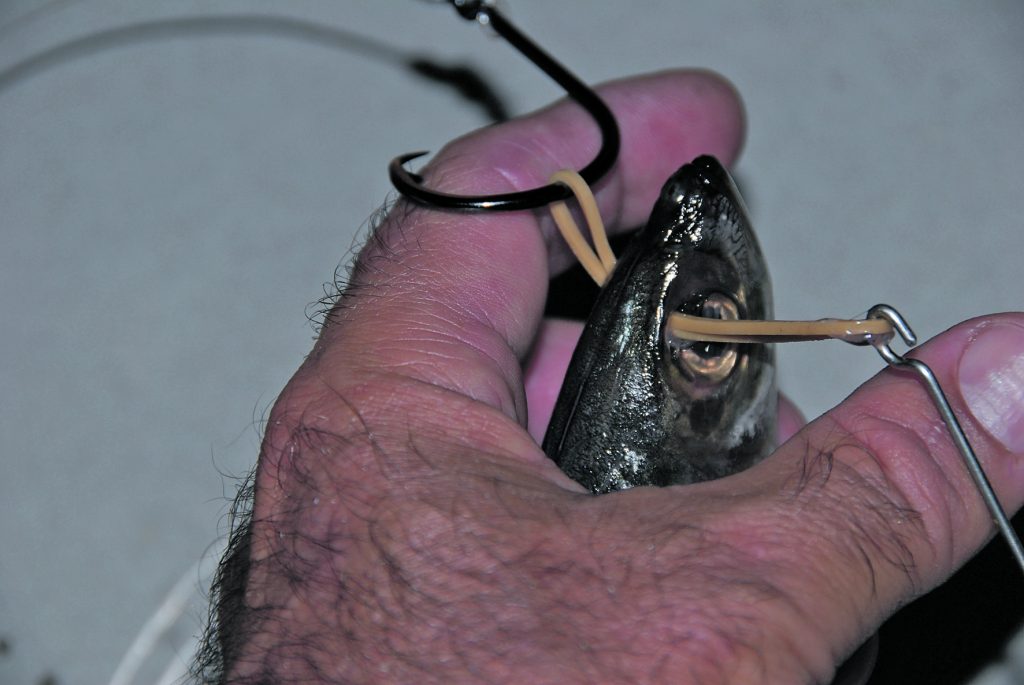
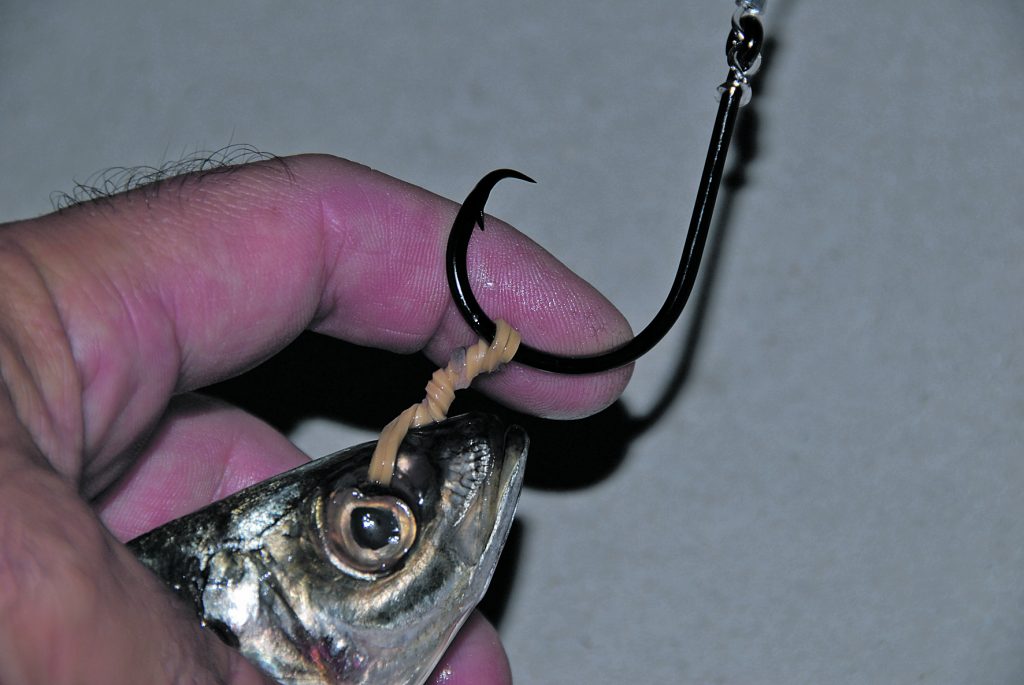
Take the rubber band off the needle, and loop it over the hook so that both loops of the rubber band are now in the hook gape.
Twist the hook around to wind up the rubber band until it is just about taut to the head of the live baitfish. Then pass the point of the hook between the head and the base of spiralled rubber band. The hook should be firm to the head but not too tight; otherwise the baitfish will not swim freely.
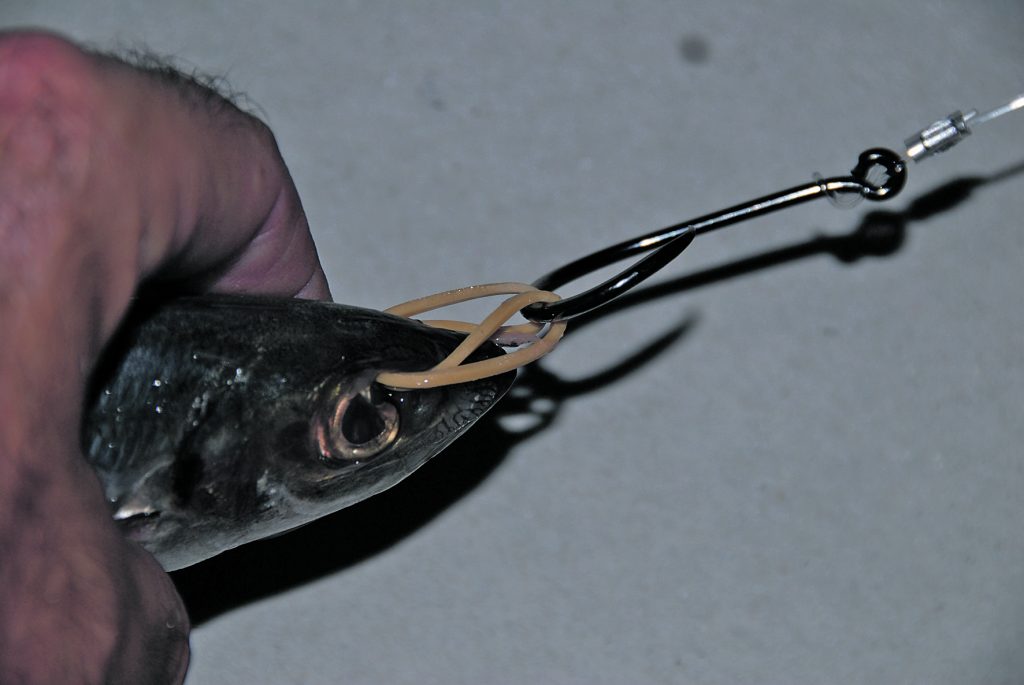
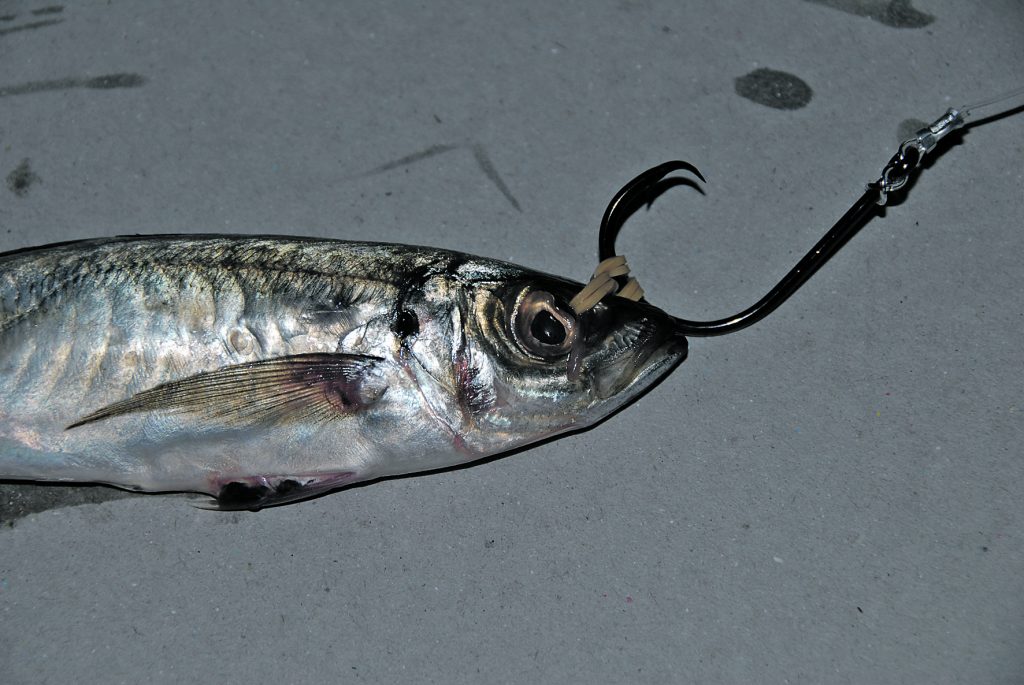
Continue to push the hook through, so that it’s now sitting prominently against the head of the bait, as shown. This bait is now ideal for slow trolling, or for sending back into the baitfish melee where a big pelagic will hopefully engulf it. Once the bait has been swallowed, allow the hooked billfish or other predator to run for a few seconds, then engage the drag and allow the pressure to set the hook. Do not strike with the rod, as you will likely yank the bait from the pelagic’s mouth.
Another way of rigging live bait is to use a snelled hook rig. This consists of two hooks (J-pattern or circle), snelled onto the leader a suitable distance apart, so the leading hook can be passed sideways through the nose of the bait and the trailing hook inserted in the tail area. This is generally used when fishing at anchor or drifting baits, especially for species such as snapper, yellowtail kingfish, mulloway or threadfin, which may not engulf the entire bait properly with the first strike. The additional rear hook will greatly increase your chance of hook-up.
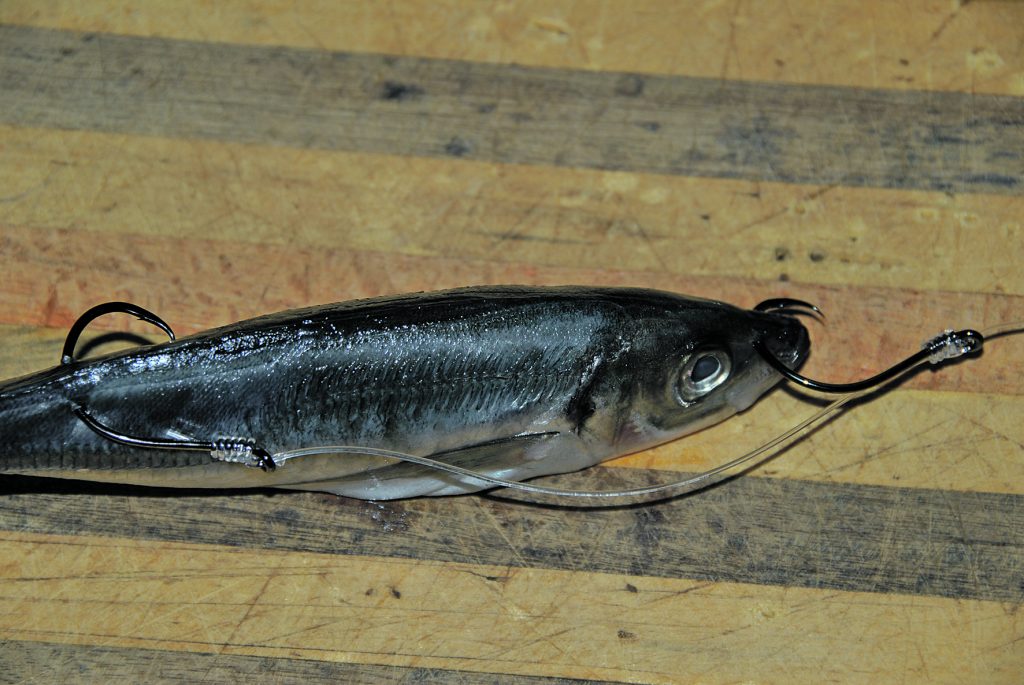
When fishing a dead or live bait in a strong current, or when slow trolling a live bait and favouring a double hook rig, pass the front hook up through the chin of the bait and out the top of the nose. This will keep the mouth shut and limit the bait from spiralling in the current. However, live baits rigged in this manner will generally not live as long.
Another variation of the single hook rubber-banded live-bait rig is to simply insert the hook sideways through the nose of the live bait. The bait will generally not live as long, and cannot swim as freely as with the first method, but it’s a quick way to get a bait quickly back into the water if there is predators lurking close by.
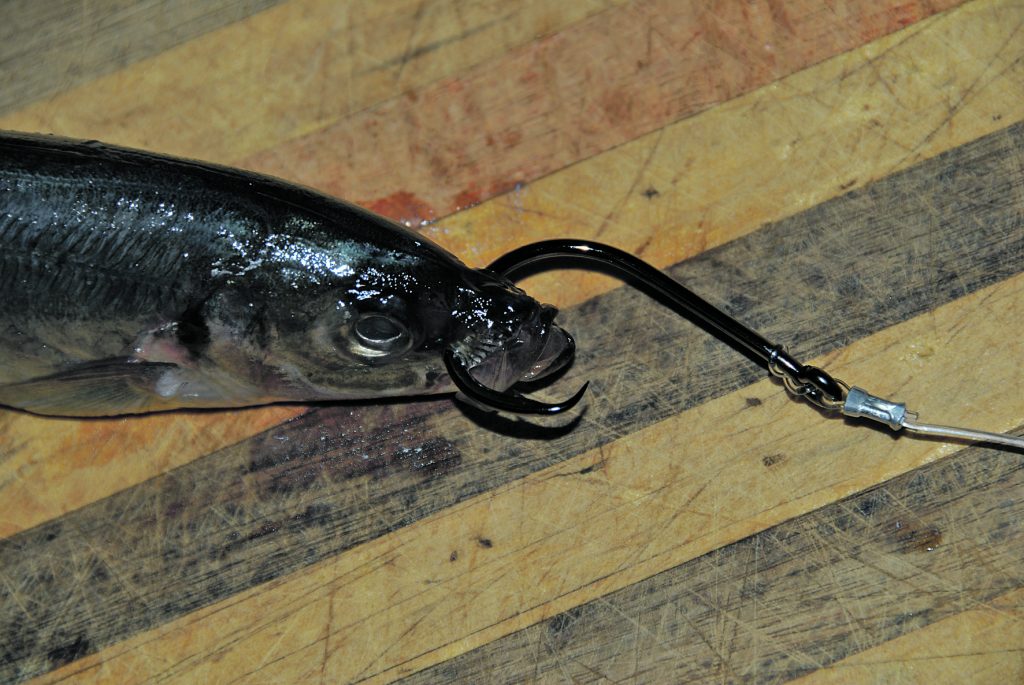
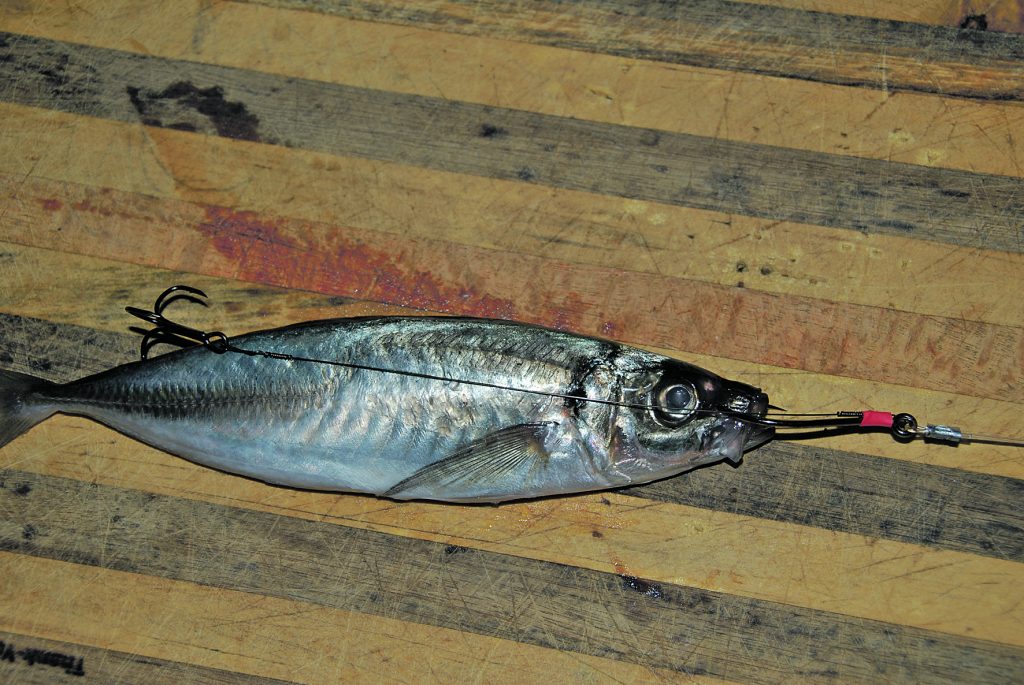
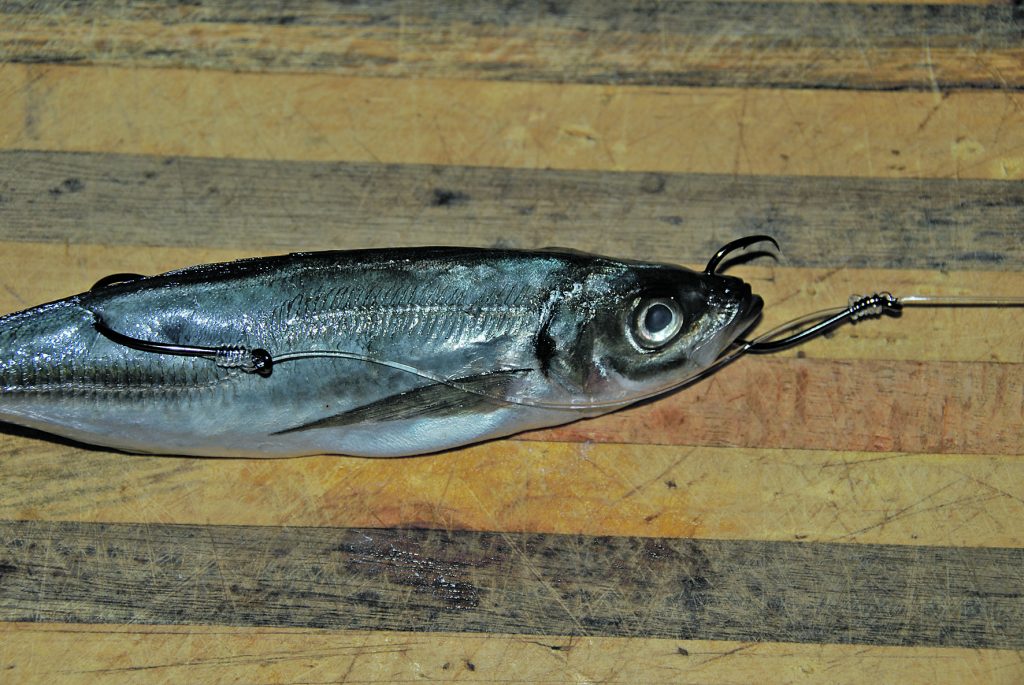
The last rigging method commonly used for bluewater baits is rigging with wire. This is used for toothy critters, especially mackerel species and wahoo. It can be fished with a monofilament leader or wire leader. The front hook is either pinned sideways through the nose or up through the chin area and out the top of the nose. Due to the tendency of mackerel to take the tail off the bait in the first strike, a treble hook is put down near the tail and held there by inserting one point of the treble into the baitfish. A wire leader can be used, but may deter strikes. As mackerel commonly strike the tail, a wire leader is often not required, though the wire connecting the front hook and treble is all that’s required to eliminate a bite-off. This wire is generally high-tensile single-strand (commonly called piano wire), and is haywire twisted to the hooks. The small band of the heat shrink at the head is not required and is just my personal way to neaten the rig.