by Gordon Macdonald •
Spring is prime month for anglers to target school mackerel in the channels and adjacent the ledges and banks in Moreton Bay. There are numerous techniques that can be employed to catch these succulent silver streaks, however trolling spoons would have to be one of the more popular and successful methods.
Even commercial fishers troll spoons behind paravanes or trolling boards now that specifically ring-netting school mackerel has been banned. You can often see the pros in the eastern end of the Rous Channel and numerous other areas plying their trade during September, which is a sure-fire way to ascertain that the schoolies are on the chew.
Spoon lures are one of the oldest lures around and have been used to catch everything from tiny trout to spectacular Spaniards. The curved, dished shape of these commonly metal lures means that they will spin when trolled. This produces a constant flashing and even a slight sideways swagger, which many fish find irresistible, as it resembles a struggling baitfish.
As spoons constantly spin, a swivel (preferably ball-bearing) is necessary to prevent line twist. Being metal (commonly stainless steel), spoon lures will last many seasons and can catch hundreds of fish in their lifetime. Although spoons are sometimes lost due to being bitten off or broken off, you’ll probably have your spoons for many years.
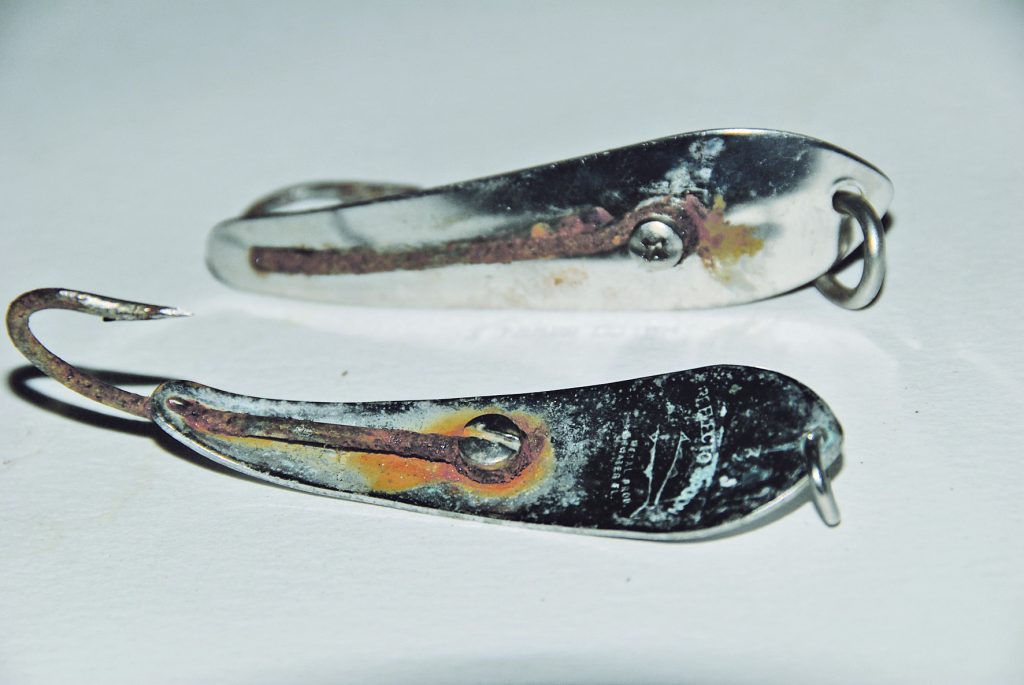
Over time, their hooks will rust badly and the metallic finish of the lure will often become dull, tarnished and rust-stained. This does not make them throwaways, because a little maintenance will have them ready to go back into action.
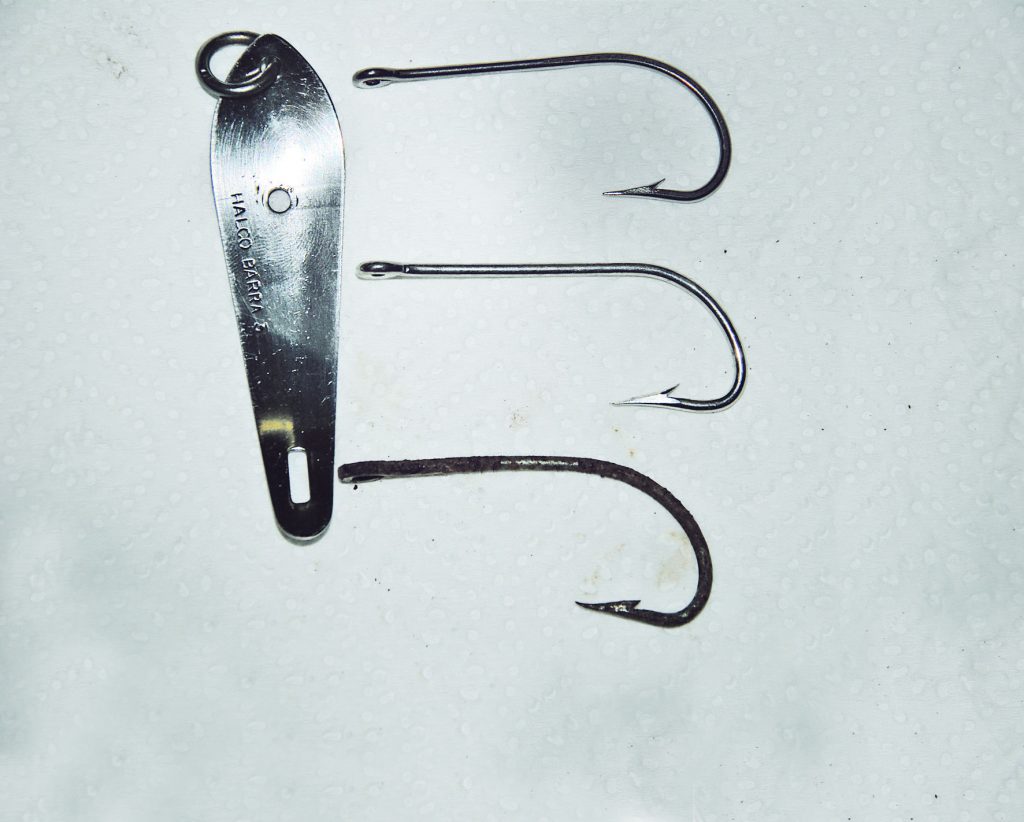
There are many different brands of spoons on the market including Halco Barra Drones, Luhr Jensen Reflecto Spoons (also called ripple spoons) and Makka Spoons. All are great products, however, the most commonly available are the Halcos. I used these for this article, but the basic practices, hooks and methods will apply to most brands.
Step 1.
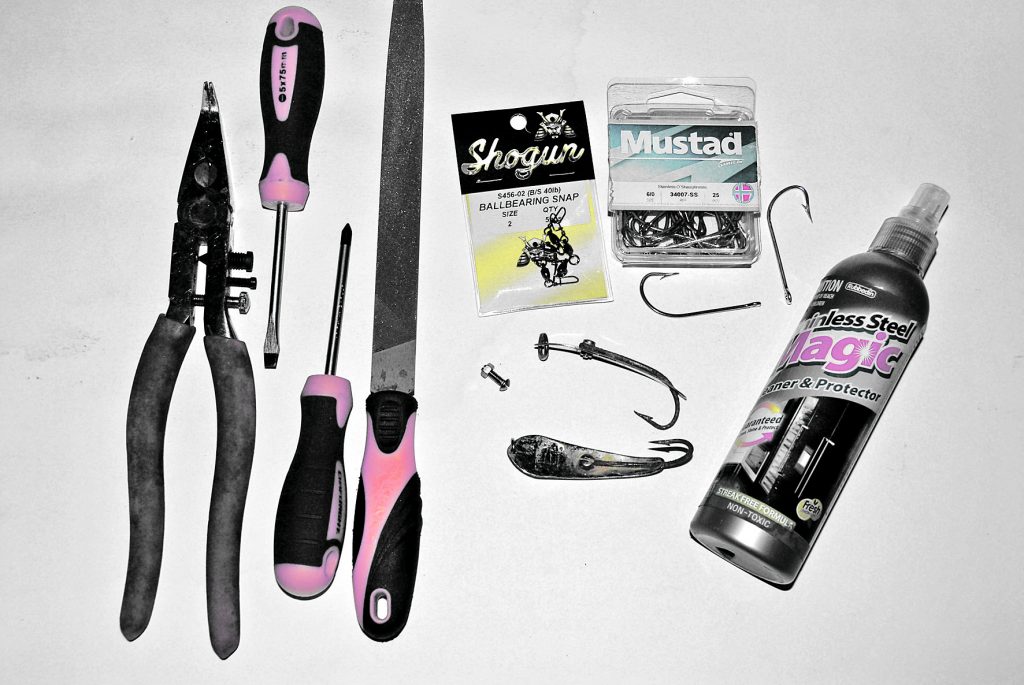
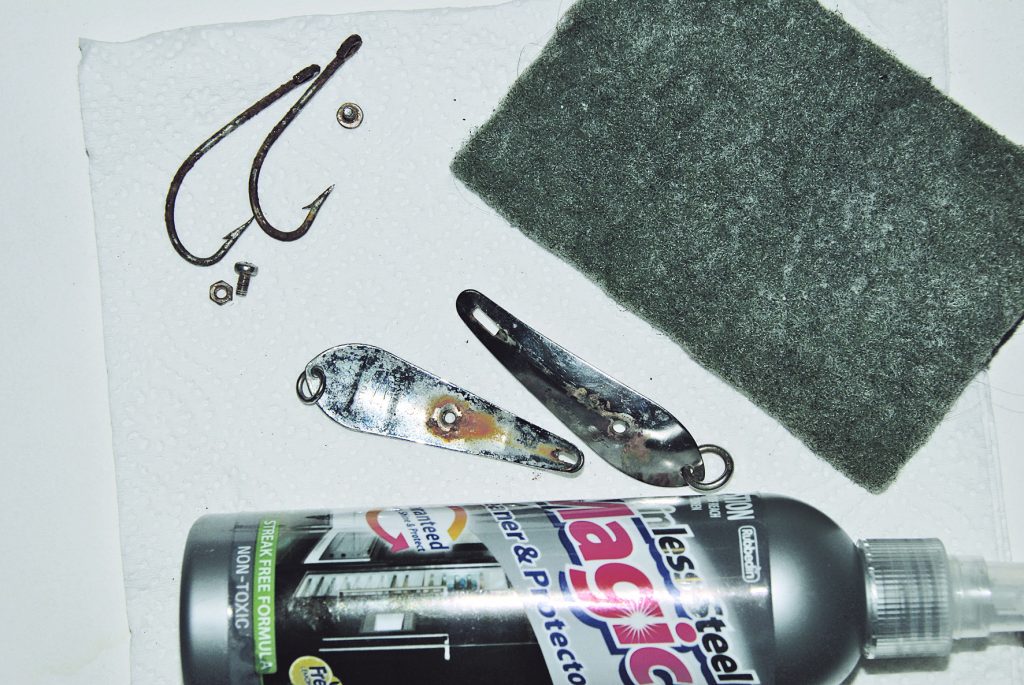
To recondition your spoons you will need a few basic tools and other items: a pair of pliers, screwdrivers to suit the bolt in your lure, a hook file, sidecutters, stainless steel cleaner and scourer, some basic grease, replacement hooks and ball bearing snap swivels. You will also need additional nuts and bolts to match those in your lures if they are too corroded to remove or reuse.
Step 2.
How the hooks are affixed to your lure may vary. Most are attached with either a bolt and nut or a bolt that is threaded directly into the metal of the lure. Lures with this extent of hook corrosion and blade discolouration are common after a season or two of use. While they may still catch fish, a little care will have them working to their optimum performance.
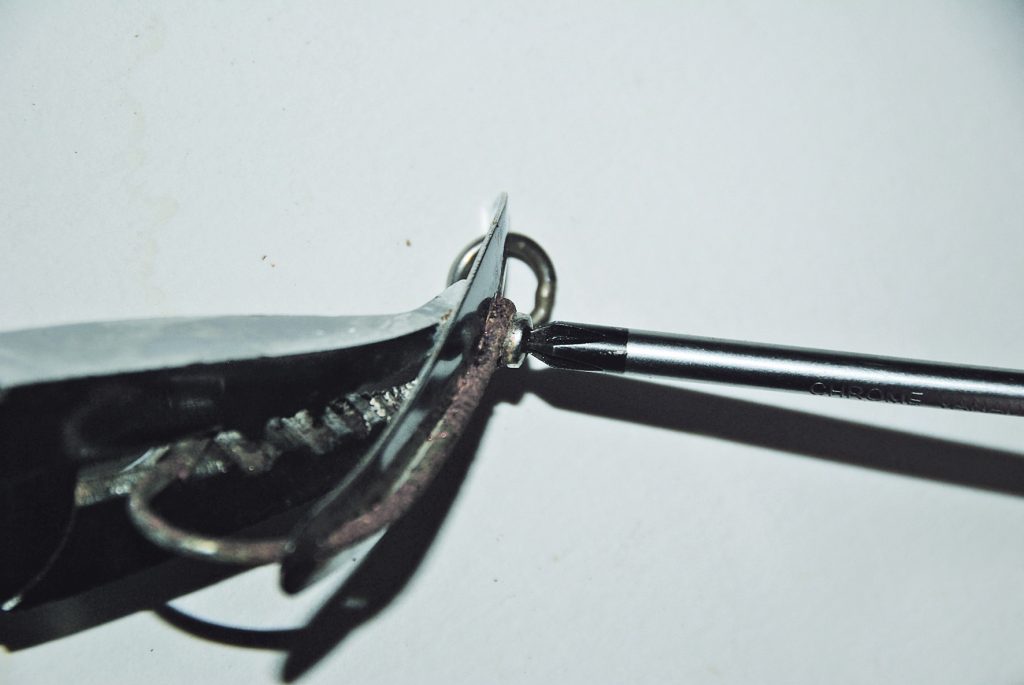
Step 3.
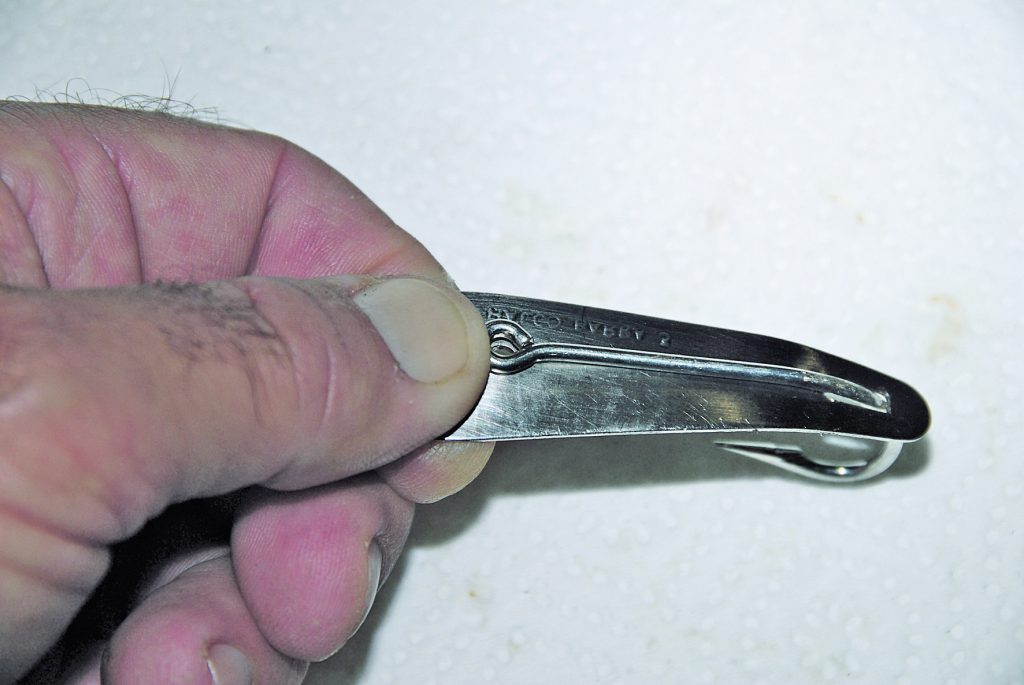
Disassembling the lure is the first step, so you can then replace the hooks and clean the blade. If they are a little rusty, you’ll probably need to hold the nut with pliers or a small shifter while you unscrew the bolt using the appropriate screwdriver. If the nut is badly corroded and you can’t loosen it, simply cut it off using a hacksaw or angle grinder. You’ll then need to source a replacement stainless steel bolt and nut, which should be available from a chandlery outlet.
Step 4.
To clean the stainless steel spoon, you can use some stainless steel cleaner or other products such as CLR, Silvo and other metal cleaners. Use steel wool or a scourer to remove any rust stains. Larger lumps or rust will generally just break away with a bit of pressure from the tip of a flat blade screwdriver.
Step 5.
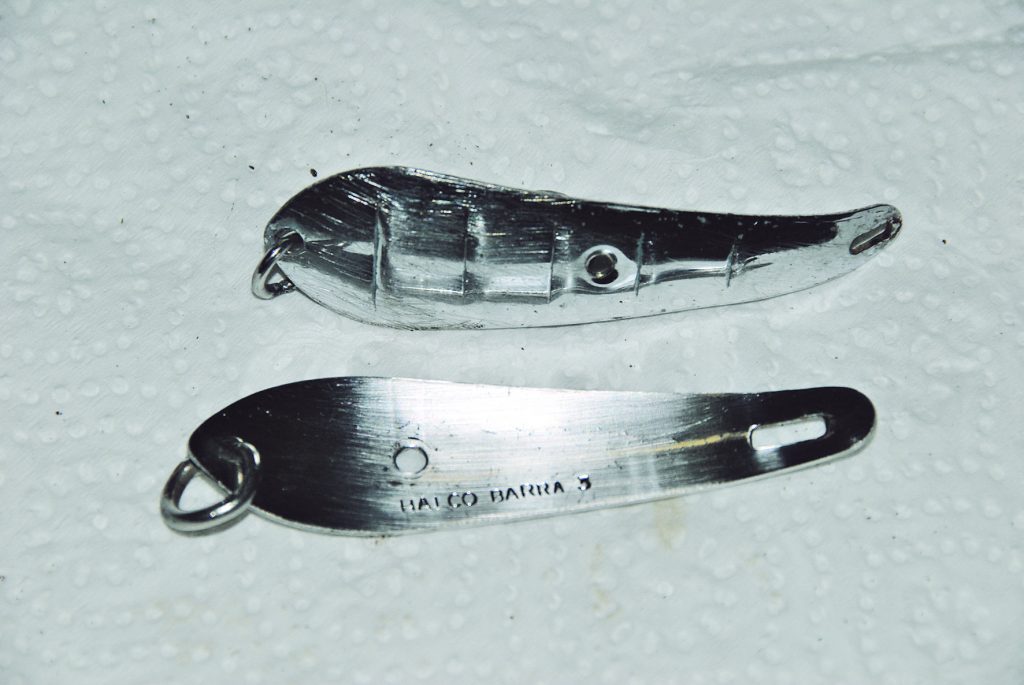
Once the rust is removed, wash away the rest of the cleaner and dry the spoon blade. You can even polish the metal further with a lamb’s wool buffer. Even like this the lure has plenty of flash. Adding some reflective tape is another option to increase flash.
Step 6.
To get a replacement hook you can take the rusted hook down to your specialist tackle store so they can match it up. Most spoons come with a standard carbon steel hook, which is often Duratin coated, but you can replace it with a stainless steel version. Although these are a little more expensive, they last a lot longer and the slightly thinner hook aids penetration. The hook you choose must be an inline (not offset) pattern, usually an O’Shaughnessy pattern. If you choose a chemically-sharpened hook, ensure you add some anode tape to prevent electrolysis, which makes the hook points brittle.
Step 7.
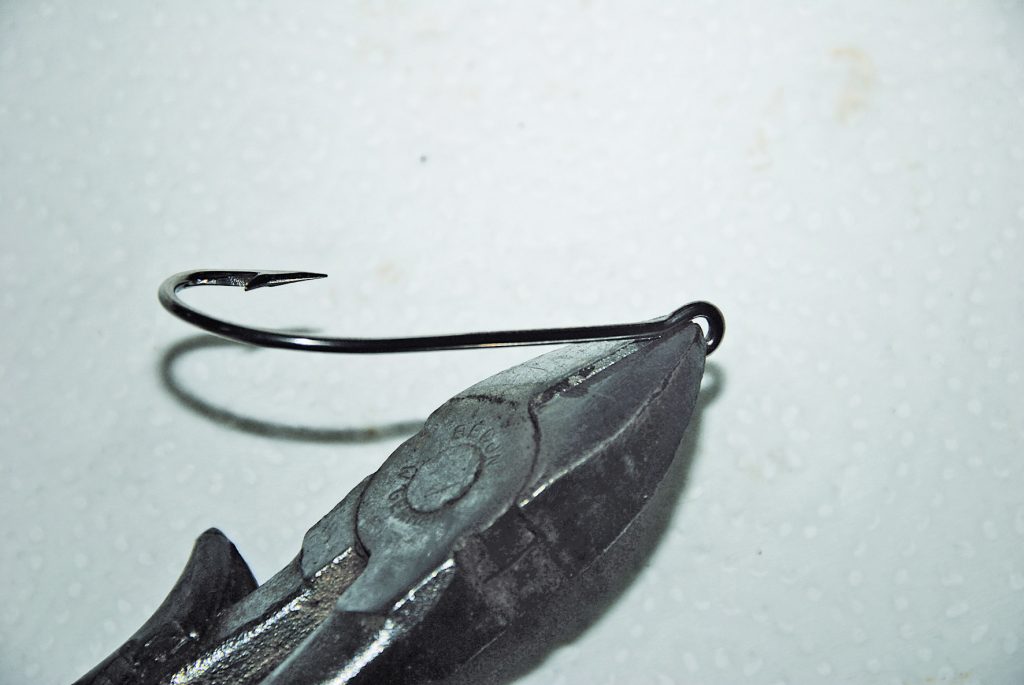
Some hooks may need slight bending to make them fit the curved shape of the spoon snugly. Use pliers to bend the shank of the hook and possibly widen the gape until the hook suits the spoon. You can use the old hook as a template to assist you. Chemically sharpened hooks may need heating to enable you to bend them without snapping.
Step 8.
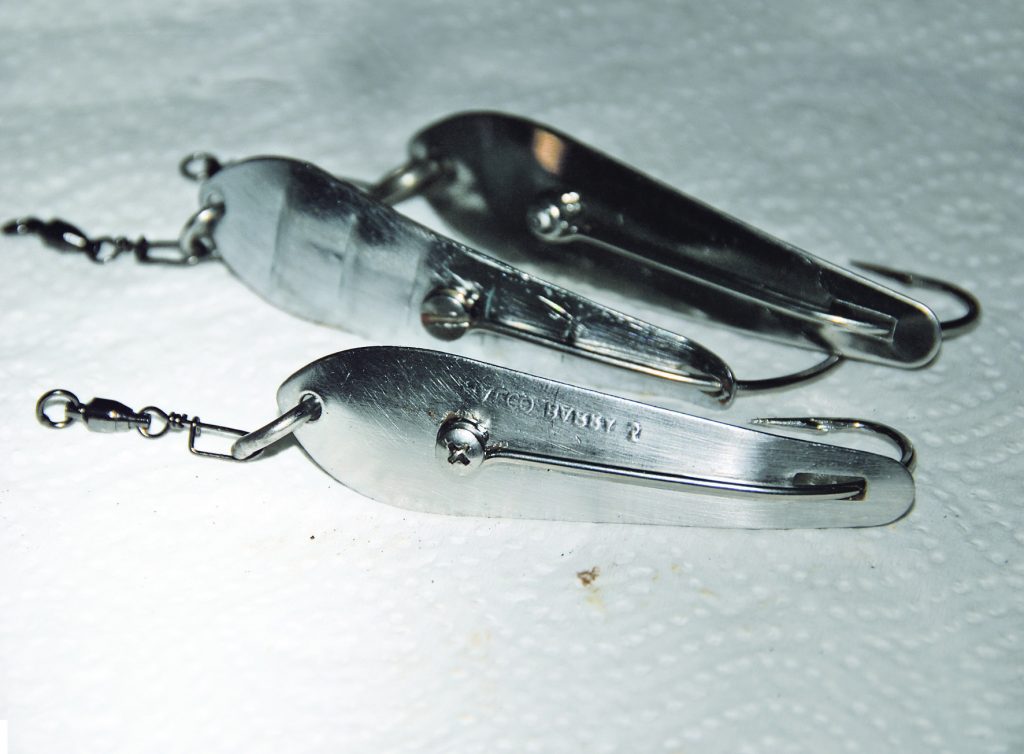
When finished, the hook should follow the curvature of the spoon snuggly while the eye of the hook corresponds with the bolt hole in the spoon. The author used 6/0 Mustad 34007 stainless steel hooks for his #3 Halco Barra Drones and they don’t need any reshaping to fit.
Step 9.
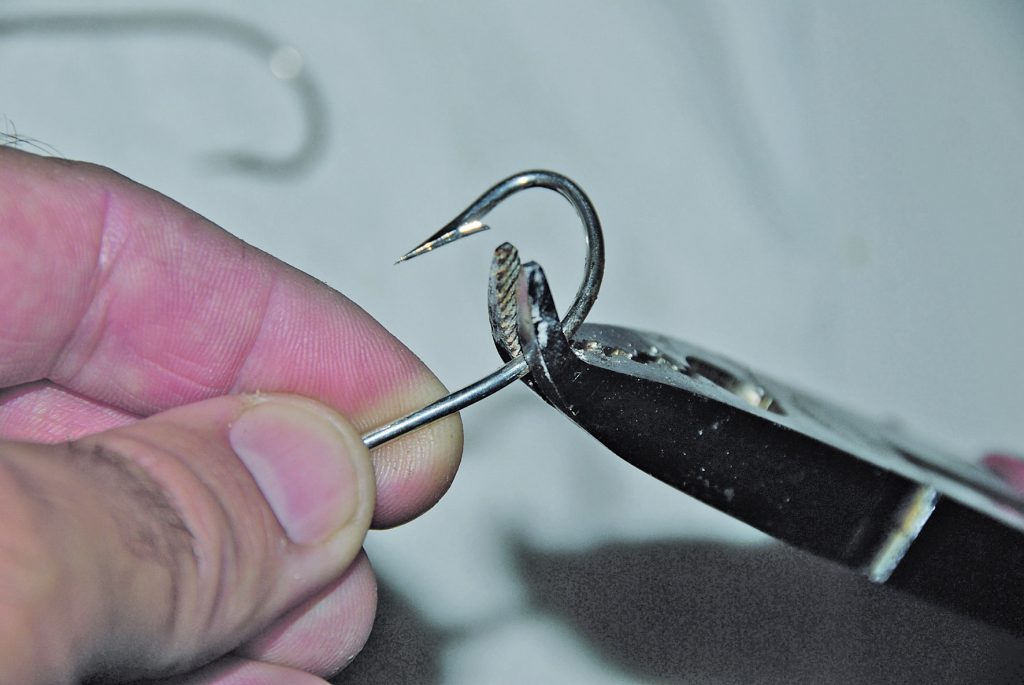
Usually the eye of the hook is too small to allow the bolt to fit through. Making it larger is achieved by pinching the gap in the hook eye with a pair of side-cutters to open it a little.
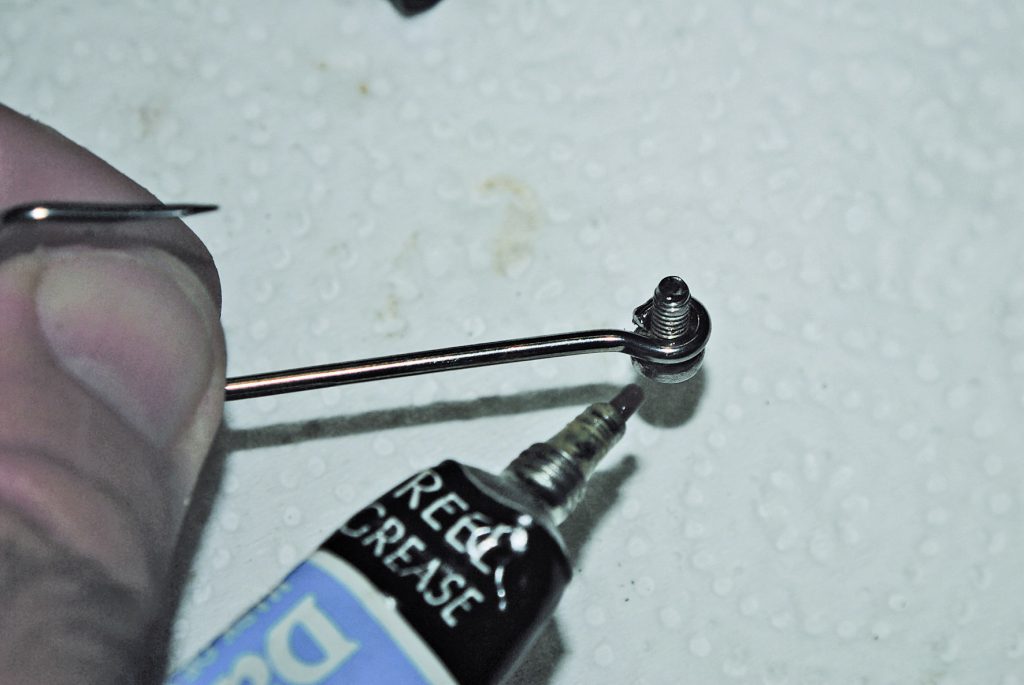
Step 10.
You can add a little grease (reel, bearing or marine) or anti-seize to the thread of the bolt so you can undo it in the future, if you need to change the hook again due to damage or corrosion.
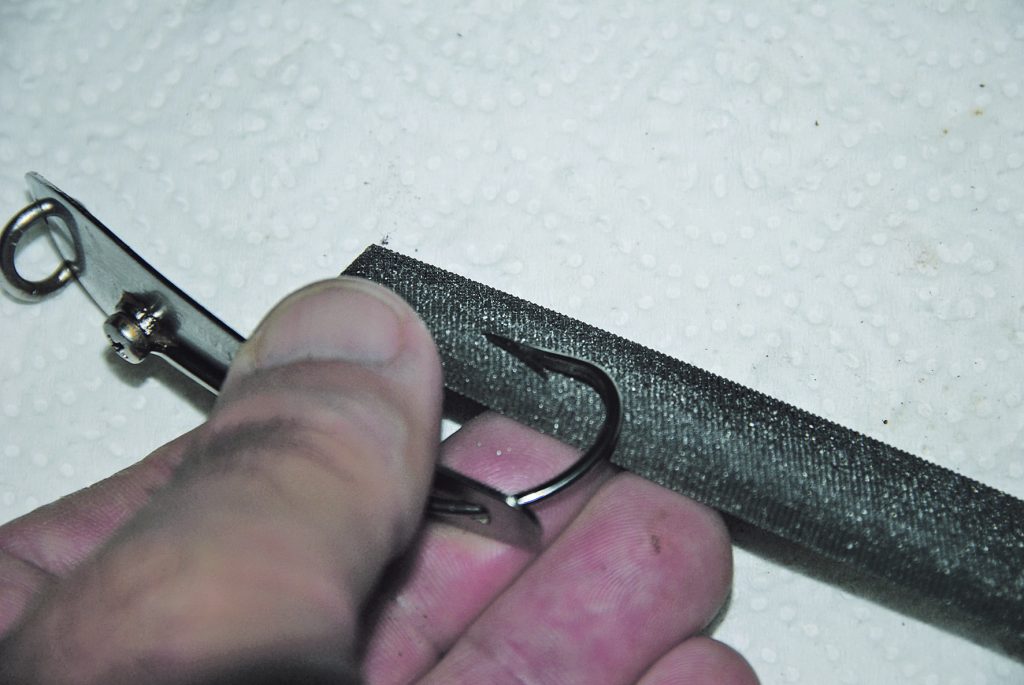
Step 11.
Reassemble your spoon, tighten the nut and bolt and then use a hook file to sharpen the hook if necessary. Stainless steel hooks often aren’t that sharp straight out of the box, but they hold their point well once honed.
Step 12.
At the start of the season, the author puts new ball-bearing snap swivels on his spoons. He prefers to keep these small and opt for a Shogun #2 40lb ball-bearing snap swivel, which is suitable for the #3 spoons that he uses for Moreton Bay schoolies. These hold up well, even when swinging fish aboard on the leader. With your spoons now ready to roll, the next step is to get up and go fishing.