by Gordon Macdonald •
With the quality and swimming action of the numerous modern day lures, and the time restraints of many anglers, the acquisition and rigging of swimming baits has become a bit of lost art.
Once, any bluewater angler worth their salt could rig numerous baits in different ways. Although there are heaps of great lures available these days, I believe there is no substitute for a natural swimming bait.
While live offerings are extremely effective, they can only be trolled at very slow speeds. As a well-rigged swimming bait can be trolled up to three times quicker than a live bait, anglers can cover a lot more water in their search. An effective and hardy trolling bait that is quick to rig and looks extremely realistic is the split-tail mullet.
I first used these baits when chasing billfish on the Cape Bowling Green grounds off Townsville around 30 years ago. Mullet were easy to get and very hardy baits that would troll for a long time on the quieter days. And it wasn’t just billfish that loved them. This bait has accounted for almost every species of pelagic in northern and southern waters including Spanish mackerel, wahoo, cobia, mahimahi, and numerous tuna and mackerel species.
The split-tail mullet can be rigged on monofilament or wire, depending on the target species. Sinker weights can be varied depending on the size of the mullet, the line class fished and the desired troll speed. When flat-lined (which has the line fairly parallel to the water) the split-tail mullet can be trolled at up to around 8 knots. When the boat is slowed or stopped, the bait will sink deeper, which is ideal when fish are sounding deep.
The bait is allowed to sink to the required depth before the boat is put into gear and slowly moved forward to get the bait slowly rising back towards the surface. If you want a little more flash from the mullet, you can scale it first, although this can decrease its longevity.
Lightly salting the rigged mullet for a few hours will toughen the bait a degree. You can rig mullet of all sizes; you just need to change the size of the hooks and sinker weight – the basic rigging remains the same. There are several different ways to rig a split-tail mullet and some use a backbone skewer to remove the entire backbone. However, let’s look at the most simple way to rig a split-tail mullet.
Step 1.
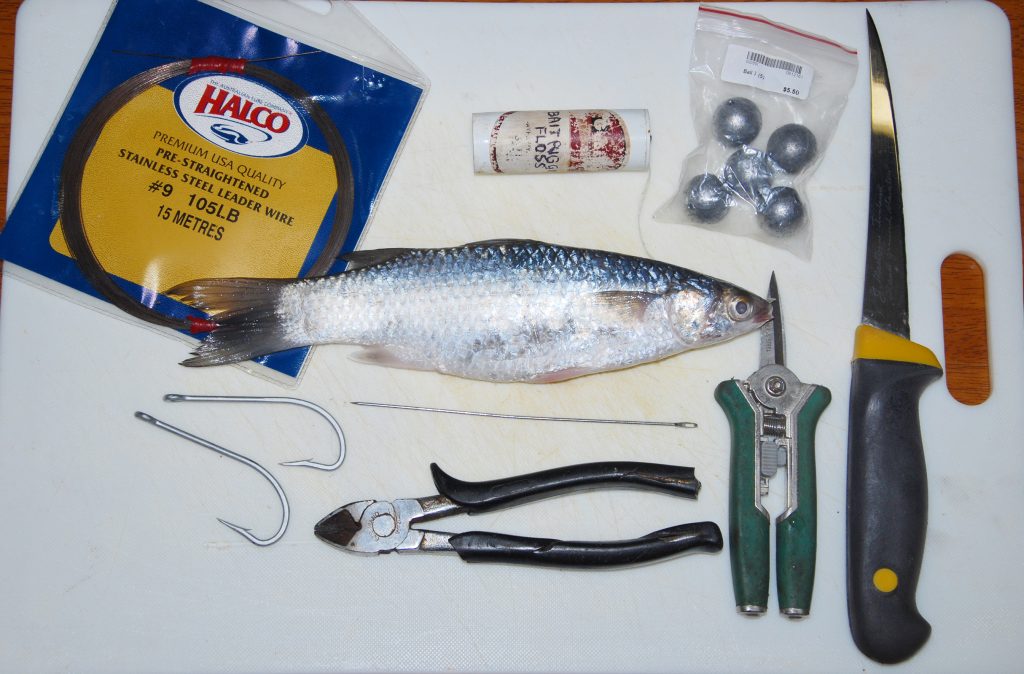
You will need a mullet (this one is around 25cm in length), two VMC 9255 9/0 hooks, some 105lb piano wire, waxed bait thread, a stitching needle, a very sharp thin-bladed knife, #7 ball sinker, snips or poultry shears and a sturdy pair of side cutters.
Step 2.
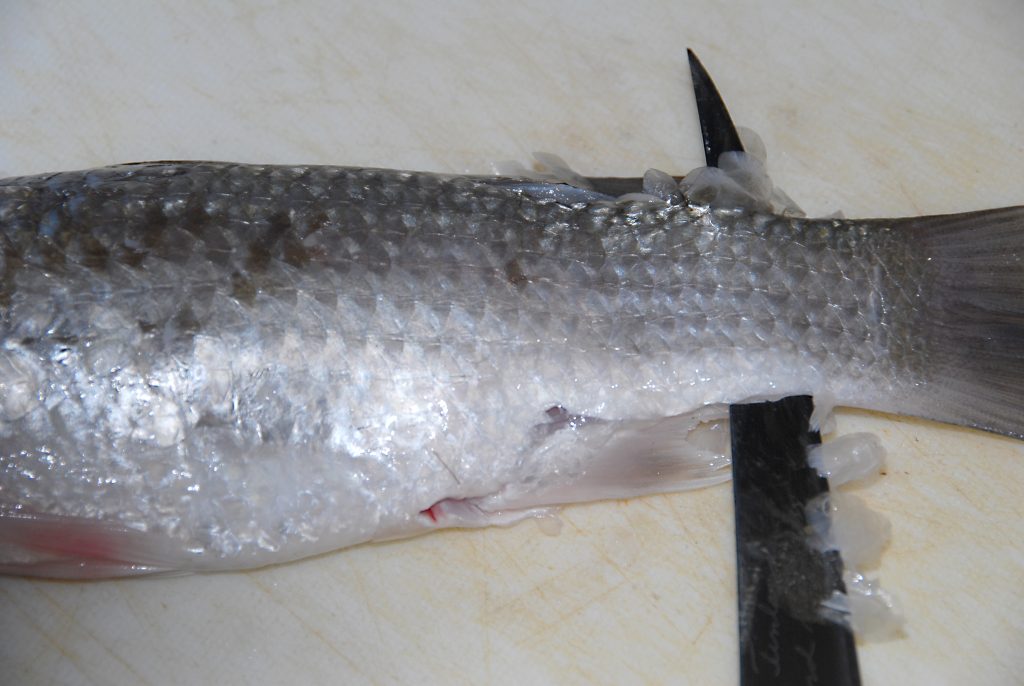
Push the blade of the knife into the anal cavity and push right through the fish, keeping the blade flat to the spine, until it protrudes out the other side of the back adjacent the adipose fin. Keeping the blade flat to the spine, slice down until you are at the base of the tailfin. Repeat this step on the other side of the spine.
Step 3.
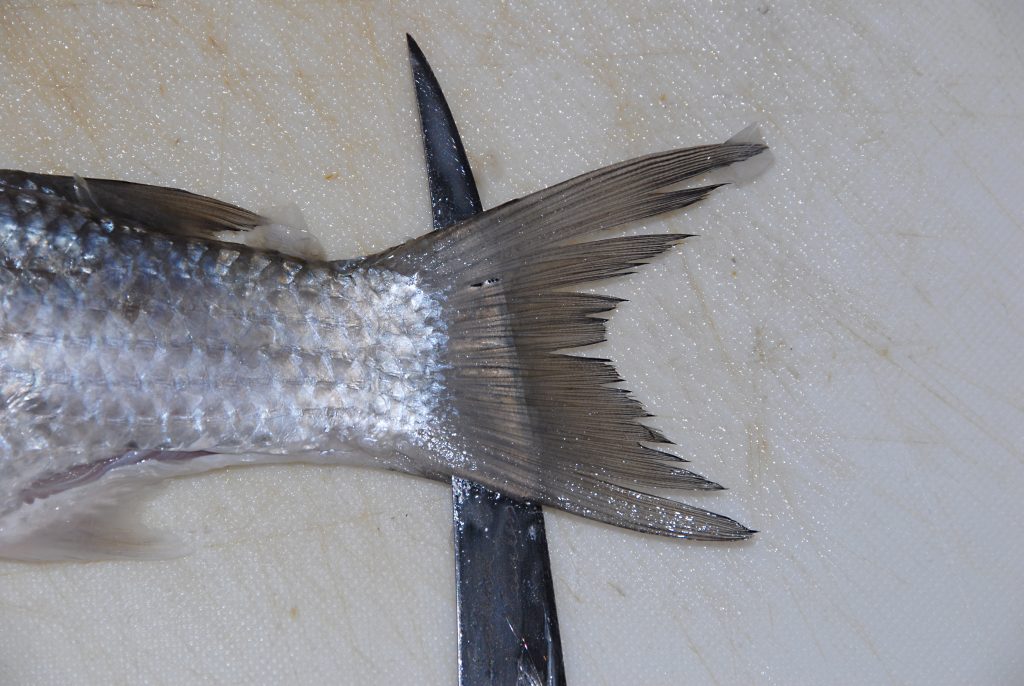
Your knife needs to be very sharp to complete this next step properly. Angle the knife at around 45° and push down lightly to get the point in the dead centre of the fish. Next, slowly slice backwards to split the tail fin in half, leaving a tail piece on each fillet.
Step 4.
Slice forward along each side of the backbone. Cut along the belly of the fish, slicing to just behind the ventral fin. Along the back, slice right up to the rear of the head.
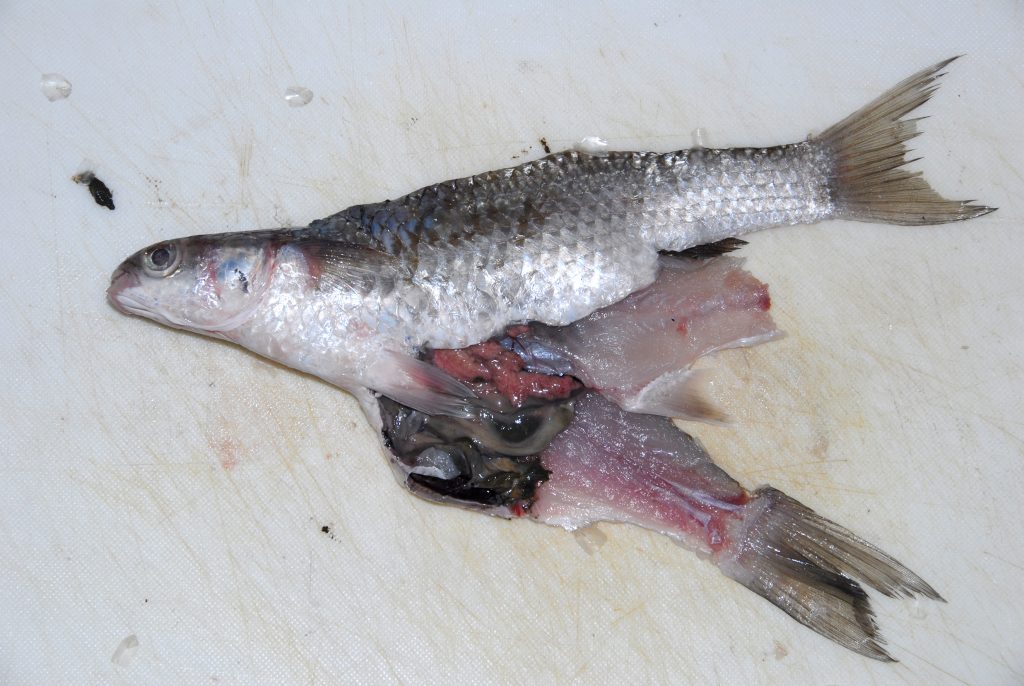
Step 5.
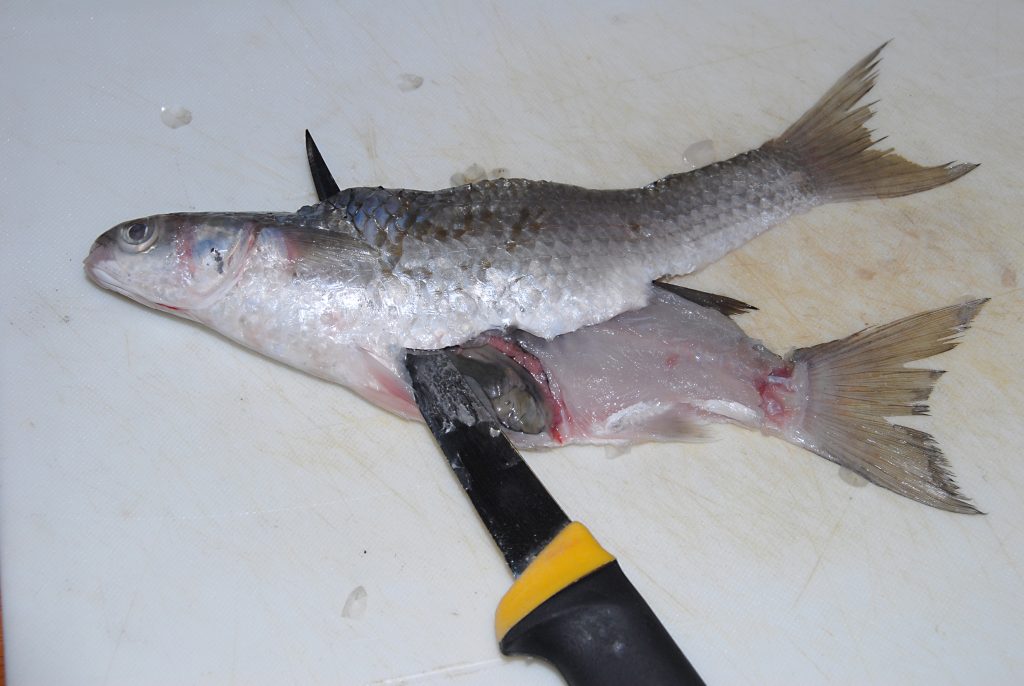
You should end up with the mullet looking like this with two separate fillets with tail lobes attached and the spine and guts in the middle.
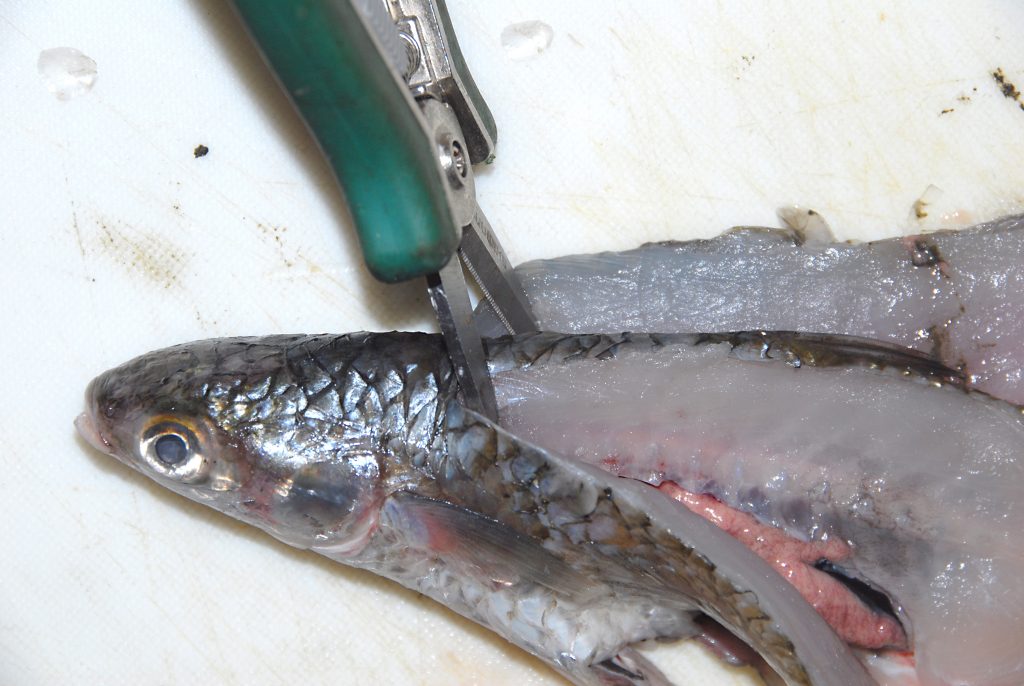
Step 6.
Using sharp snips (or poultry shears), sever the backbone just behind the head to remove it entirely along with all the guts.
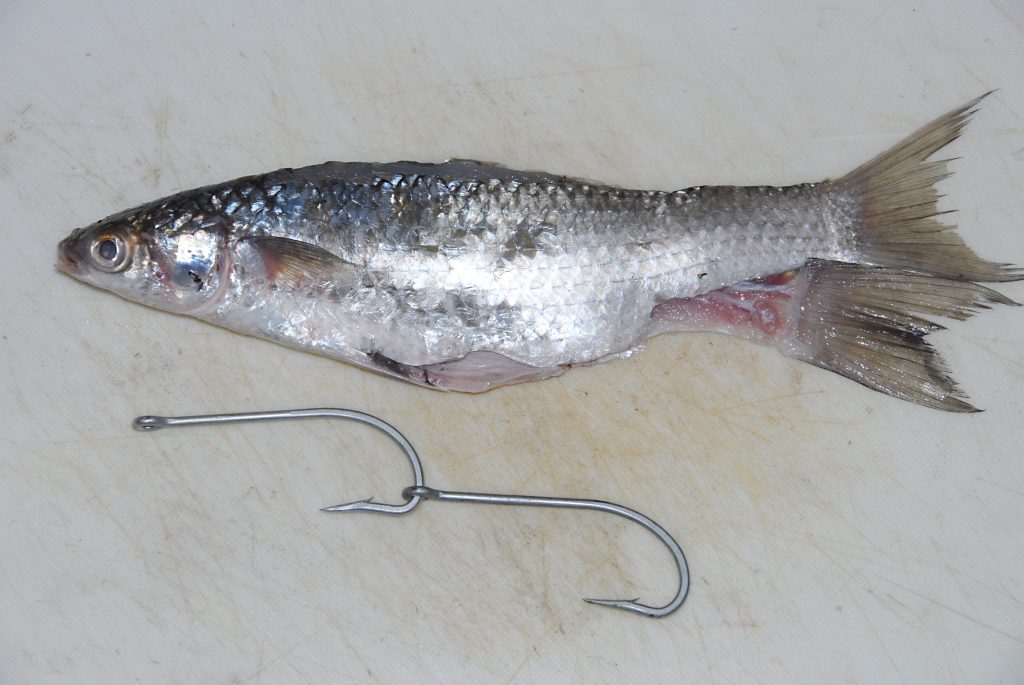
Step 7.
Using your side cutters, open up the eye of one of the VMC 9255 9/0 so you can gang it to the other hook. Close the eye with some sturdy pliers. Other suitable hooks include Mustad 7766, Mustad 34007 and any other O’Shaughnessy pattern.
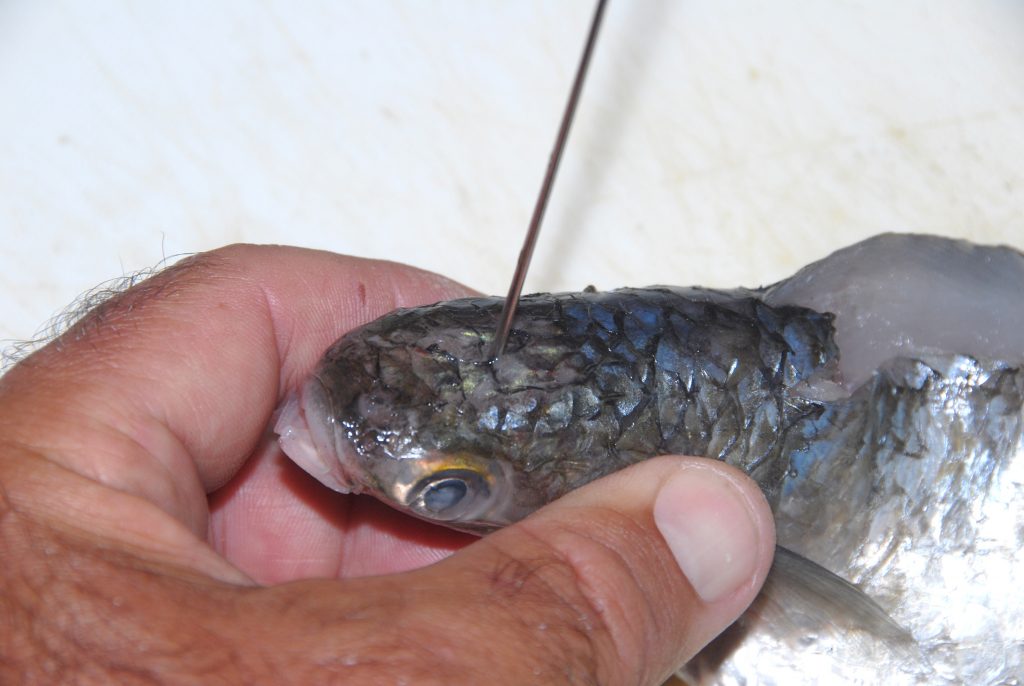
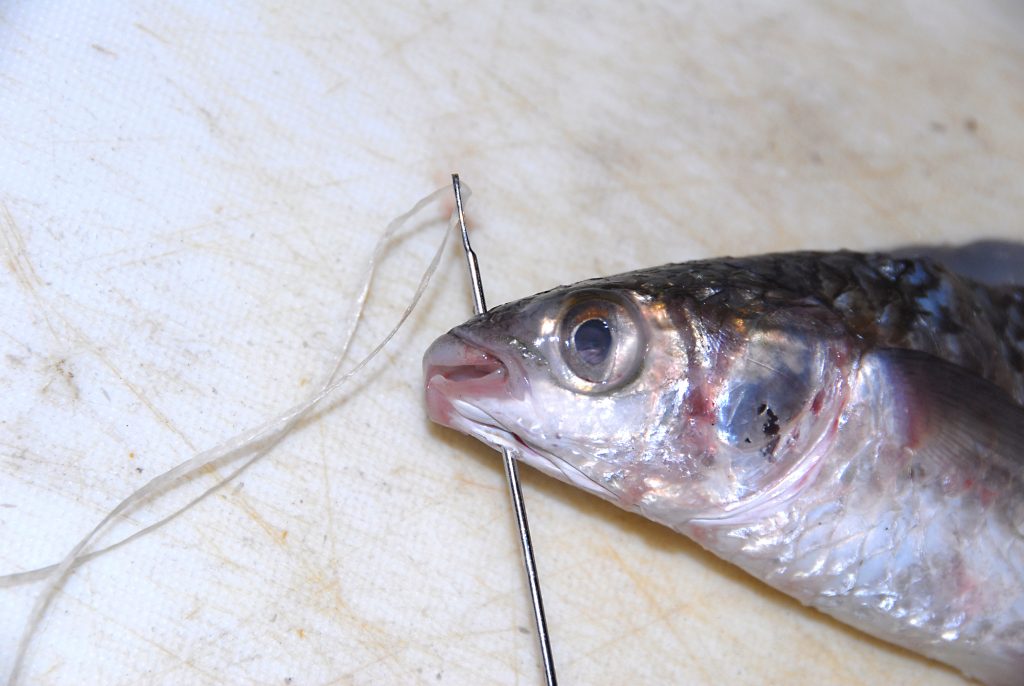
Step 8.
Use your bait needle to penetrate down through the centre of the head. You will see a diamond shaped scale above the eyes, which is the best spot to penetrate. This is the position where the leader will pass and the trolling pressure is asserted to so ensure your hole is dead in the centre.
Step 9.
Thread the bait needle with some wax thread and pierce it down through the head a few millimetres behind the lip.
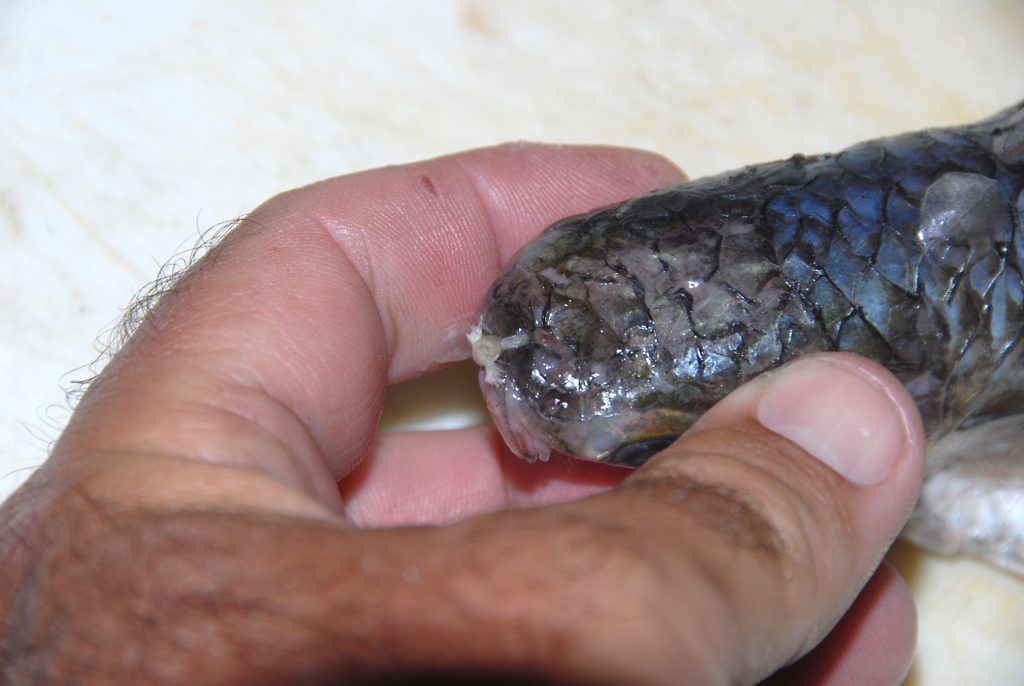
Step 10.
Tie the thread tightly so that the lips are secured. In larger mullet you may want to do a couple of stitches. Do at least three tight knots in the wax thread to avoid it coming undone.
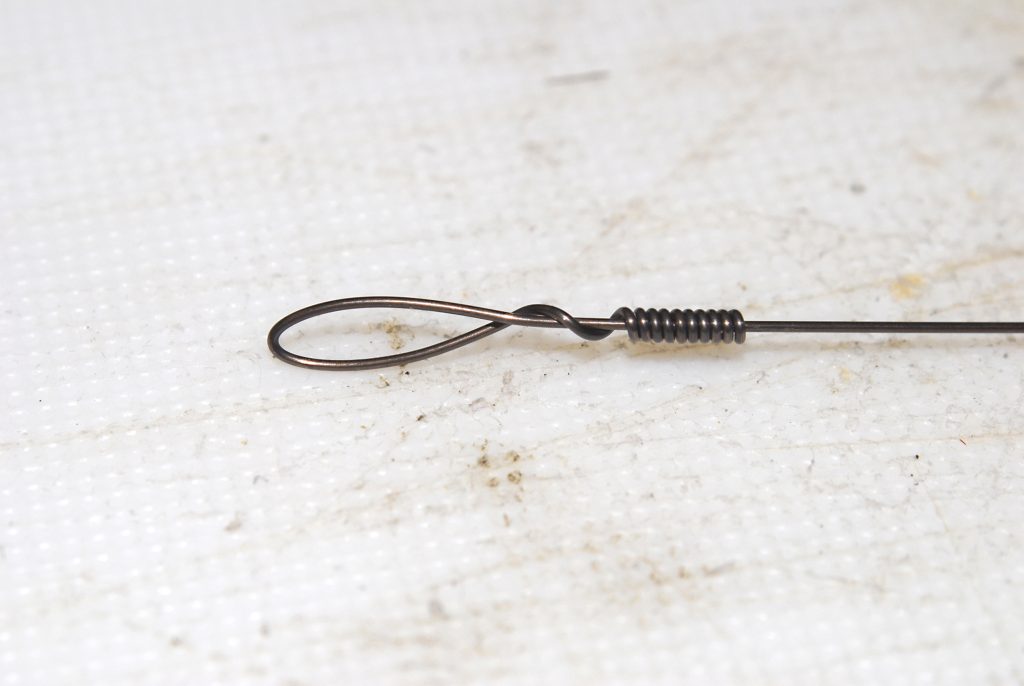
Step 11.
In one end of your piano wire, make a loop using a haywire twist. You will attach the snap of your leader to this when you want to use the bait.
Step 12.
Place the hooks inside the mullet and push the eye of the hook up through the gills and into the head area. Pass the piano wire down through the hole in the head that you previously made with the needle. Push the hook forward until you feel it hit the wire. Pull the wire out, push the hook a few millimetres forward and then push the wire back through, ensuring that it goes through the eye of the hook. Once you think you have it, double check by pulling on the hook firmly.
Step 13.
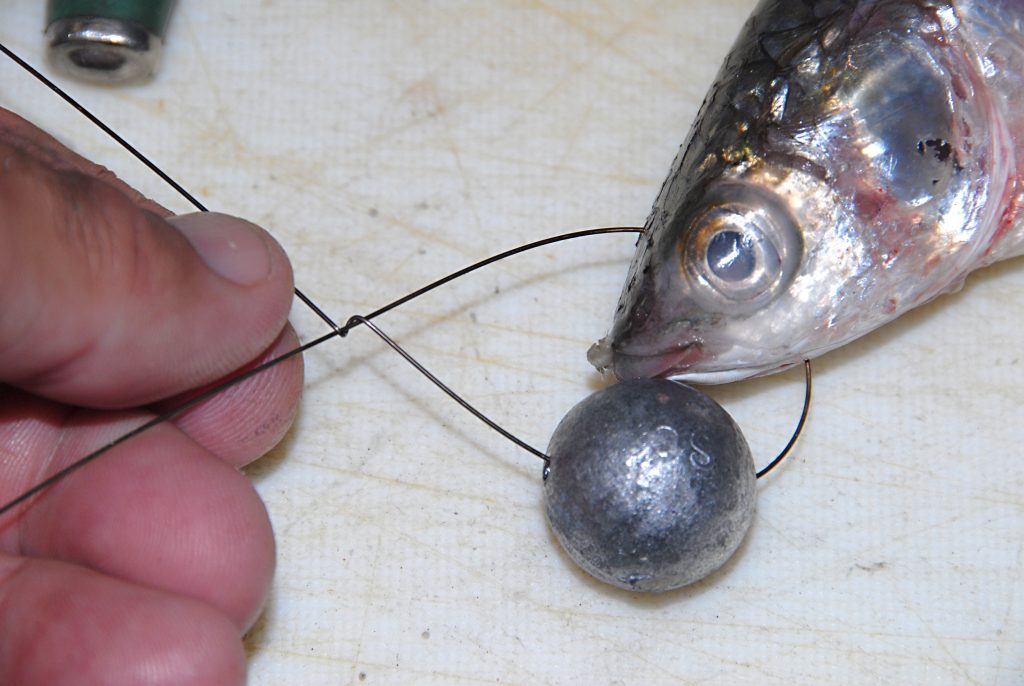
Put the ball sinker on the wire under the chin of the fish and then haywire twist a reasonable sized loop. This will allow more movement from the bait. Once the haywire is done, rock the tag end of the mono back and forward so that the tag end snaps off cleanly.
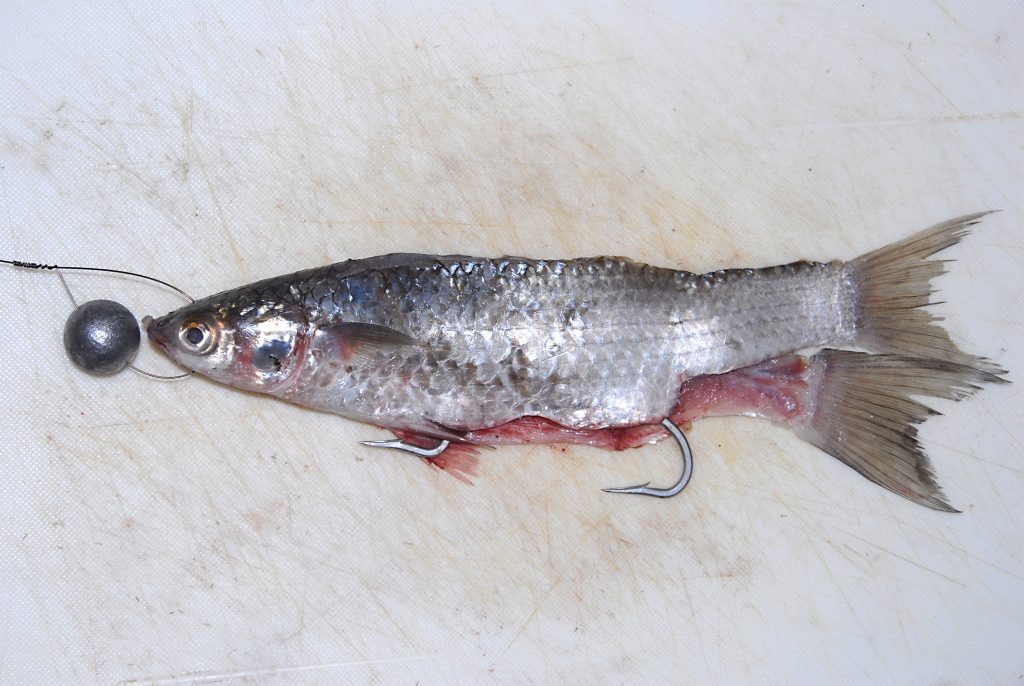
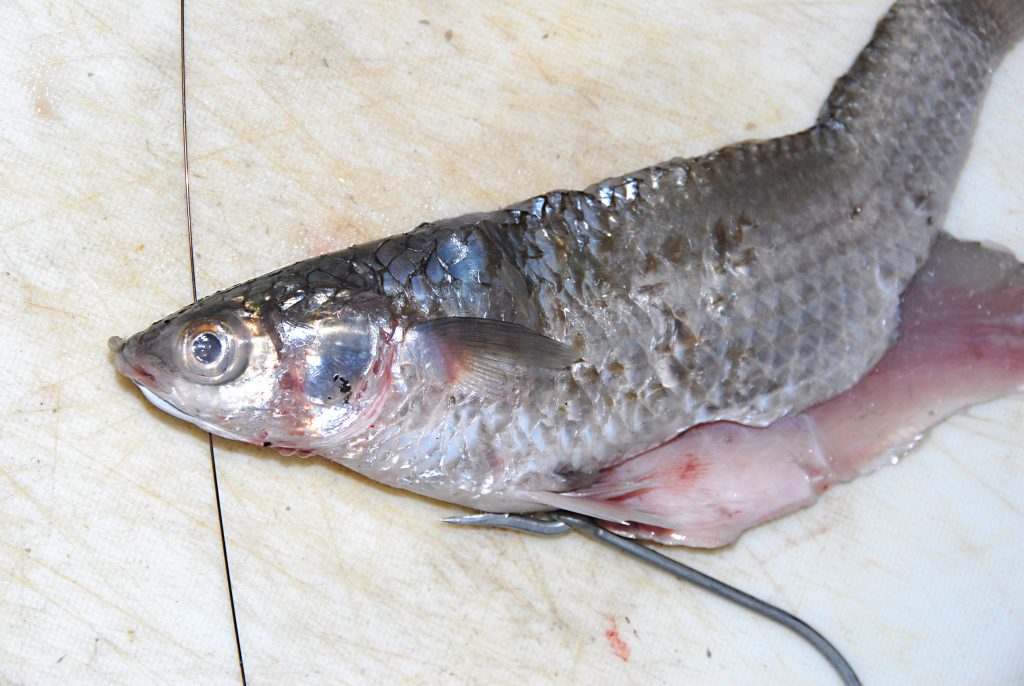
Step 14.
The completed split-tail mullet should look like this. I usually keep the wire leader limited to around 20cm so that the snap attached to the leader isn’t too far forward of the bait. Fresh mullet can be rigged and frozen until needed. If you want to use a Cryovac machine, ensure you put some protective tube on the hook points to prevent them piercing the bag. For such a simple-to-rig bait, the split-tail mullet remains a very effective bluewater trolling bait.