by Gordon Macdonald •
For all anglers, having good connections is very important for a successful result. For those using lighter tackle, this means knowing the best knots for your chosen main line and leader material type, and also for the fishing situation at hand. Whether joining main line straight to leader or to a swivel, solid ring or hook, there are numerous knots to learn and then put into practice during the fishing day.
For those using heavier tackle, it is a lot harder to rig your tackle due to the stiffness of heavy leader material and wire. Whilst knots such as FGs, PRs and others can offer low-profile leader to main line connections, there are few decent knots for connecting terminal tackle to heavy leader material and wire.
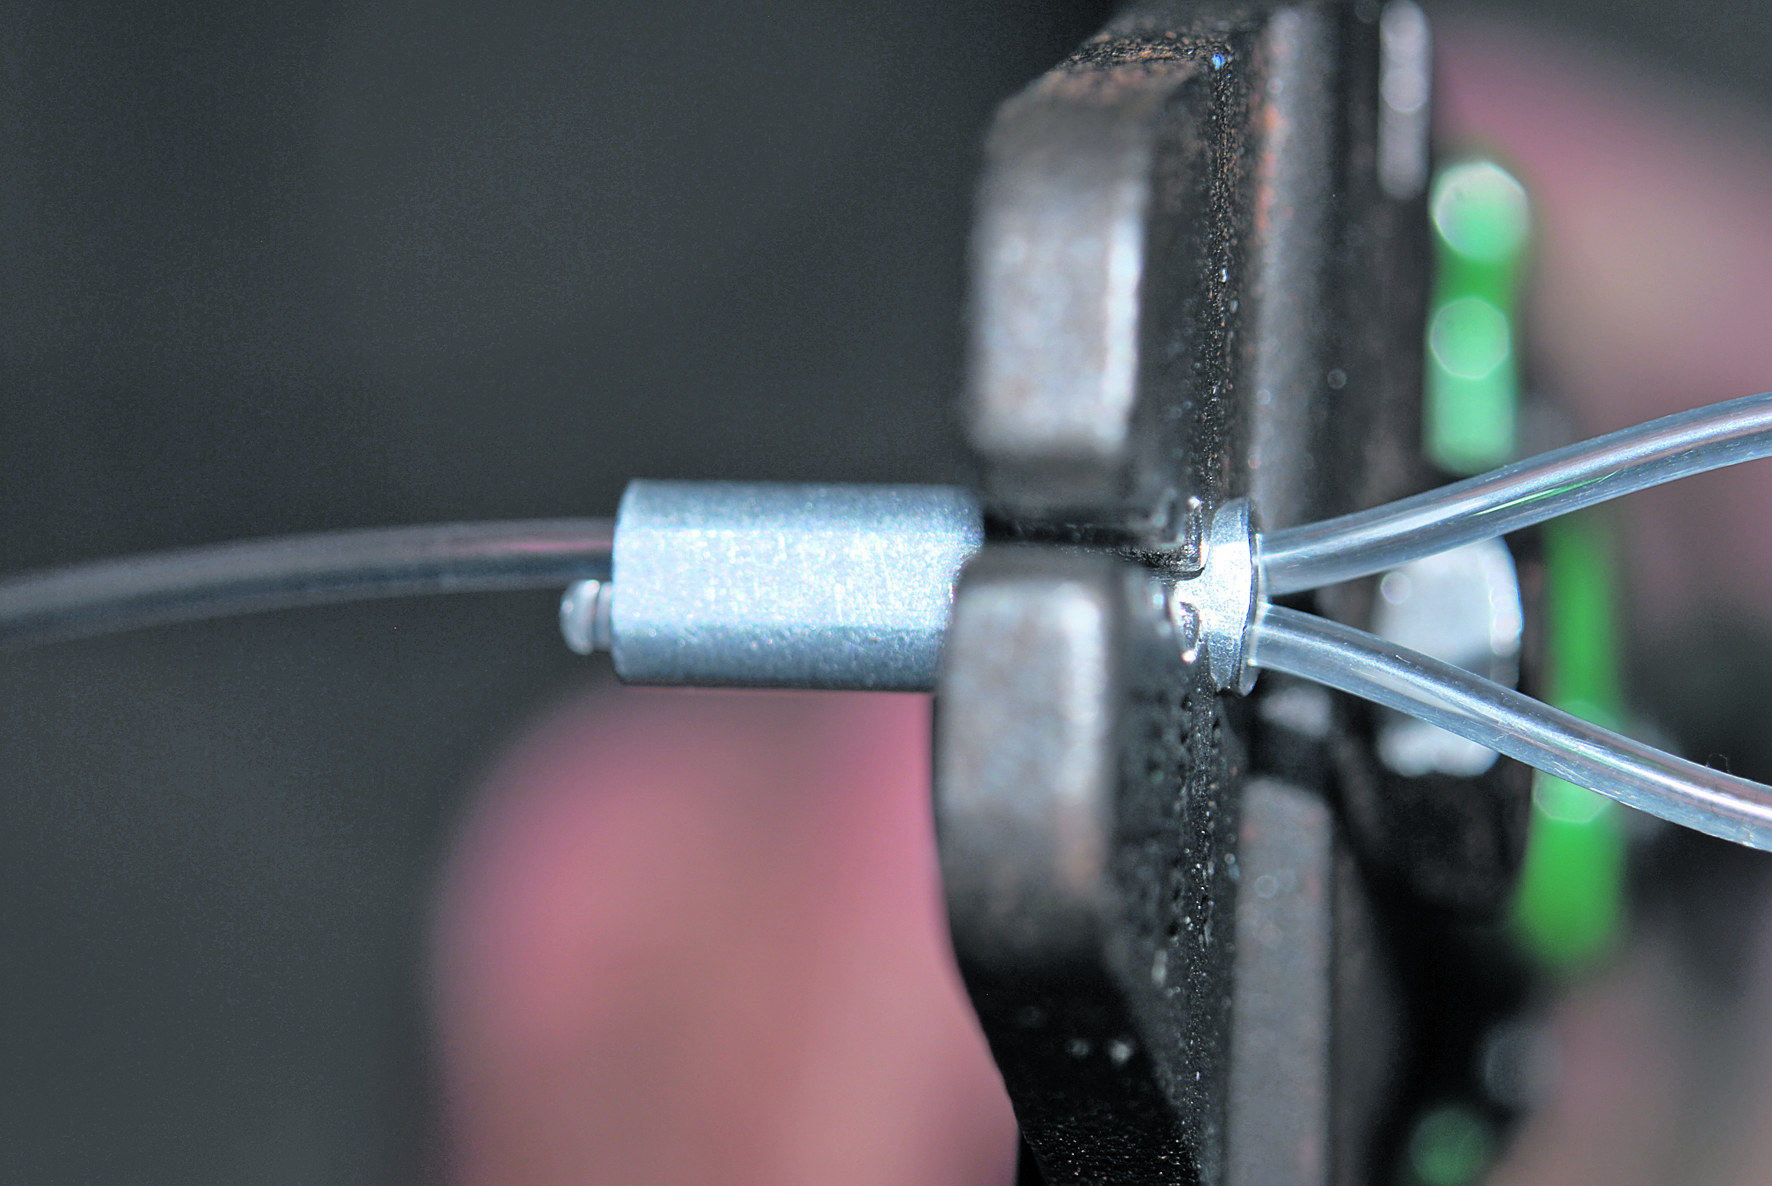
Crimps are your solution for rigging most heavy monofilaments, fluorocarbons and wire. These small metal sleeves can be made from aluminium, brass, copper or occasionally stainless steel tube. The leader material is inserted into the tube and then the tube is restricted around it using a special tool. This creates a strong and low-profile connection for attaching swivels, hooks, rings and for other terminal uses.
With so many different types of leaders and crimps to consider, we will look at some of the popular ones and the techniques used to get the job done to make the strongest connection for a multitude of rigging applications. When choosing a crimp you need to firstly consider the type of material being crimped and then the size you will need. If you are ultra-organised you may have your crimps sorted into sizes, however the basic rule is to use the most tightly fitting crimp for the size of the material being crimped. This will result in a more secure and low profile connection. It is best to firstly use the recess in your swaging tool which is the neatest fit, and then go to a smaller recess to secure the crimp more firmly. This will provide the neatest end result.
The following are some of the best ways to secure that heavy monofilament, wire or fluorocarbon. No matter whether you just want to attach a hook or want to make a rig for your heavy tackle marlin lure, having the tools and knowledge to do the job well can make a massive difference to your results.
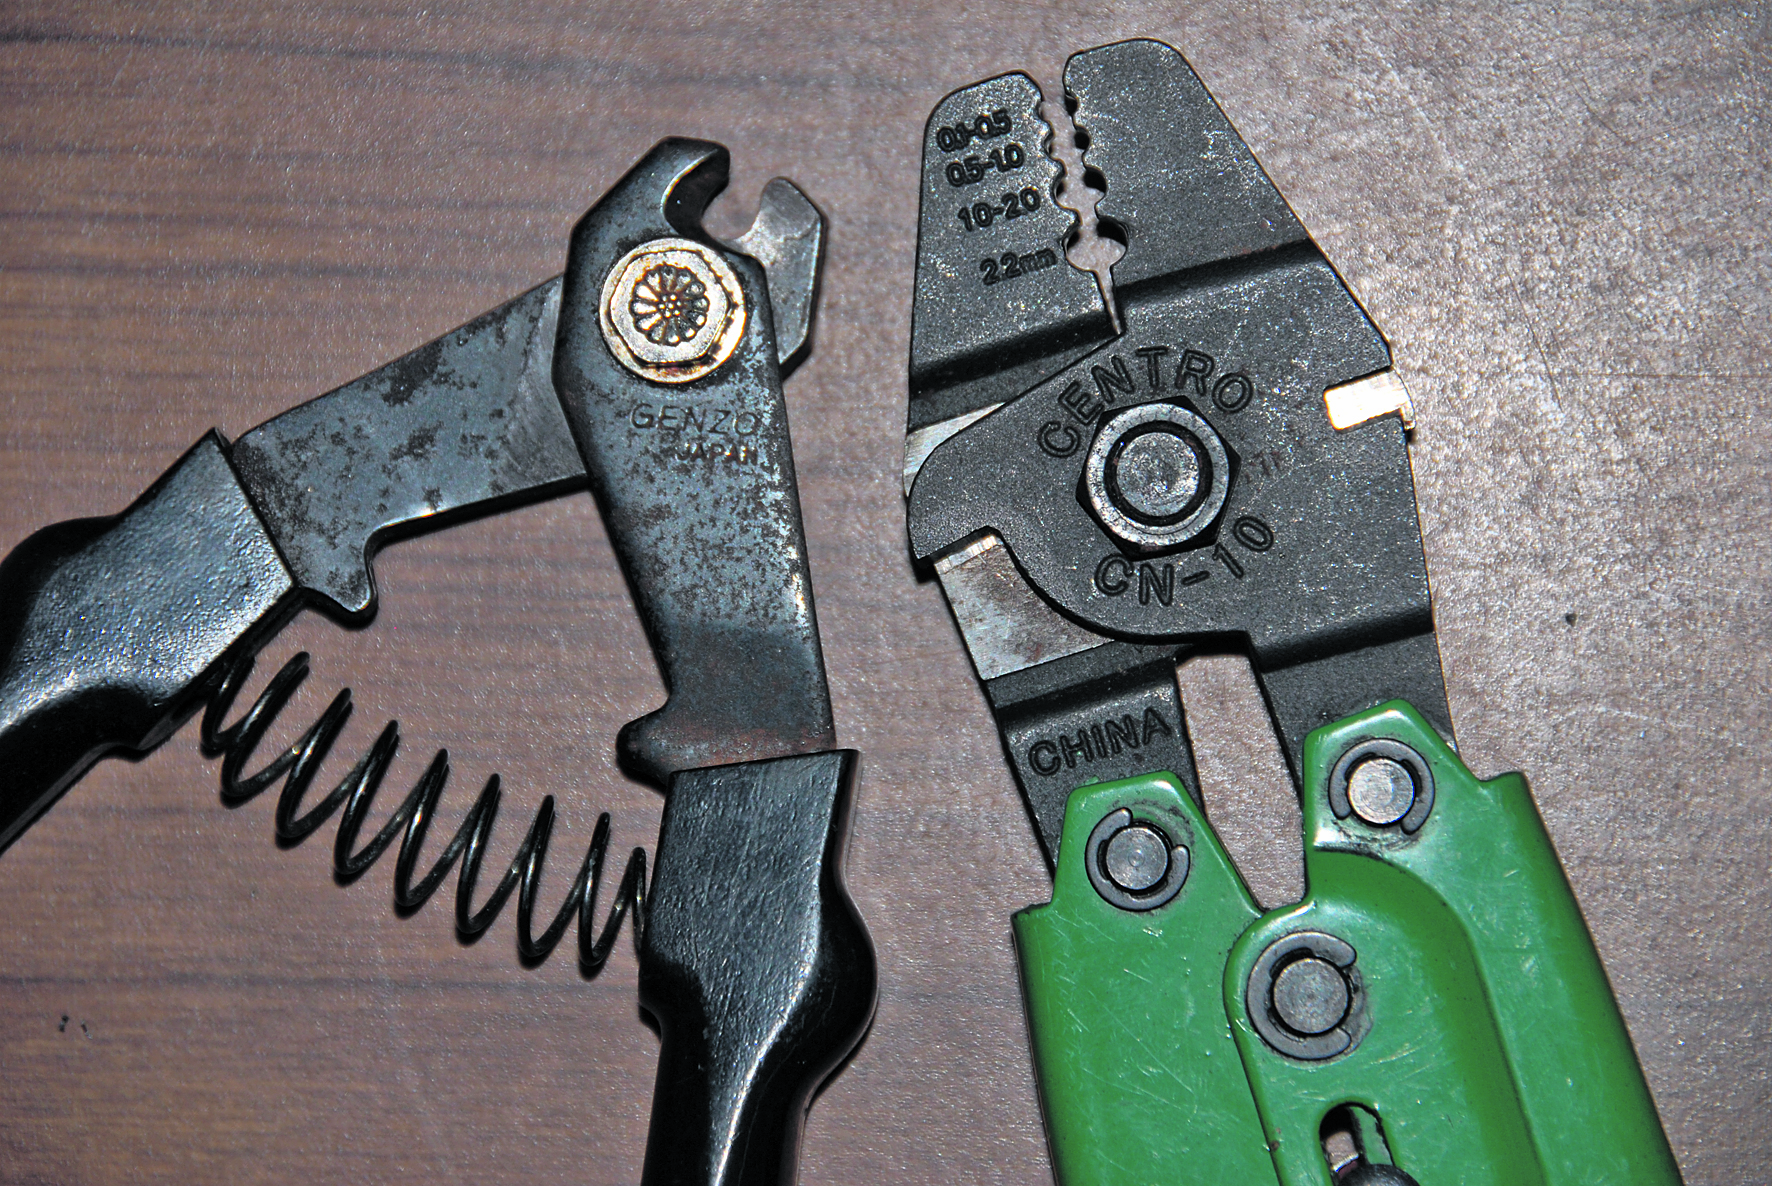
Whilst both these tools are called crimping pliers, they do a pretty rough job. They are both crushing tools which can damage the leader material, distort the crimp and generally do a fairly poor job. In my mind they are about as good as using half a brick to bash the crimp flat.

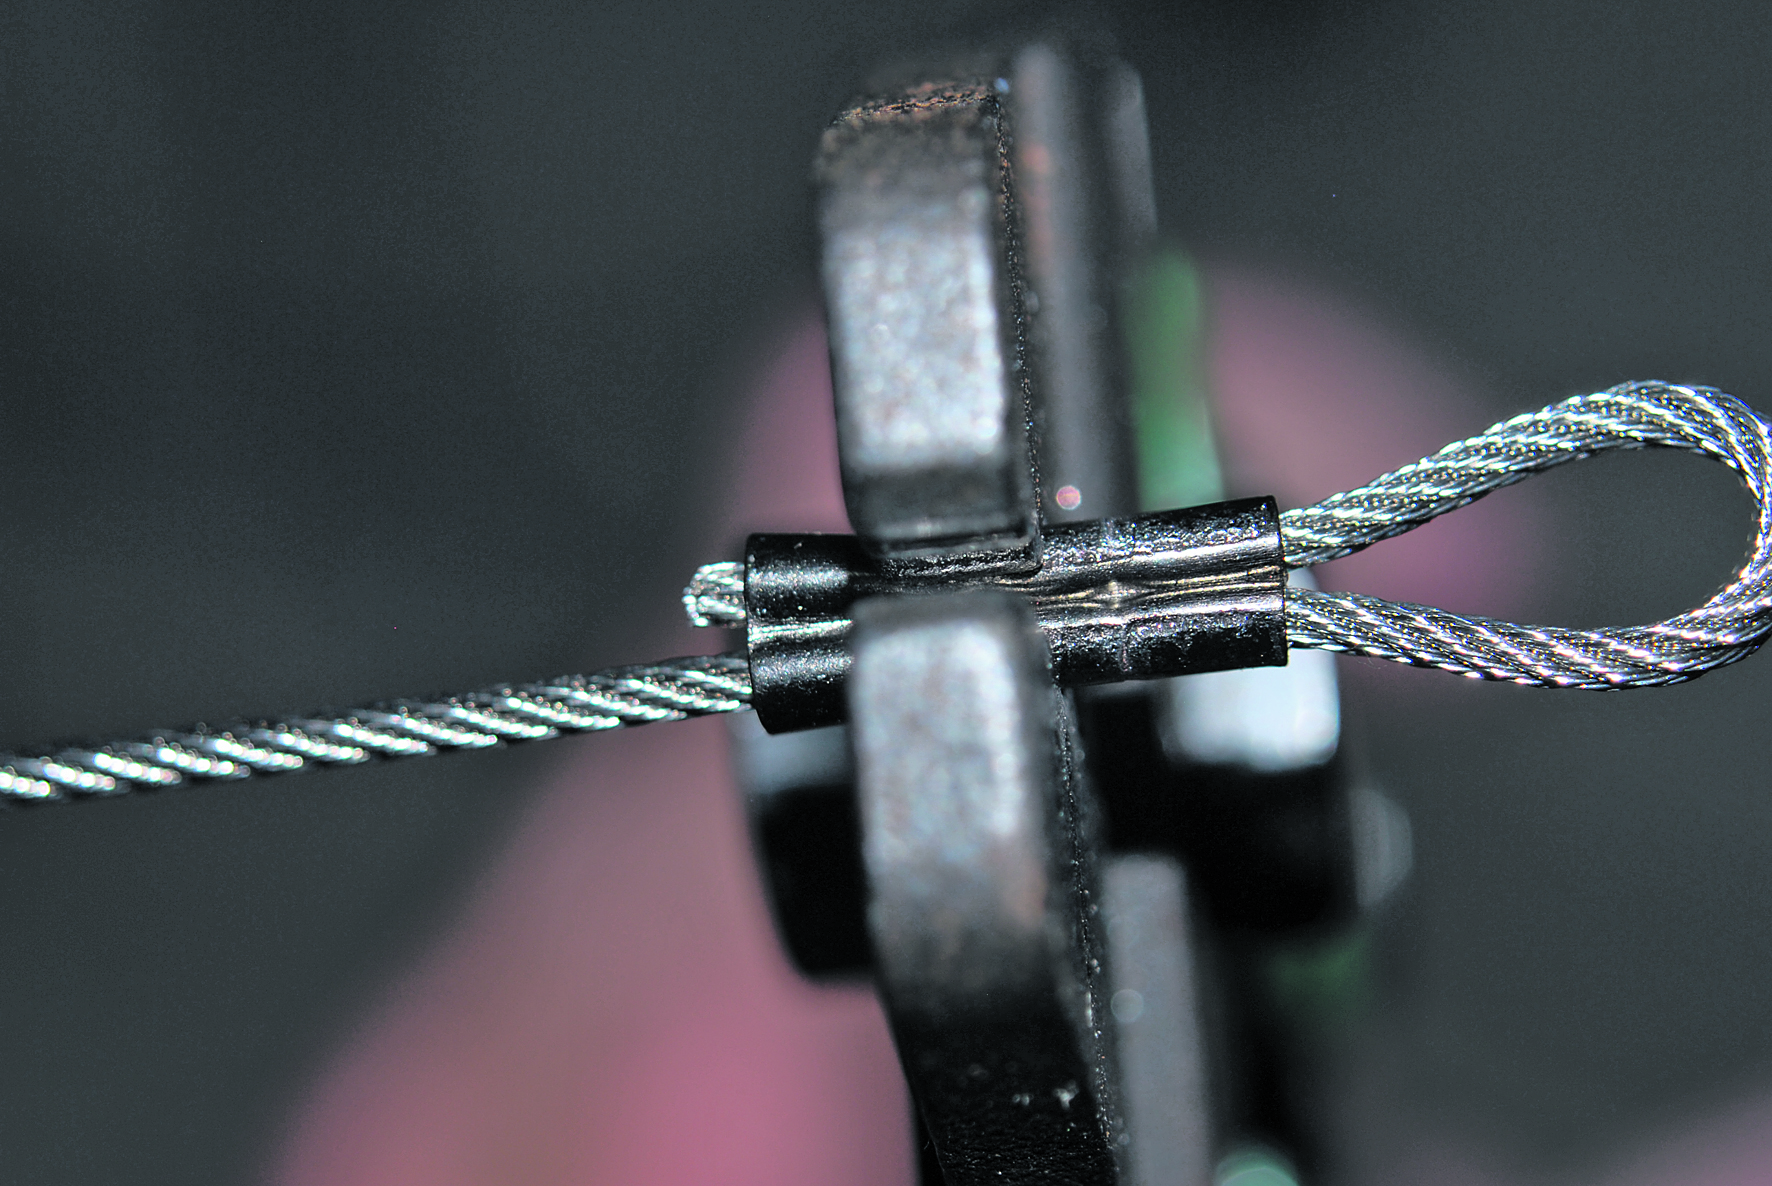
The tool on the right is a swaging tool (often called a crimping tool). They have a size guide as to which crimps are best used in which part of the jaws. Swaging tools constrict the crimp around the wire, mono or fluoro while keeping it very low profile and not damaging the leader. The tool on the left is a parrot beak style cutter for multi-filament wires. It stops the wire splaying.
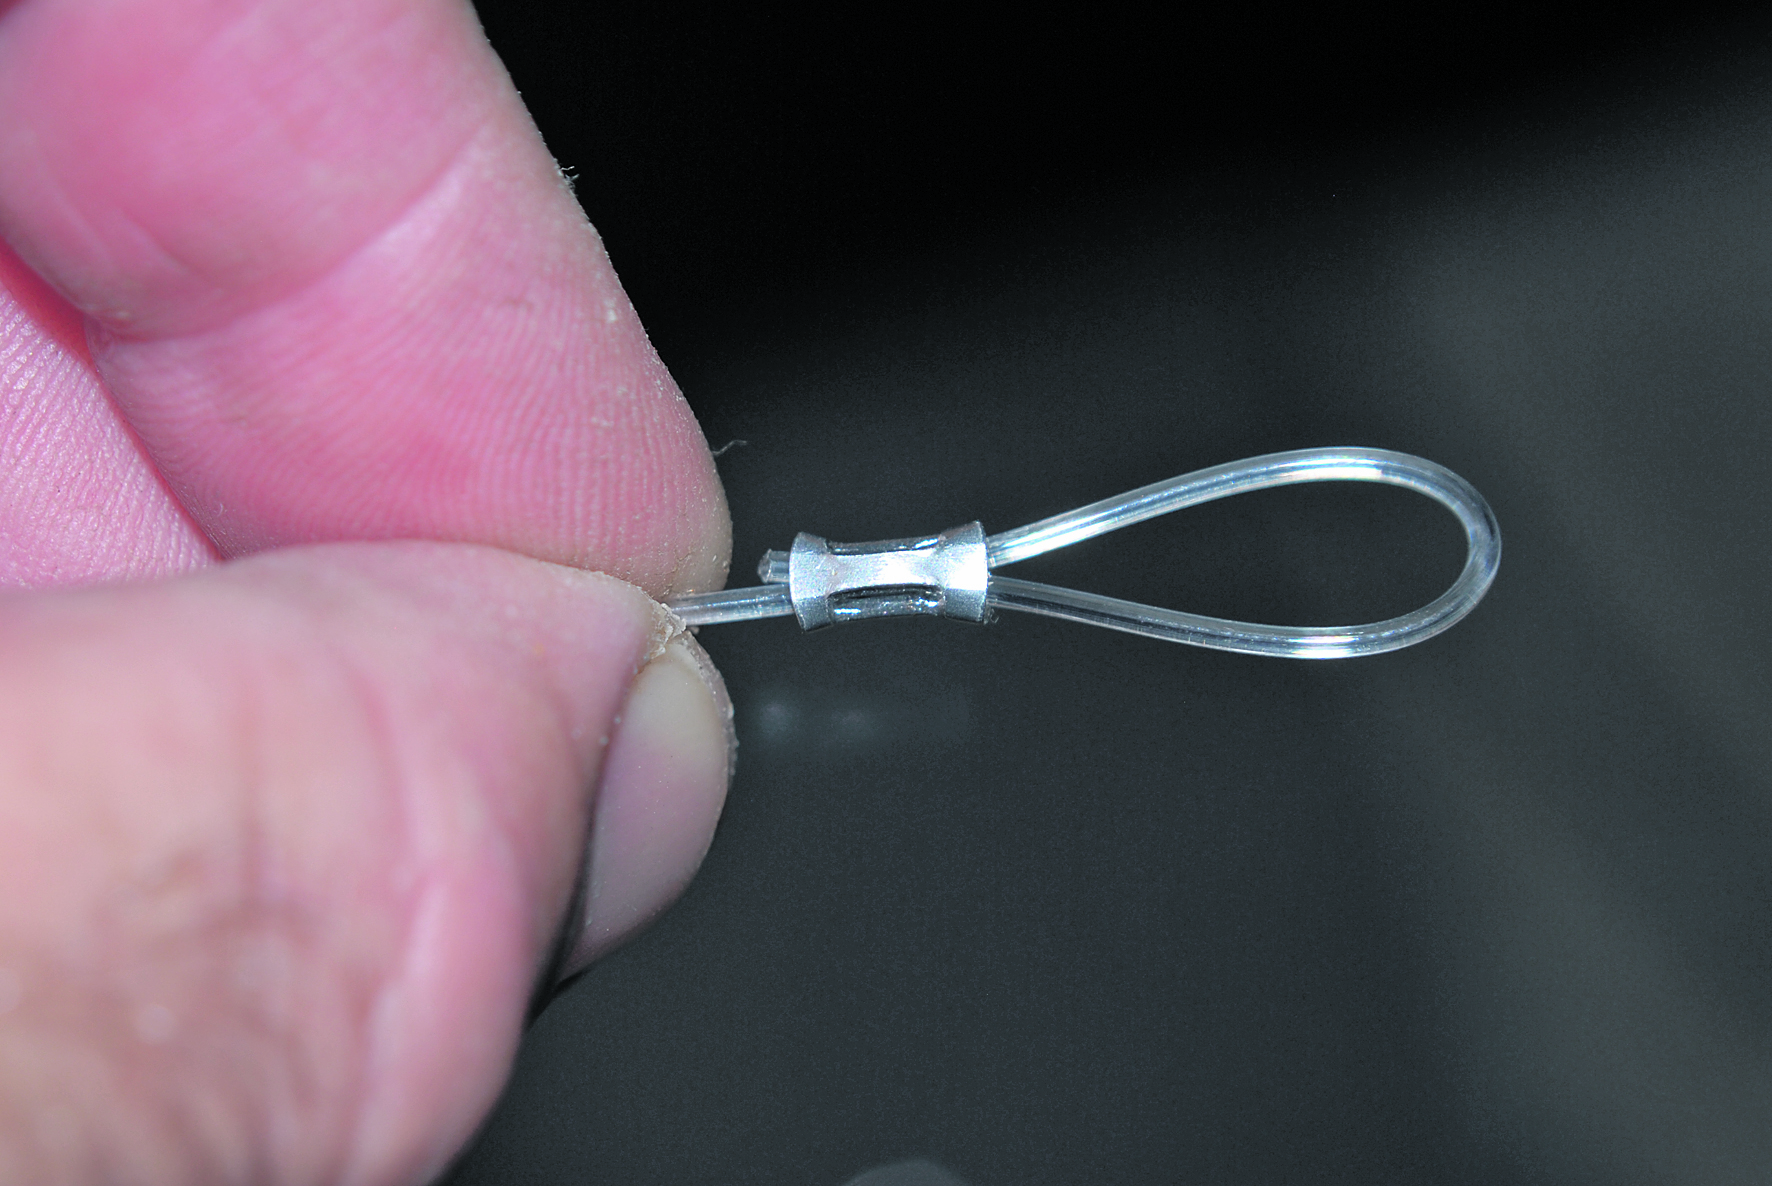
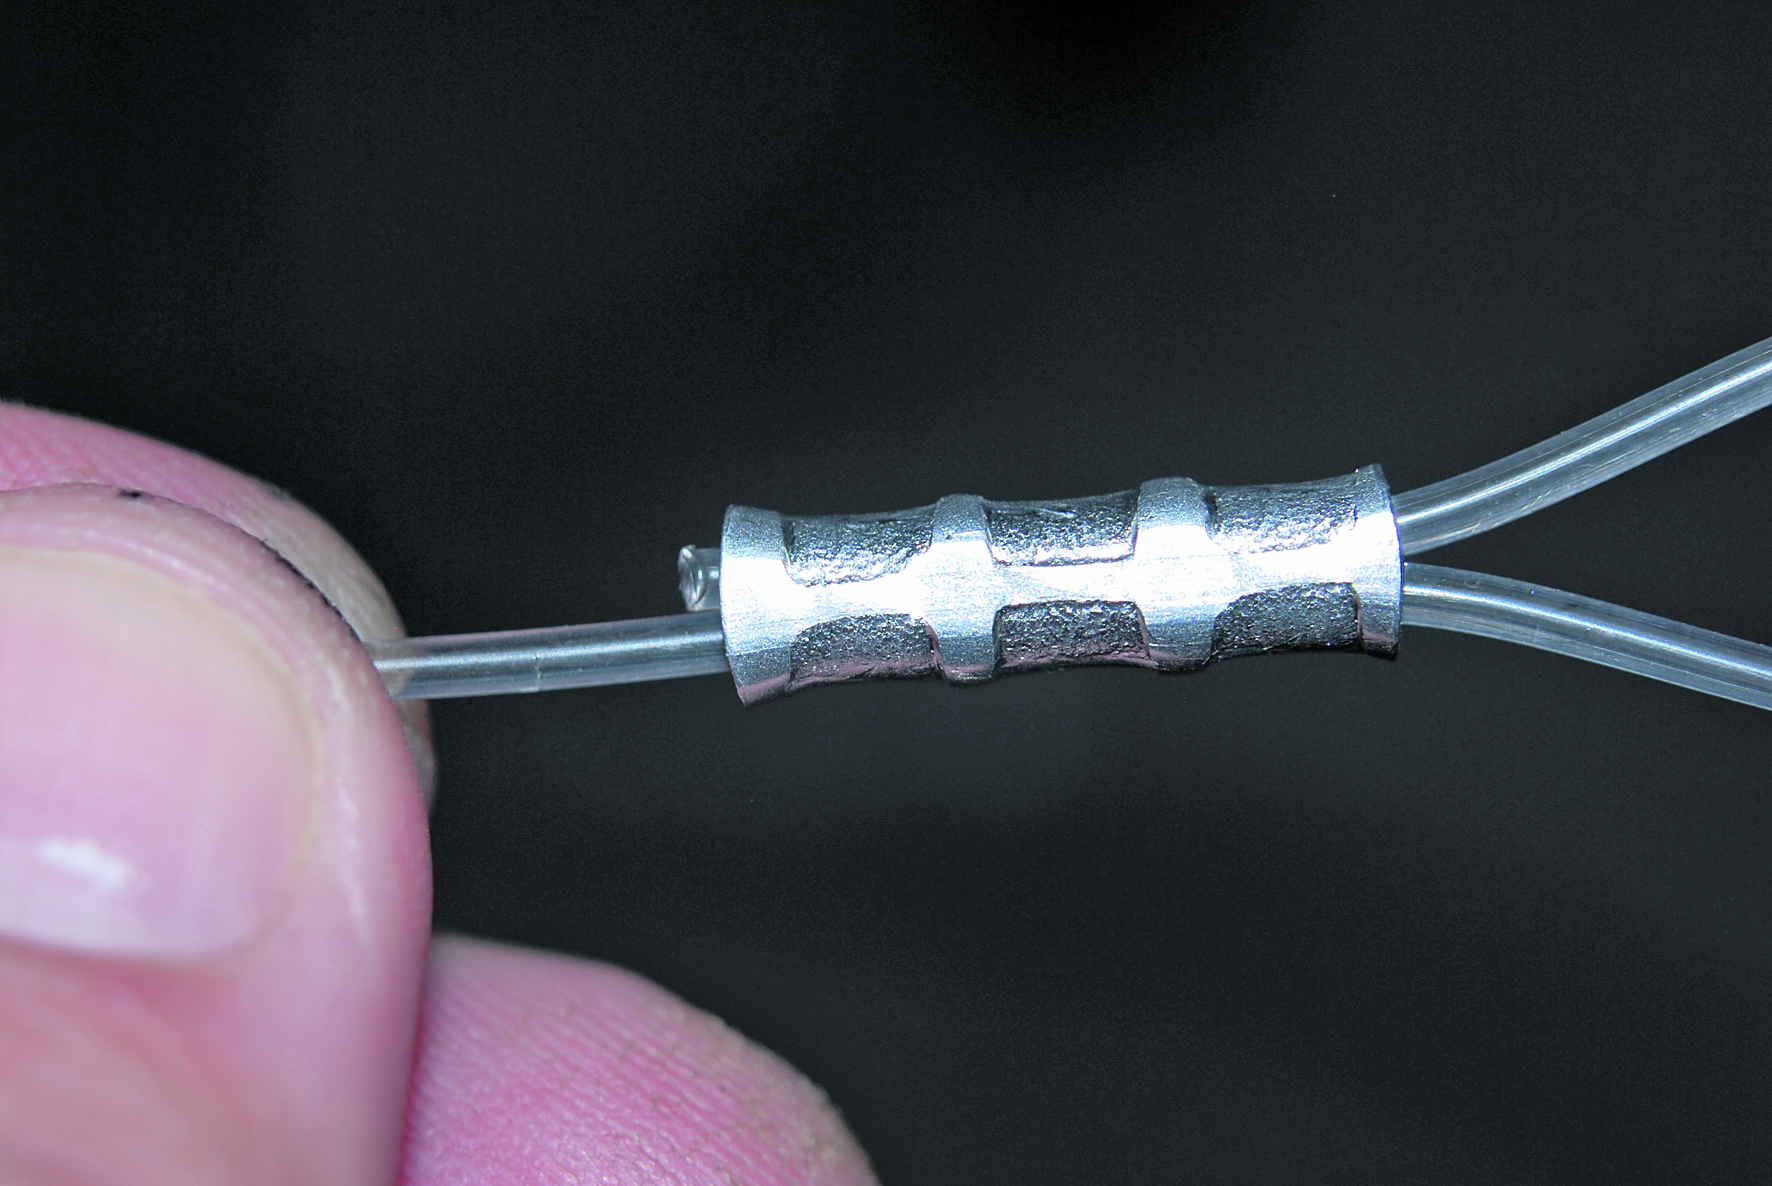
When crimping lighter mono and fluoro from around 40lb to 150lb, use a small aluminium crimp like this. The crimp is oval and should be placed sideways in the tool. Place the plier in the centre, choose the correct hole on swaging tool and squeeze the handle firmly.

If you need to, go up to the next smaller hole in the swage tool and again give the handles a good squeeze. Your crimp should now look like this with each end slightly flared up. This avoids damaging the leader material with the inner edge of the crimp.
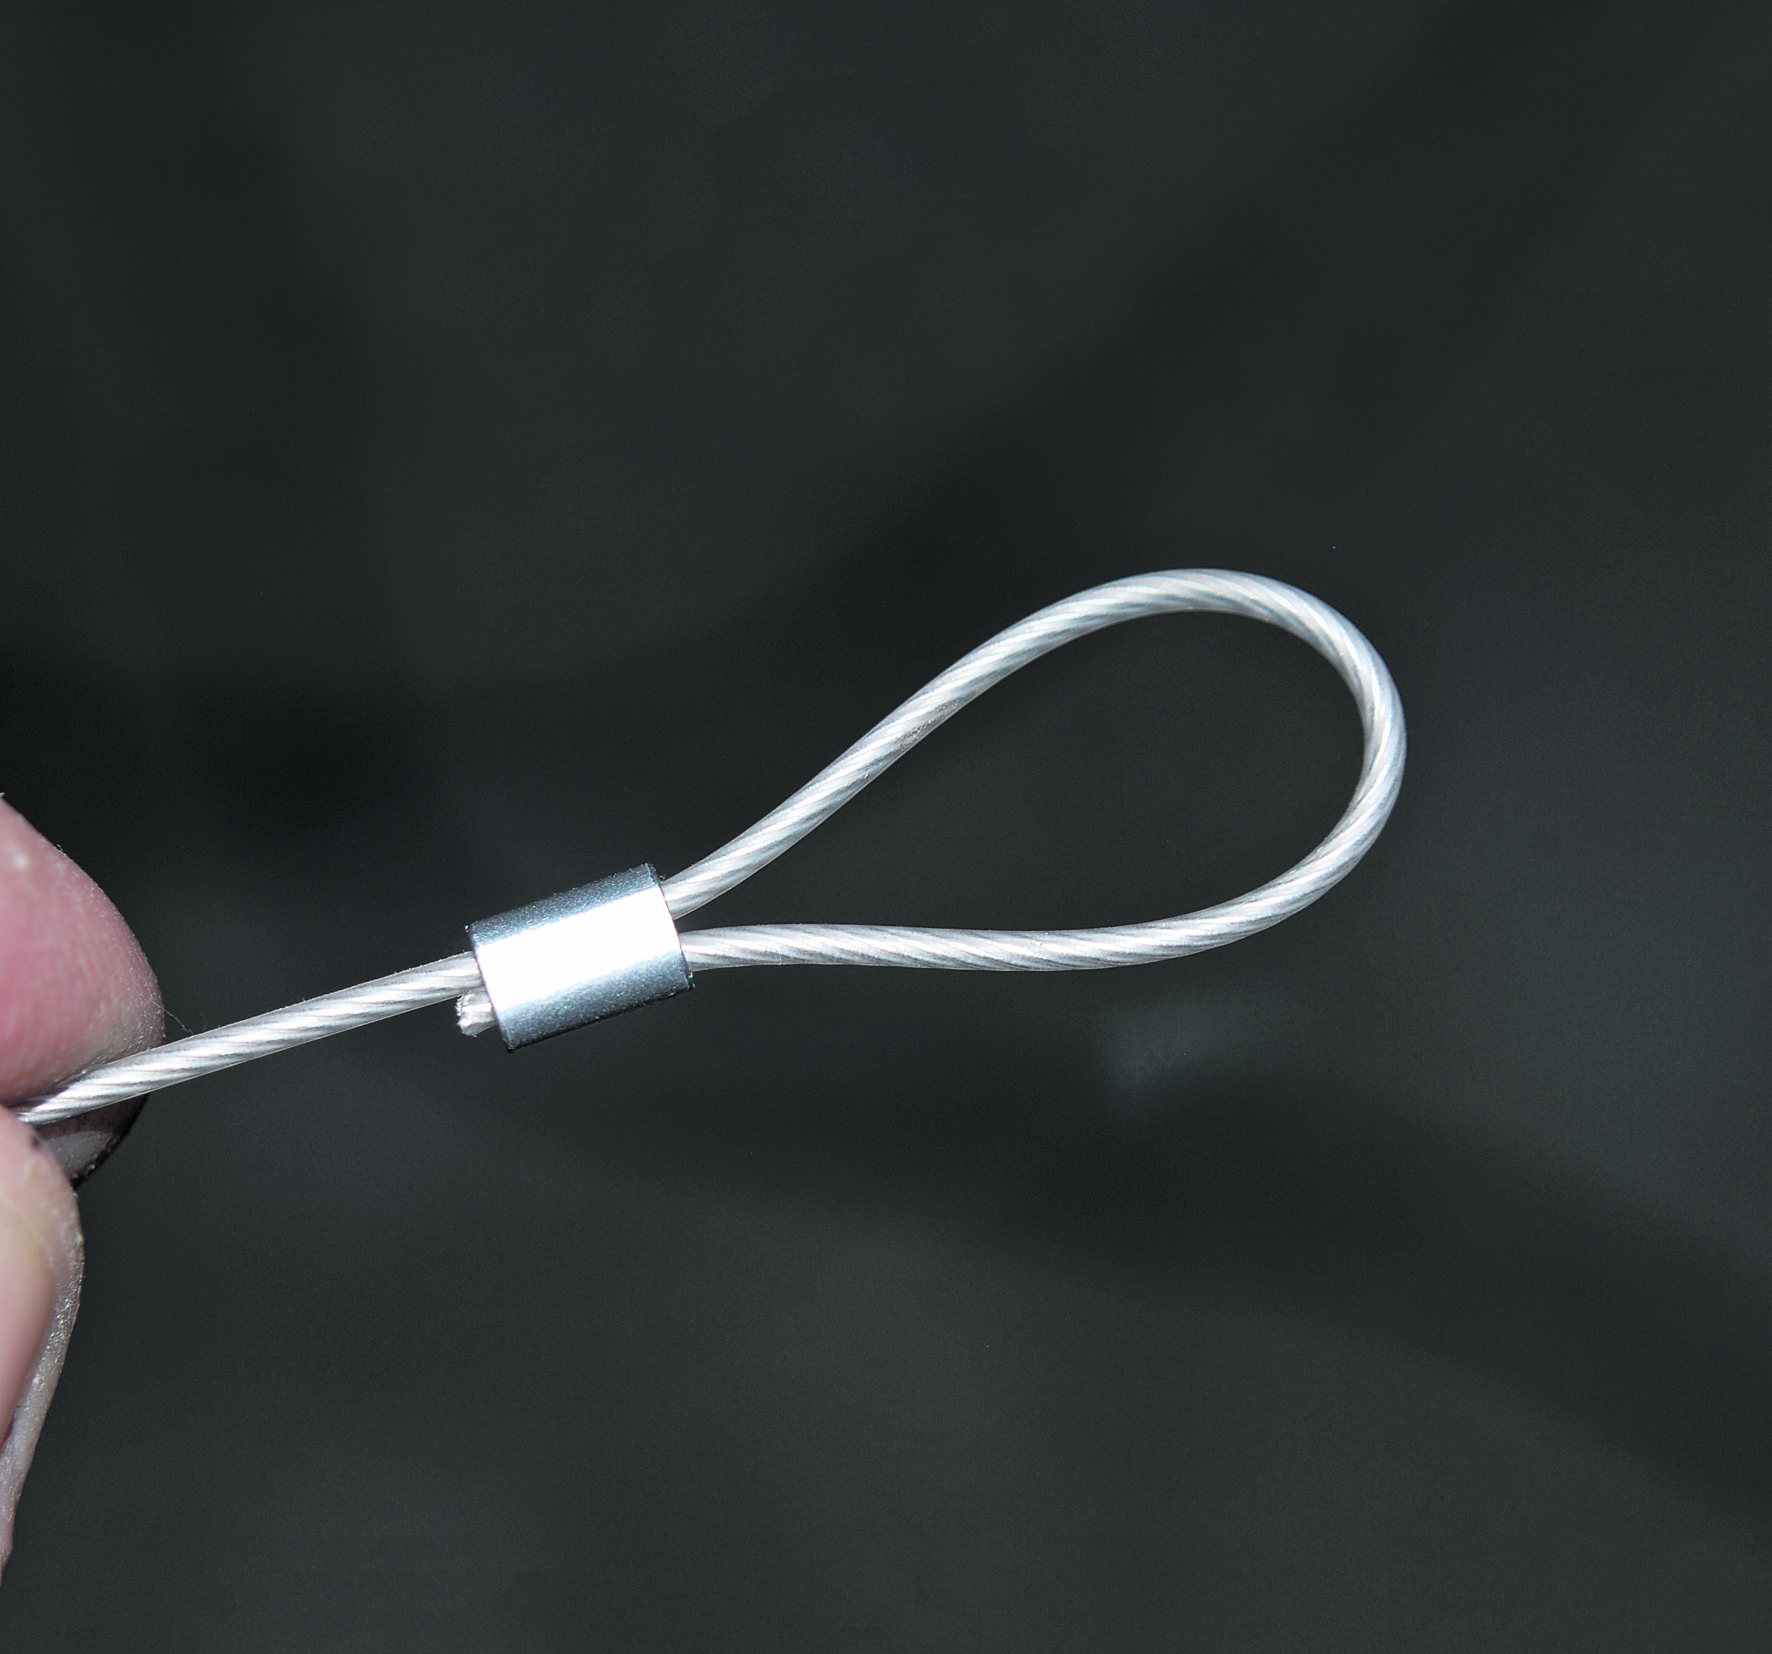
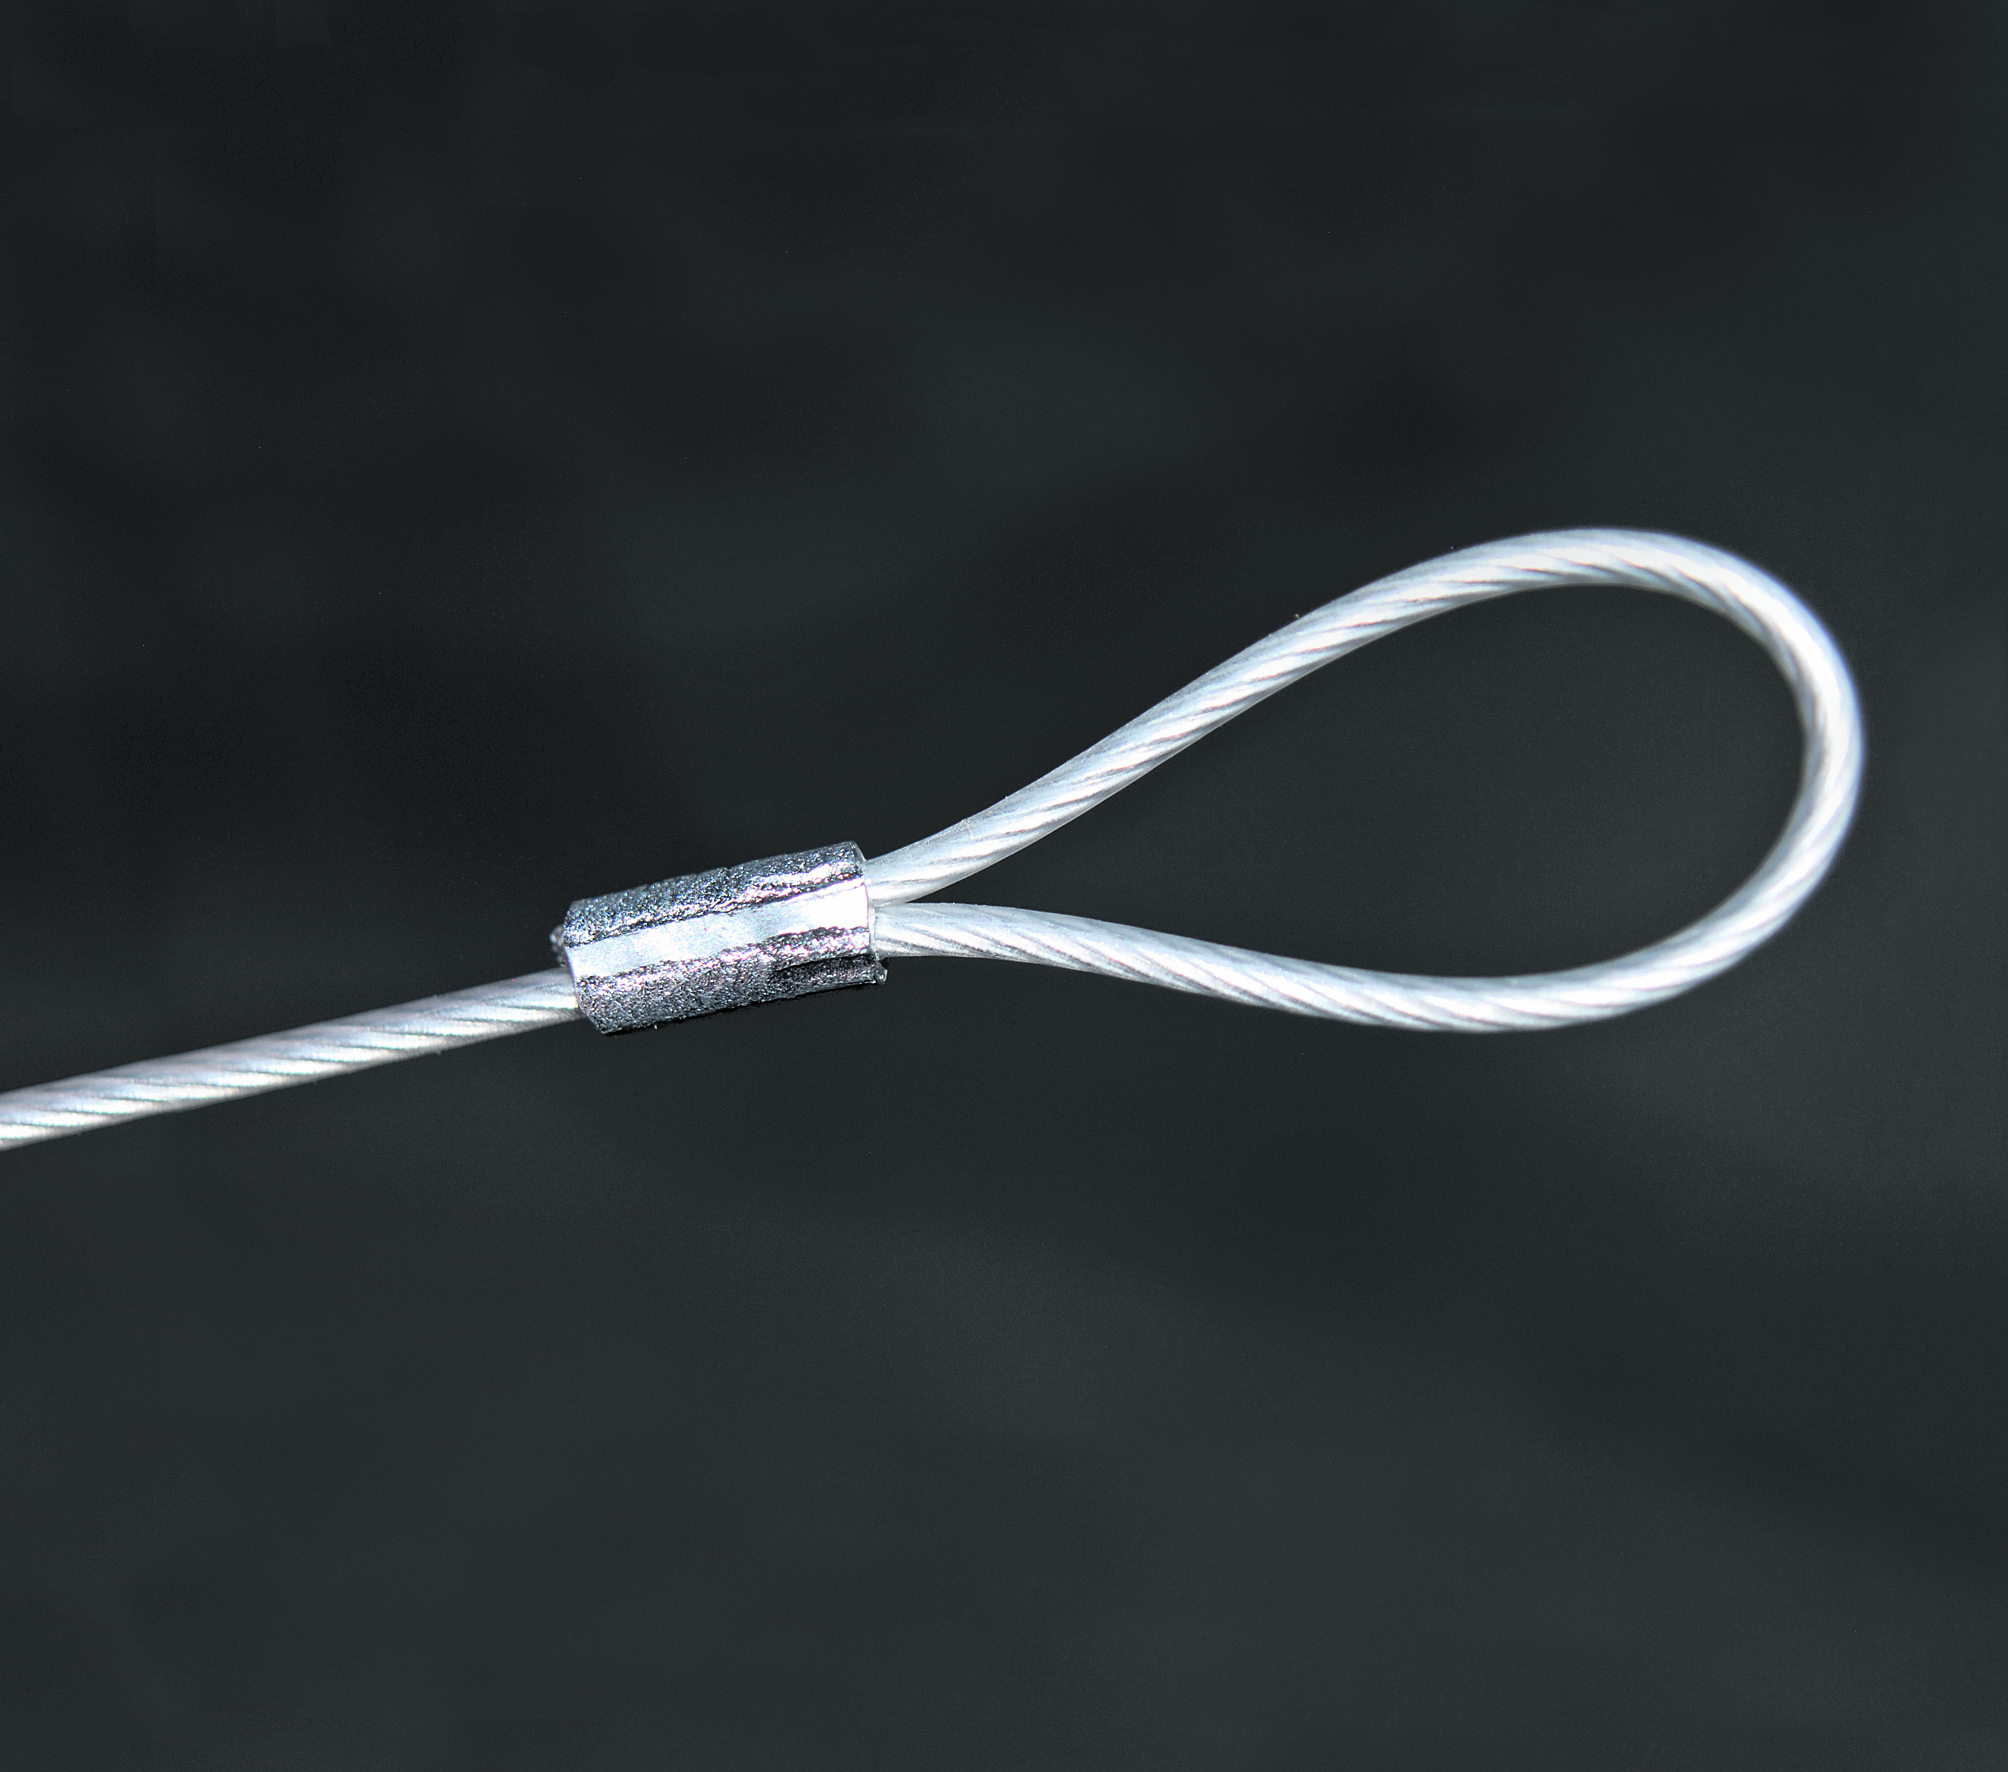
For heavier monofilament from around 200lb to 600lb, you will use one of the long aluminium crimps. Again, position the plier in from the end of the crimp to avoid damaging the leader. Squeeze the handles gently to constrict the crimp. Repeat at the other end before rolling the crimp 180 degrees and crimping in the middle. This will keep it nice and straight.
Put the crimp in the next smaller hole of your swaging tool and repeat the process. Your completed crimp should look similar to this.
When using nylon-coated wire, you can use either wire crimps (usually brass or copper) or aluminium crimps, as you used for mono.
The crimp is constricted right along the length and there is no need to crimp in from the end of the crimp. With the aluminium crimps, start from one end and squeeze several times along the length of the crimp until you have a nice neat finish like this.
For heavy multi-strand wire, use a brass or copper crimp. With figure-of-8 crimps, each side of the crimp constricts individually around each strand of wire and ends up being virtually round. The crimp goes into the plier sideways. Start from one end (no need to indent in from the end) and squeeze hard. Continue along the length of the crimp. If you think you need it even firmer, use the next smaller hole in the tool and repeat.
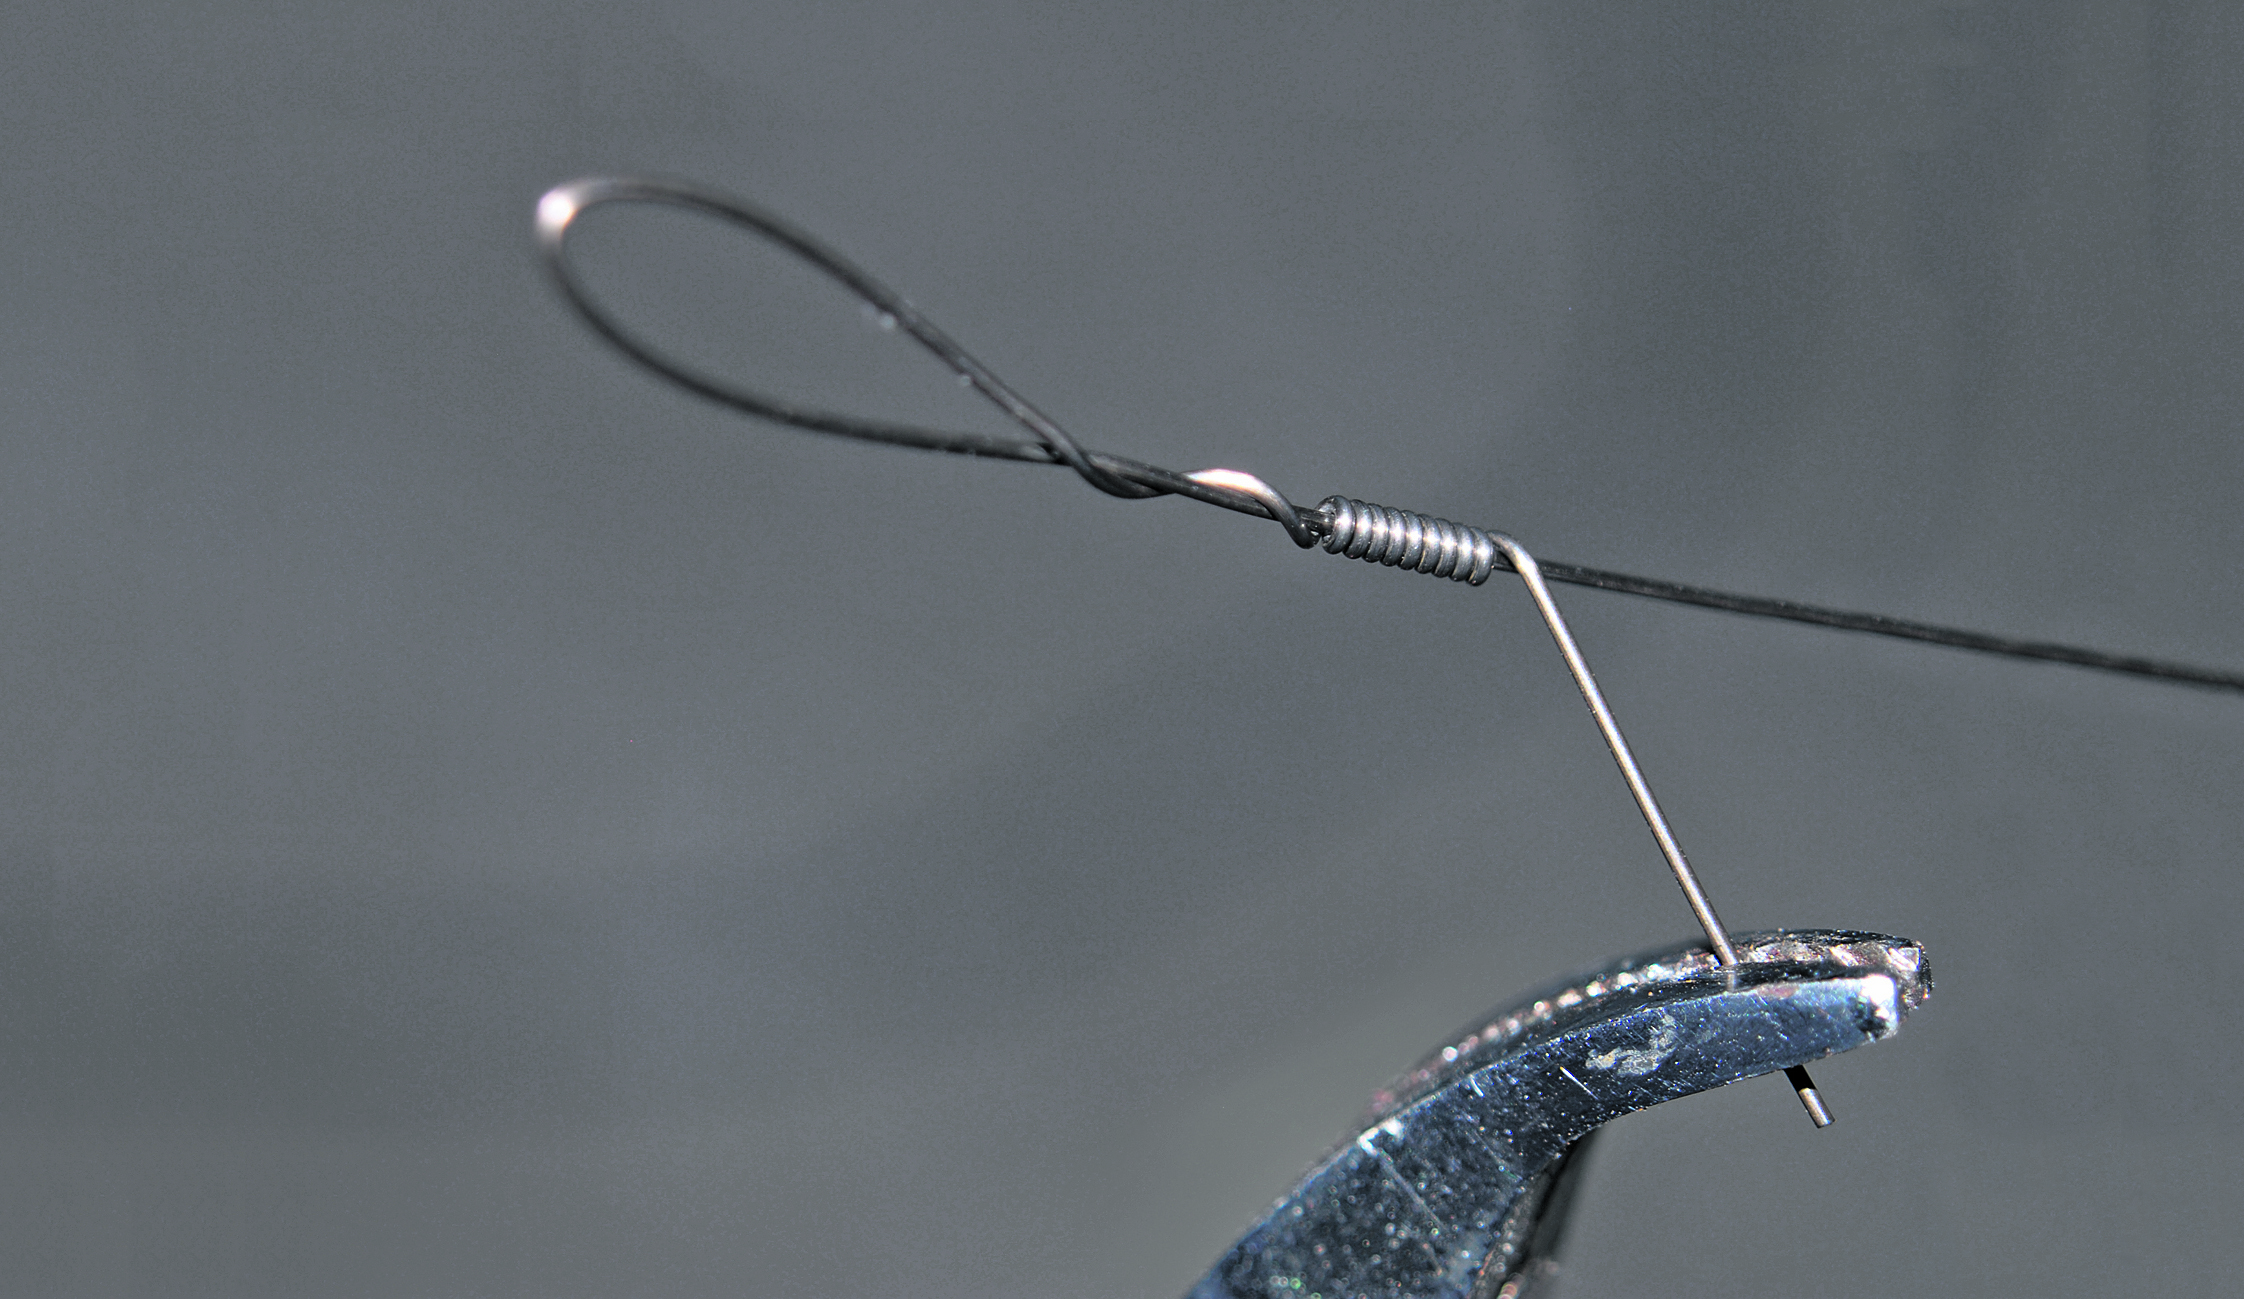
Single-strand wire, especially ‘piano wire’, isn’t suitable for crimping. Its smoothness makes the crimp slide and not grip. Instead, use a haywire twist. First, loosely wrap the wire back around itself 2-3 times. Next, bend the tag end out so it’s 90í to the main wire. Do 6-10 wraps around itself with each wrap butting up against the last. Don’t snip the tag end. Instead, rock it back and forth in line with the main wire, and it will snap off smoothly and leave a low profile.