by Gordon Macdonald •
With the warm weather upon us, anglers will notice an increase in the availability of pelagic species. While trolling with lures is popular, there is no doubting the success of trolling rigged baits, especially when the bite is tough. In the October issue I demonstrated a skipping gar, and this issue we will have a look at a swimming gar.
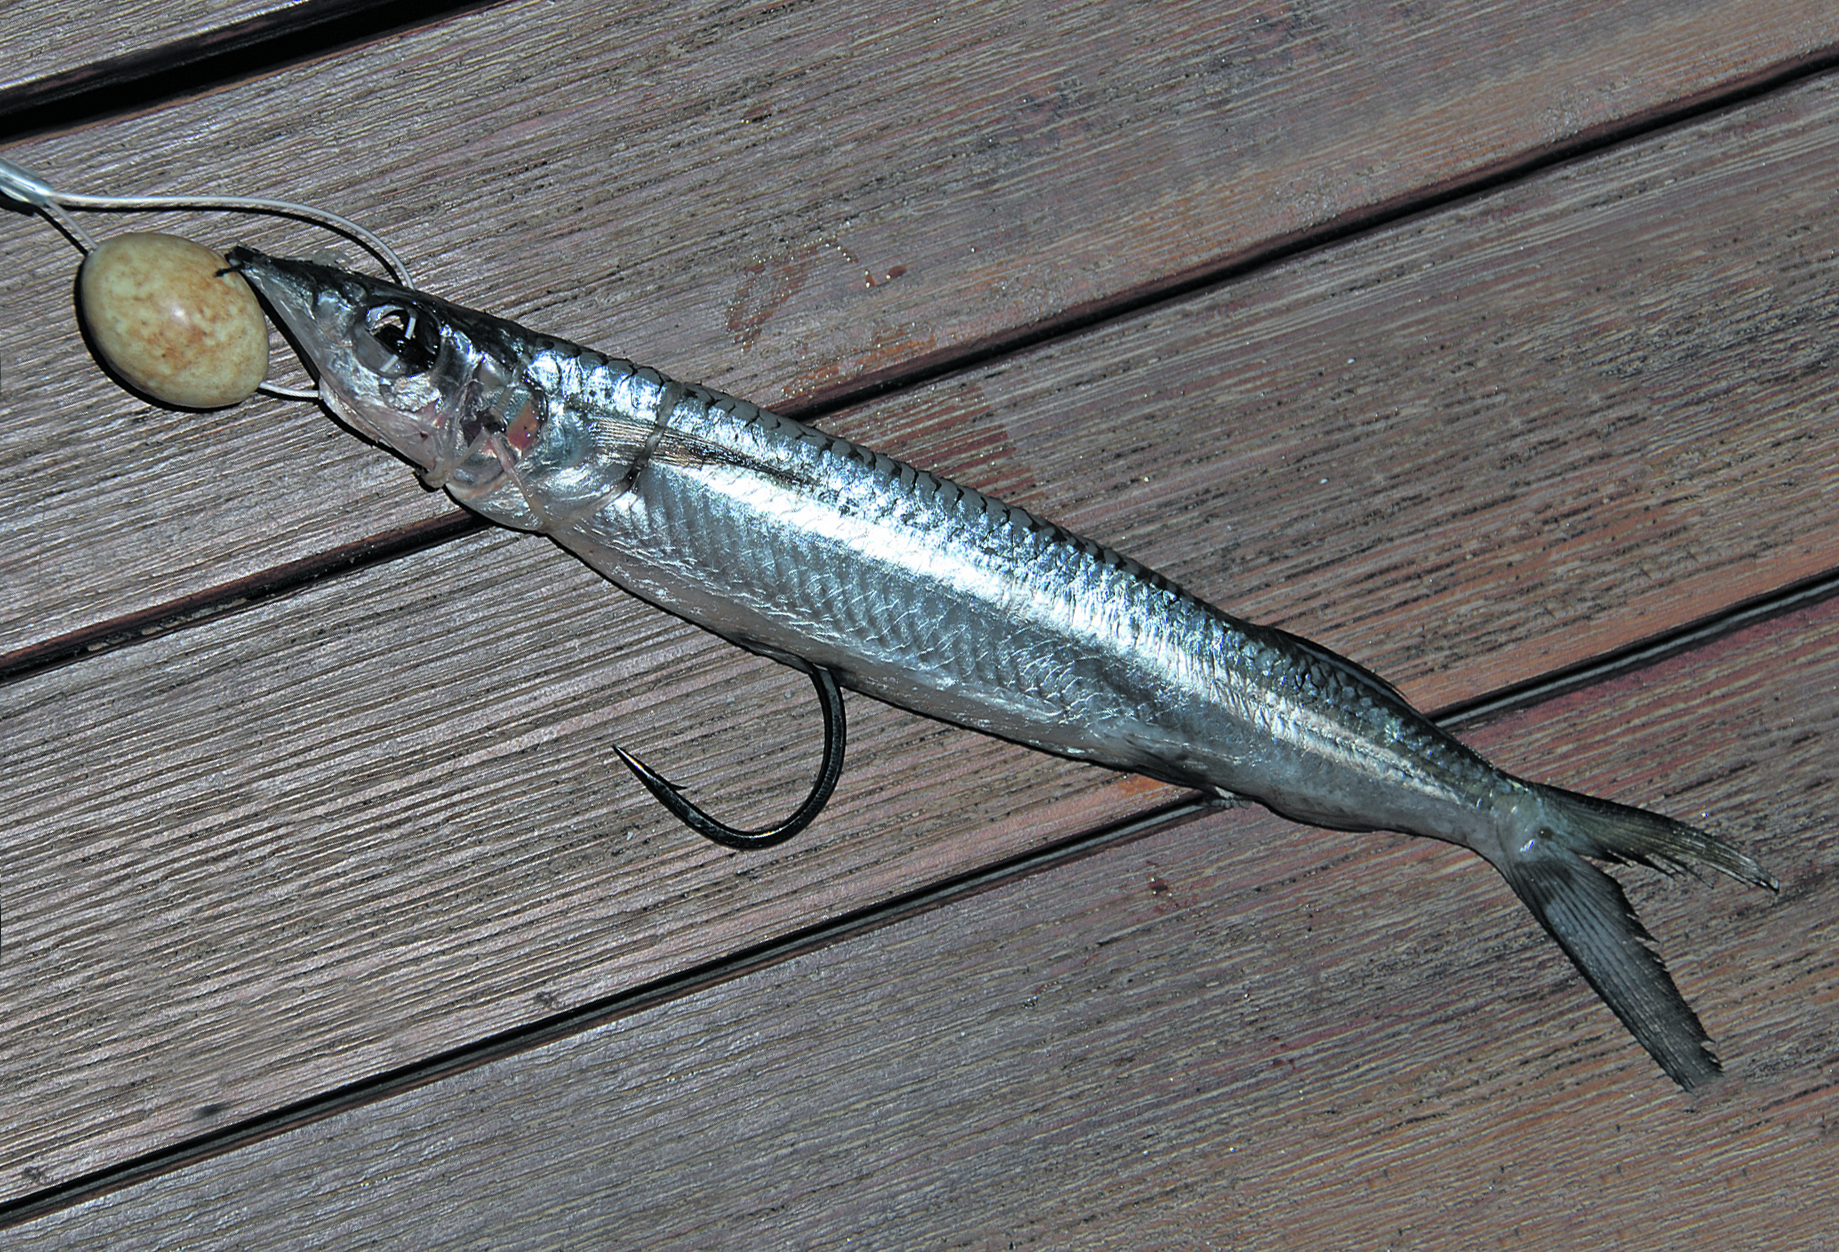
The very simple swimming gar rig has been popular for many decades. It is practically foolproof. Key things to keep in mind are that the garfish needs to be limp and flexible before deploying, and the tow point needs to be centred in the head. Add a suitable chin weight plus hook, and this rig is ready to go.
So why should you rig a gar swimbait instead of using a lure? Well, when baitfish are plentiful, or the grounds on which the billfish are holding have been worked over hard with lures, you’ll need a more realistic offering to get strikes. While the swimming garfish requires a slightly slower speed than many lures, it is a lot more enticing in its action, scent and flavour.
Often a billfish will hit or mouth the bait repeatedly before deciding to swallow it properly. If you get a strike without a solid hook-up, it’s advisable to freespool the bait, just allowing it to sink. The predator will think it has wounded the gar and will come back to slurp up its prey. Fish the reel in freespool (with the ratchet on) and allow the billfish to mouth the bait and begin swimming off before you strike.
Even if you don’t use rigged baits all the time, it’s handy to know how to rig them for those times when the bite is tough. These baits can be trolled from any fixed rod position on the boat or from an outrigger. I have also had a lot of success when trolling them from the downrigger, which is very successful when the billfish aren’t rising to surface baits or are feeding deeper.
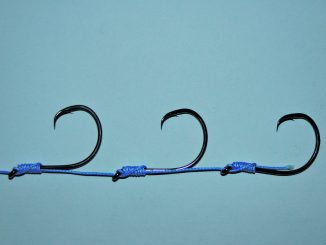
Quality fresh gar are best and these can be sourced from tackle stores, seafood suppliers or you can catch them yourself. Some good hooks include the Owner Longshank (available in 7/0, 9/0 and 11/0) or the Gamakatsu SL12S (generally 8/0, 9/0 of 10/0), but numerous non-offset hooks will do. I like to add anode tape to chemically sharpened hooks to offset the electrolysis, which can make the points brittle.
Now let’s look at the basic gar swim bait rig. You can adapt the rig by trying different chin weights, adding a stinger hook or adding a squid skirt.
STEP 1.
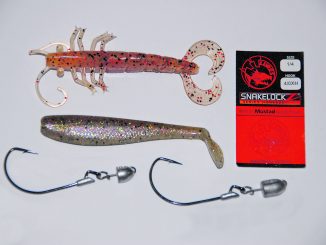
You will need an inline (not offset) hook, waxed rigging floss, a bait stitching needle, leader (fluoro or mono 60-130lb), suitable crimps, crimping pliers, knife, and a sinker (usually #5 to #7 ball).

STEP 2.
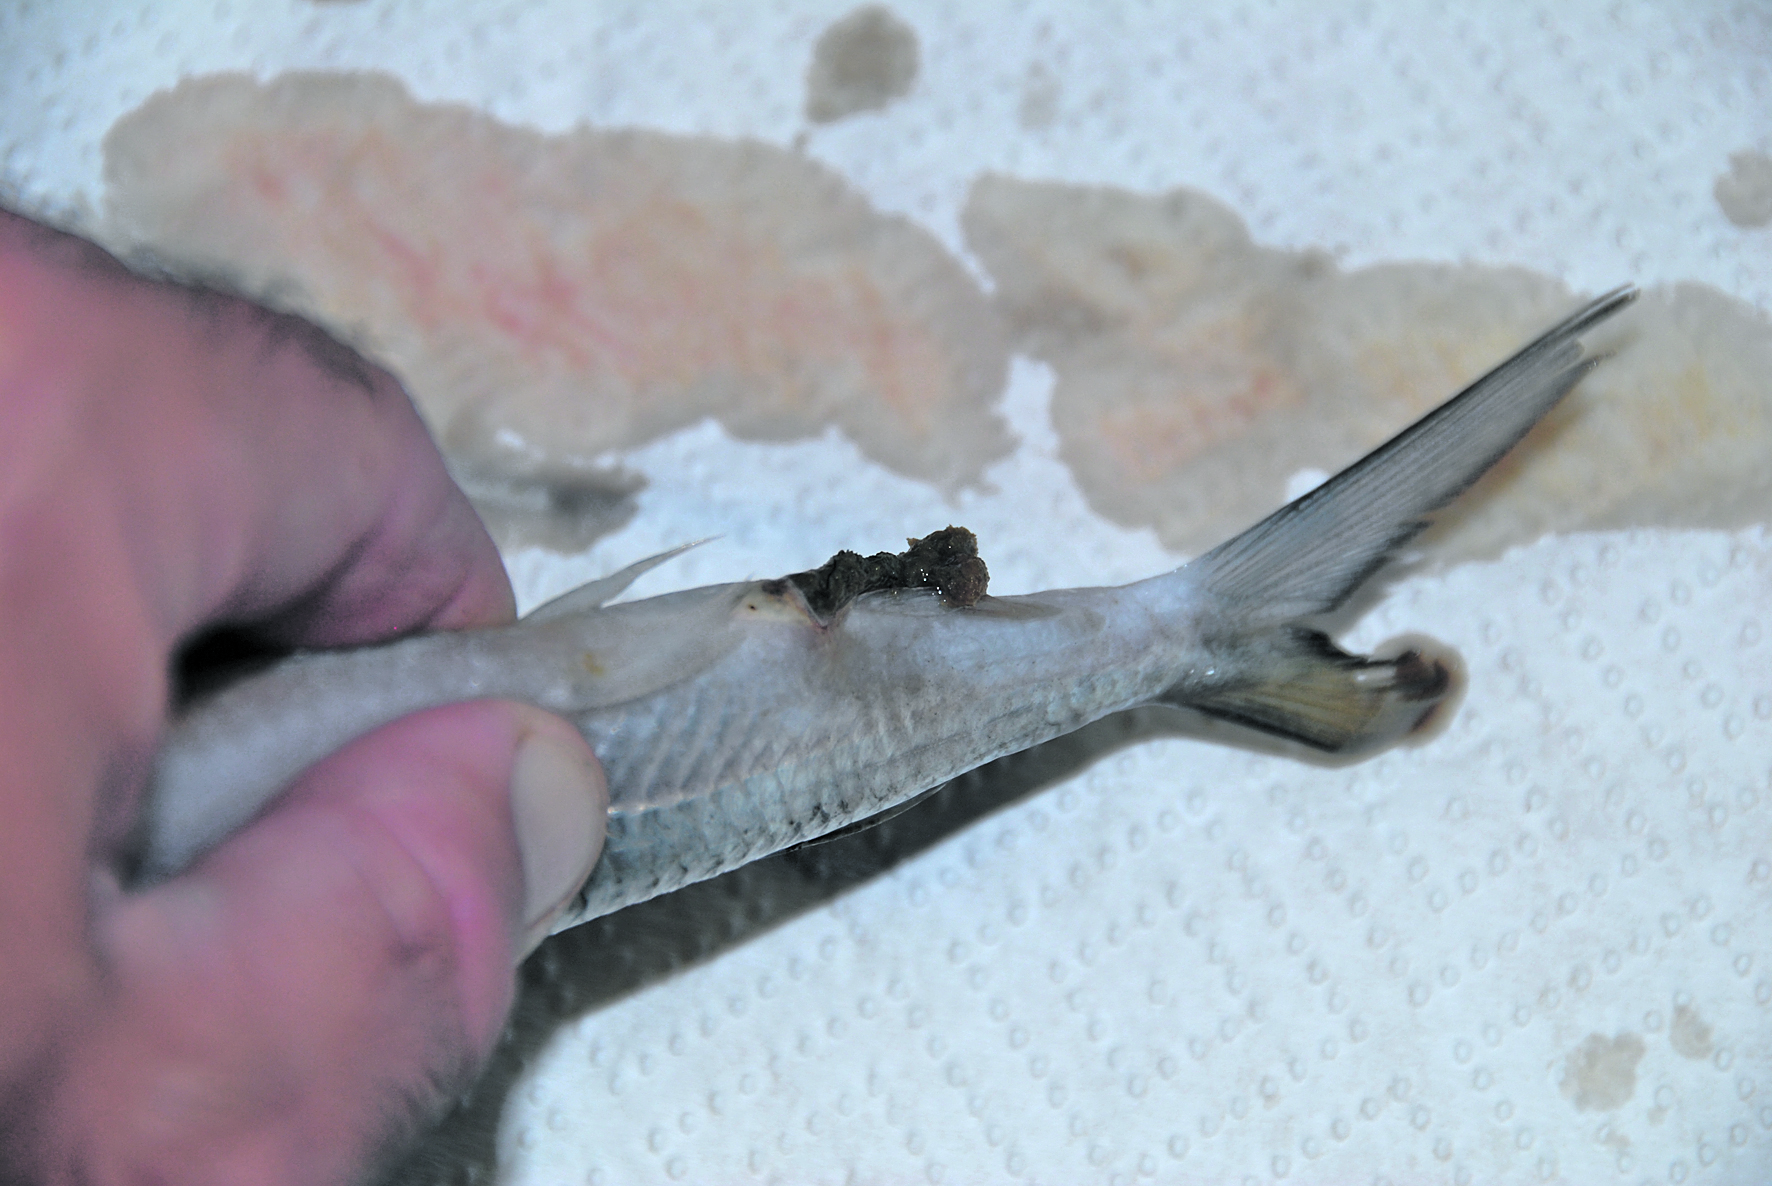
Run your fingers from the head of the gar down towards the tail, with firm pressure to push out all the excrement. Using your needle or knife tip, remove the eyes.
STEP 3.
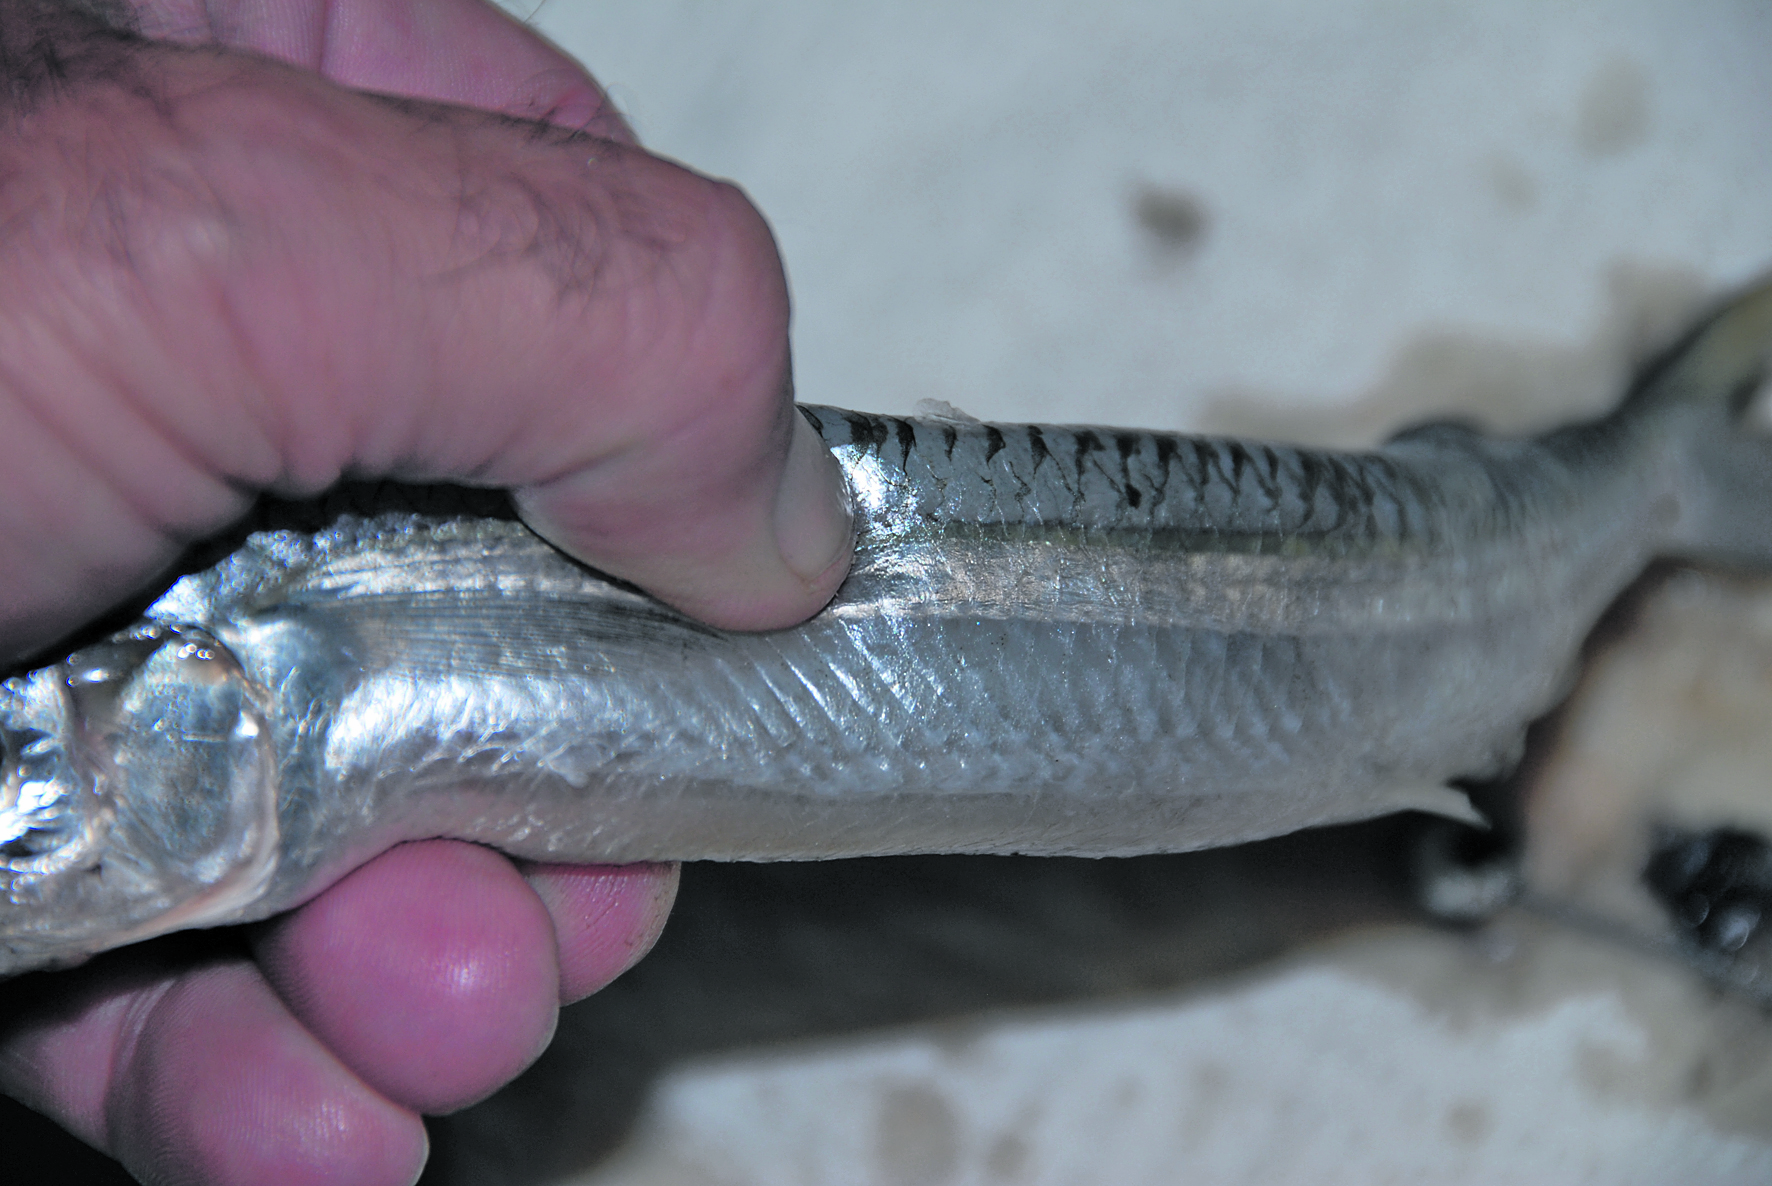
Squeeze gently, using your thumb and forefinger, at numerous spots along the lateral line. You will feel a small pop as the flesh detaches from the spine. This will improve the bait’s action.
STEP 4.
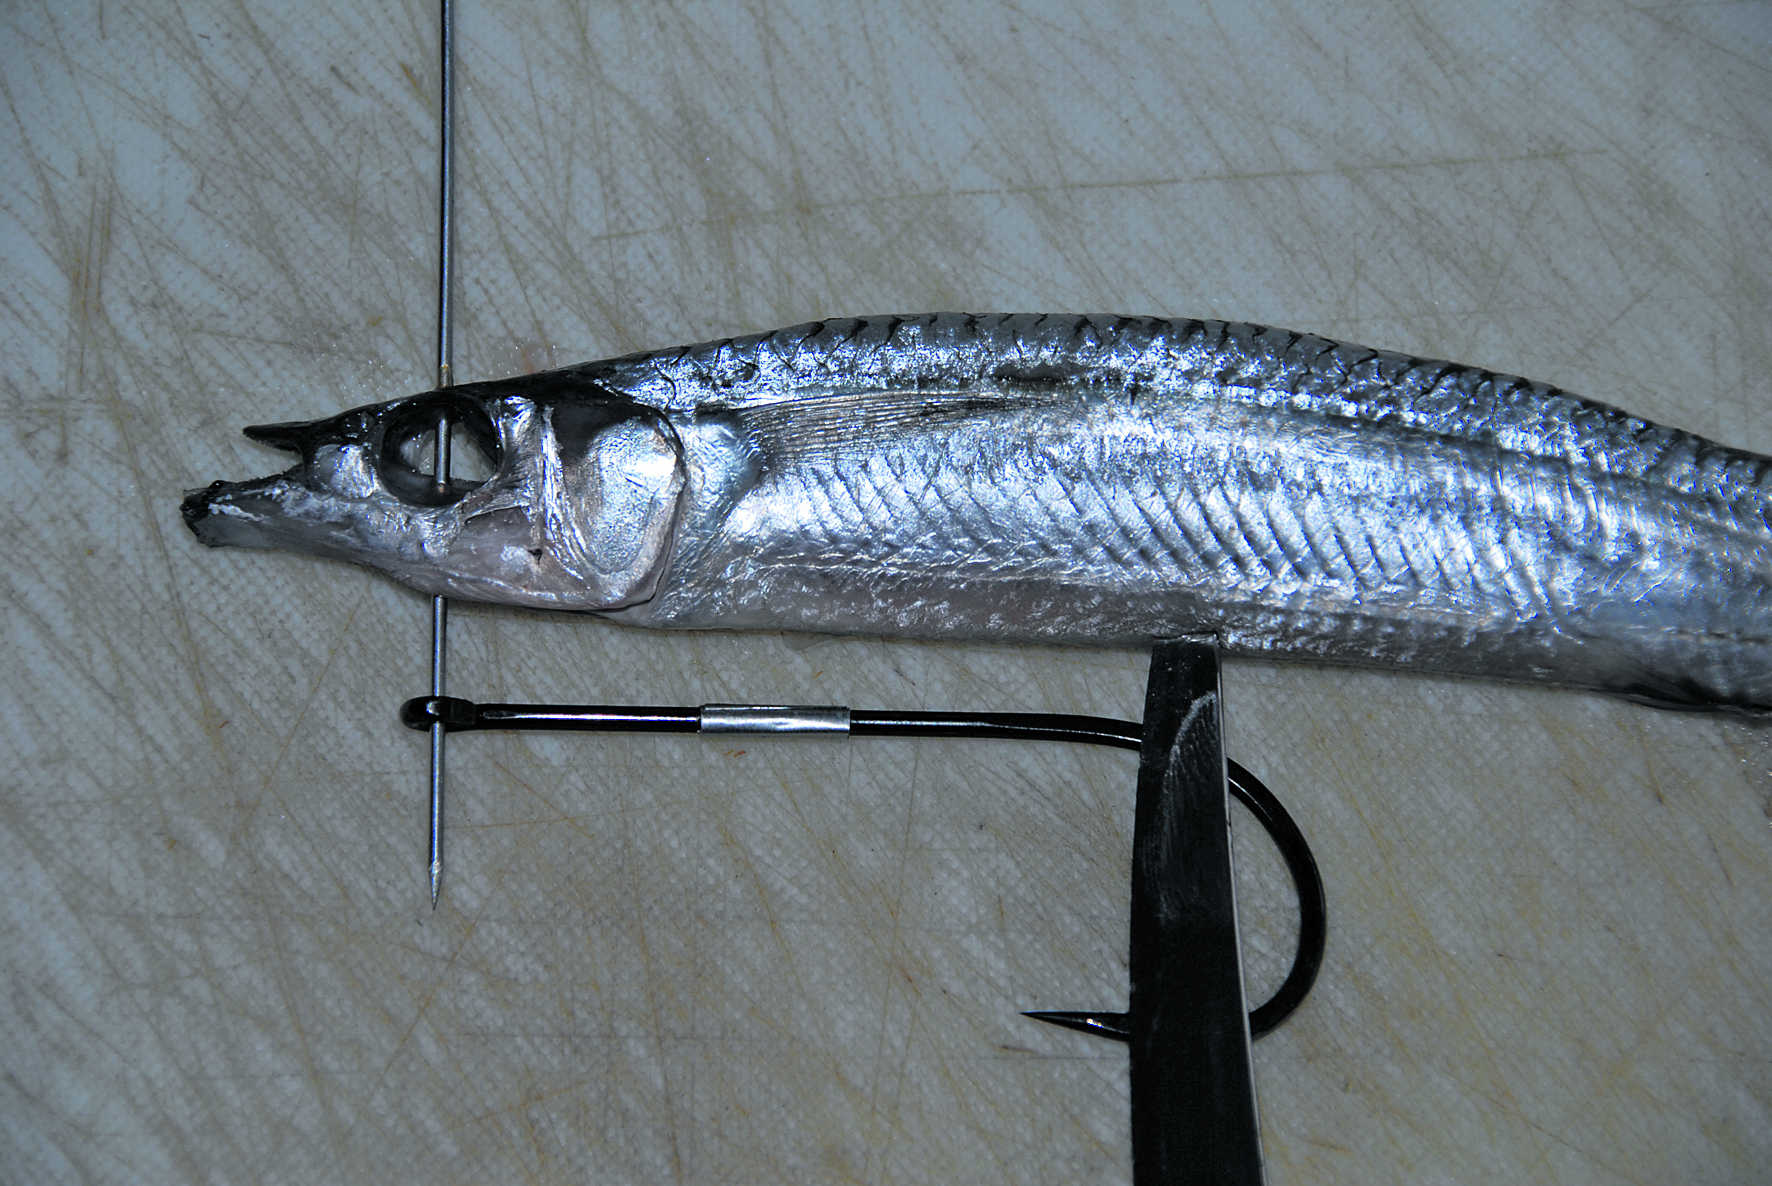
Cut the lower beak off so it’s just longer than the upper jaw. Using the knife, cut a small slot in the centre of the lower beak stub. Push the needle through the head and out the chin of the gar, directly above the eye socket and dead centre across the head.

STEP 5.
While this needle is still in the head, place the eye of the hook over the needle point. This will allow you to judge where the bend of the hook ends. Insert your knife point to create a small slit in the gar’s belly.
STEP 6.
Just behind the pectoral fin, pass the needle and rigging floss through the body from one side to the other. Pass the needle over the gar’s back and then back through the side you first pierced. Wrap the tag end and the needle with floss under the belly and use two granny knots to secure the thread, which is now in a figure-of-8 around the gar. To maintain durability, don’t cut the tag ends.
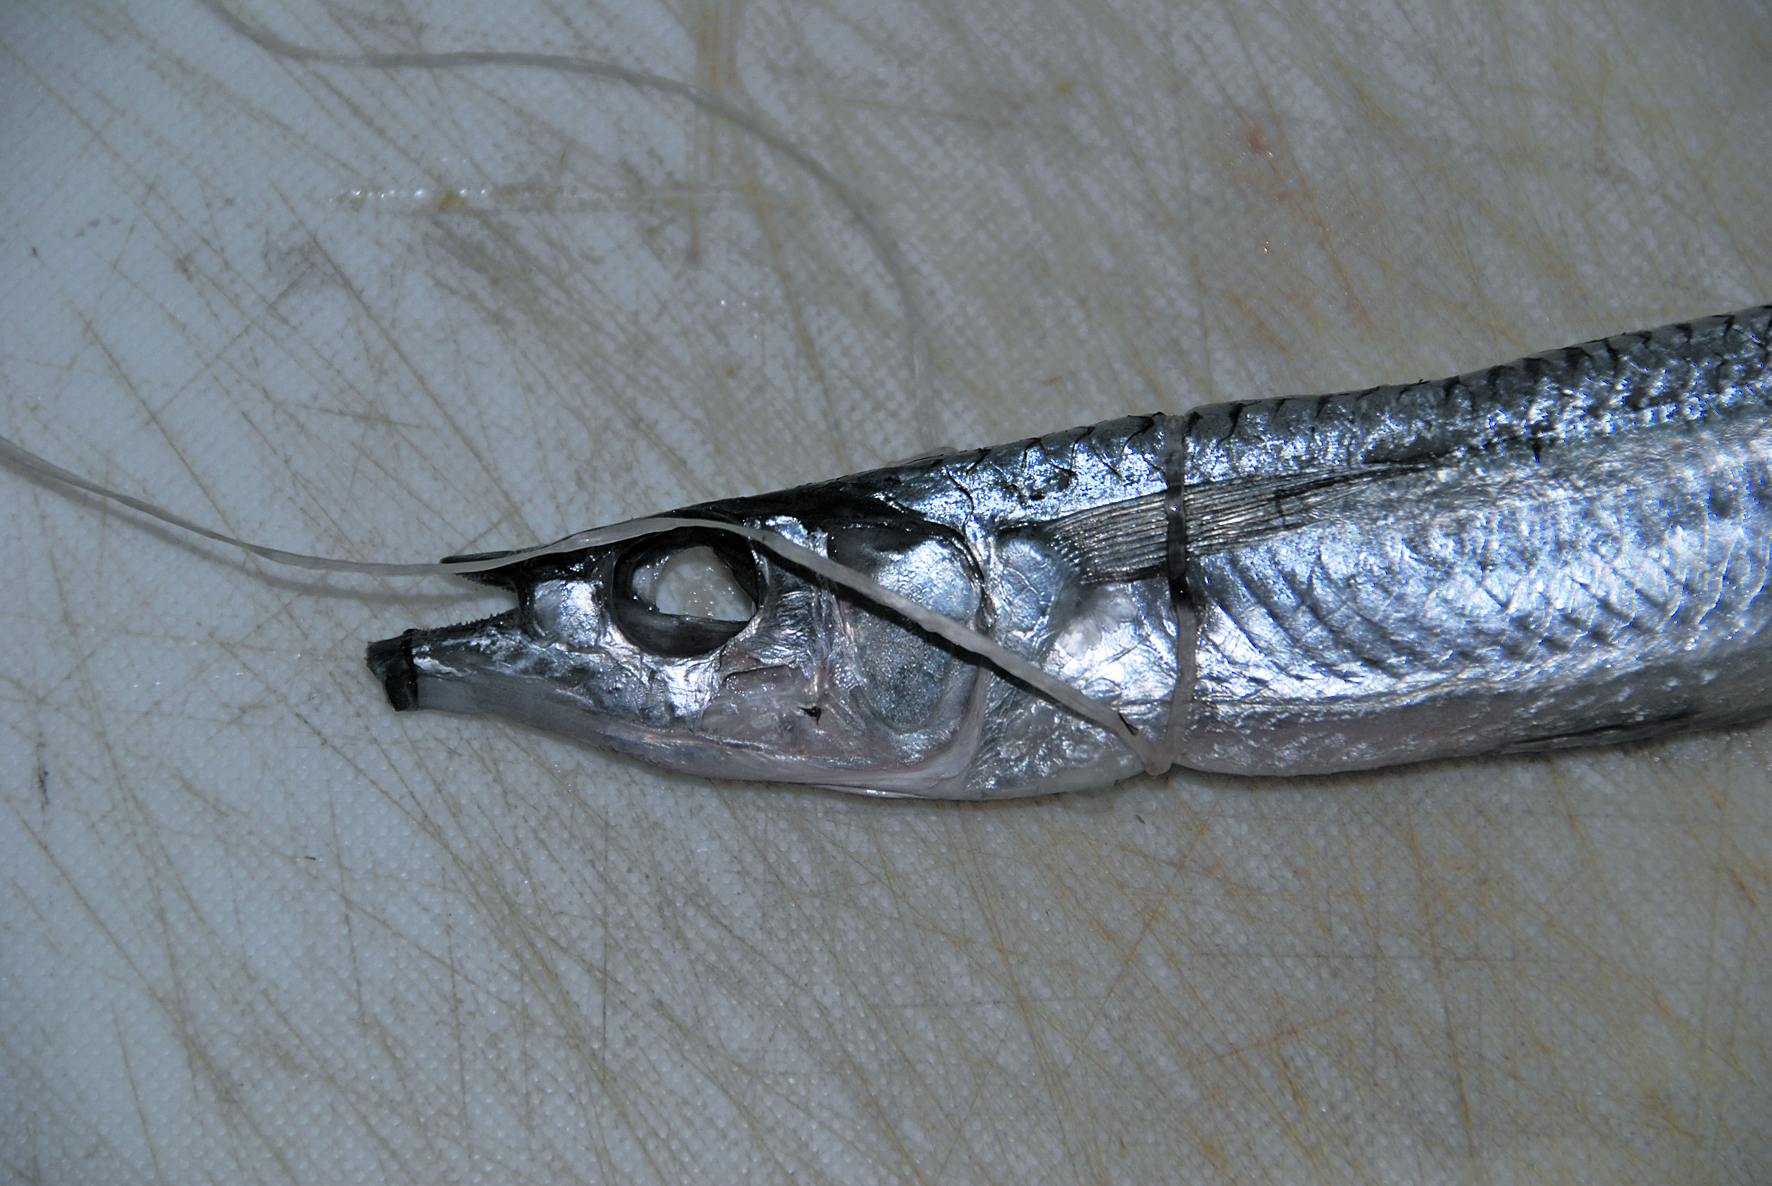
STEP 7.
Repeat this step at the gill plate area. You can use a different portion of thread or bring the existing thread forward. Punch a hole in the middle of the gill plate and do another figure-of-8 with thread around the gill area. This will keep the gills shut. Knot the two ends with some granny knots and cut away the tag ends.
STEP 8.
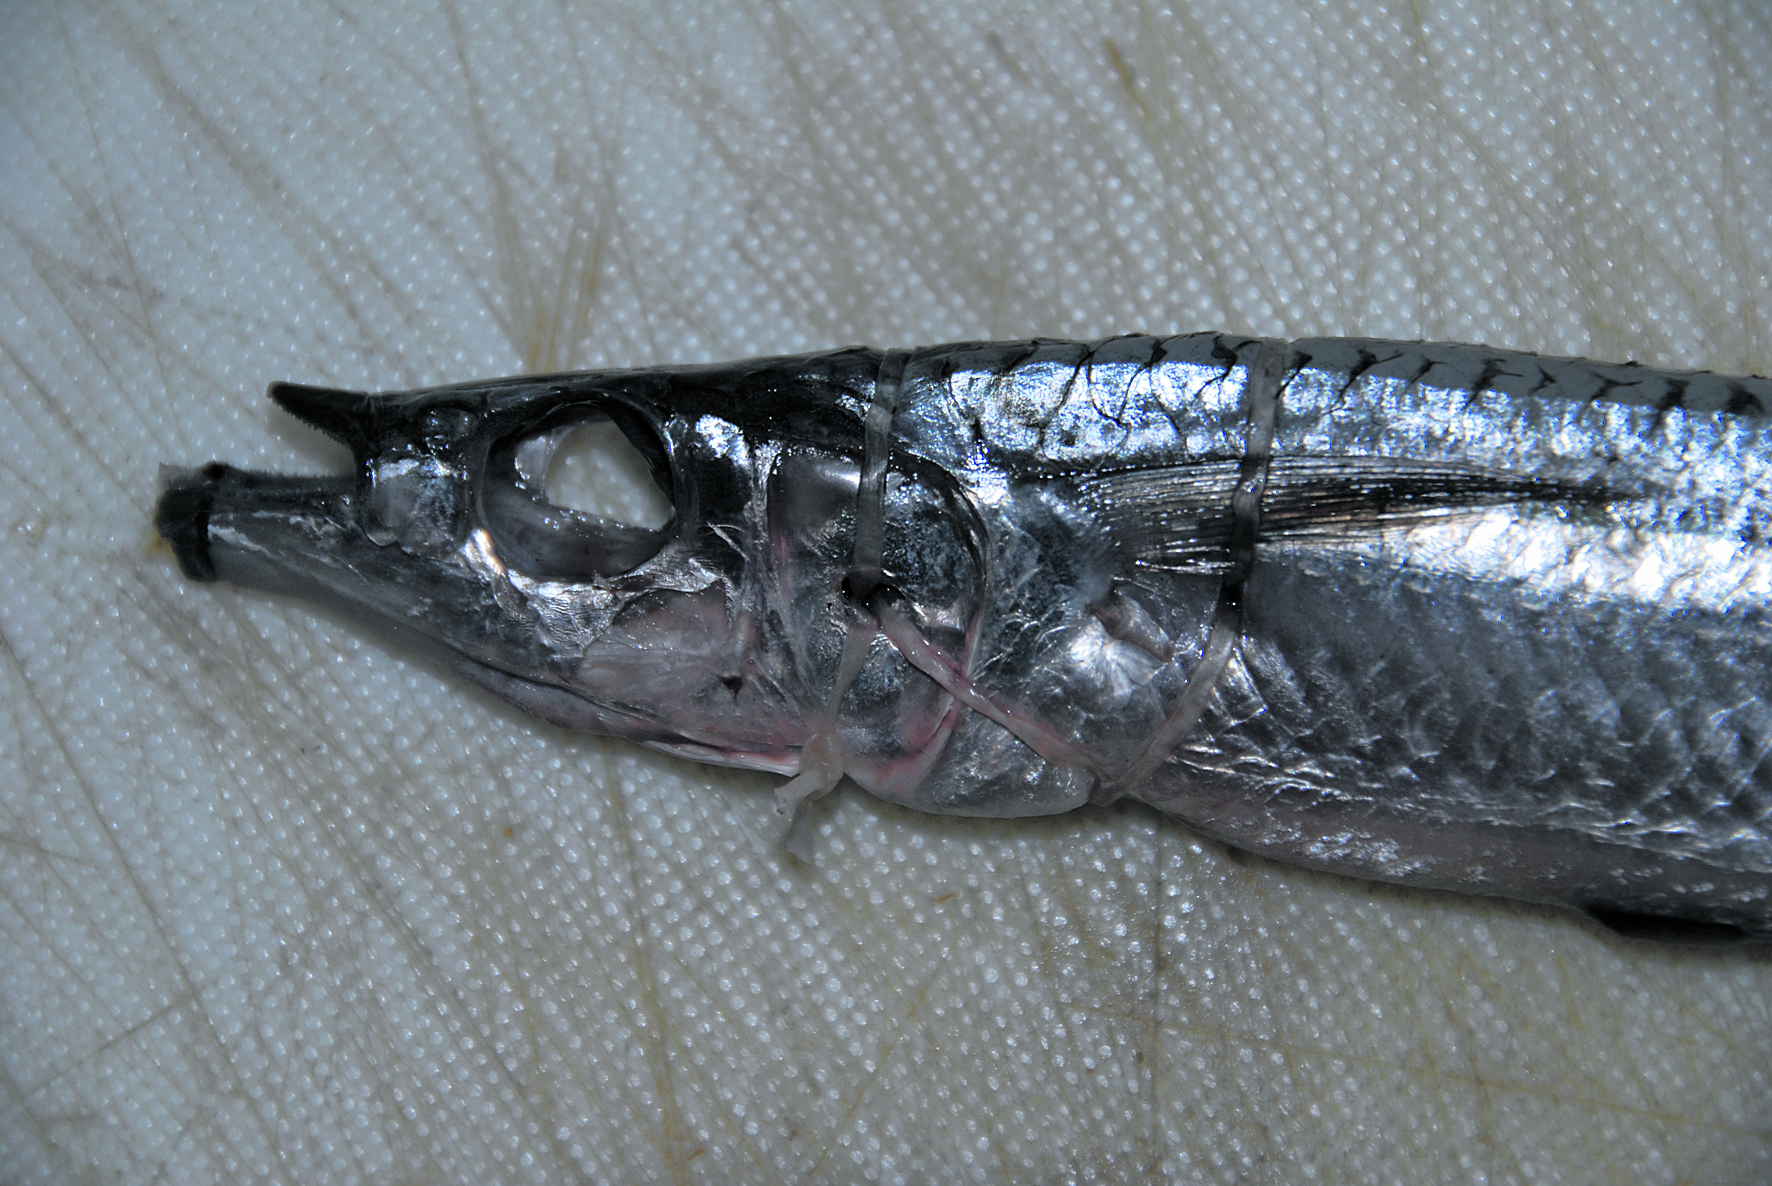
Just forward of the eyes, punch the bait needles through the head from top to bottom, with rigging floss attached. Wrap the floss around the bait’s nose and insert in the slot that you made in the beak earlier. Tie the ends together with a granny knot. This will prevent water from entering the gar’s mouth.

STEP 9.
Insert the eye of the hook into the belly slot and wriggle the hook as you push it up the bait’s body and through the gill plate until the hook eye is in the eye socket area. Pass the leader through the hole you previously made with the needle in the top of the head and out the chin. Pass the tag end through the sinker.
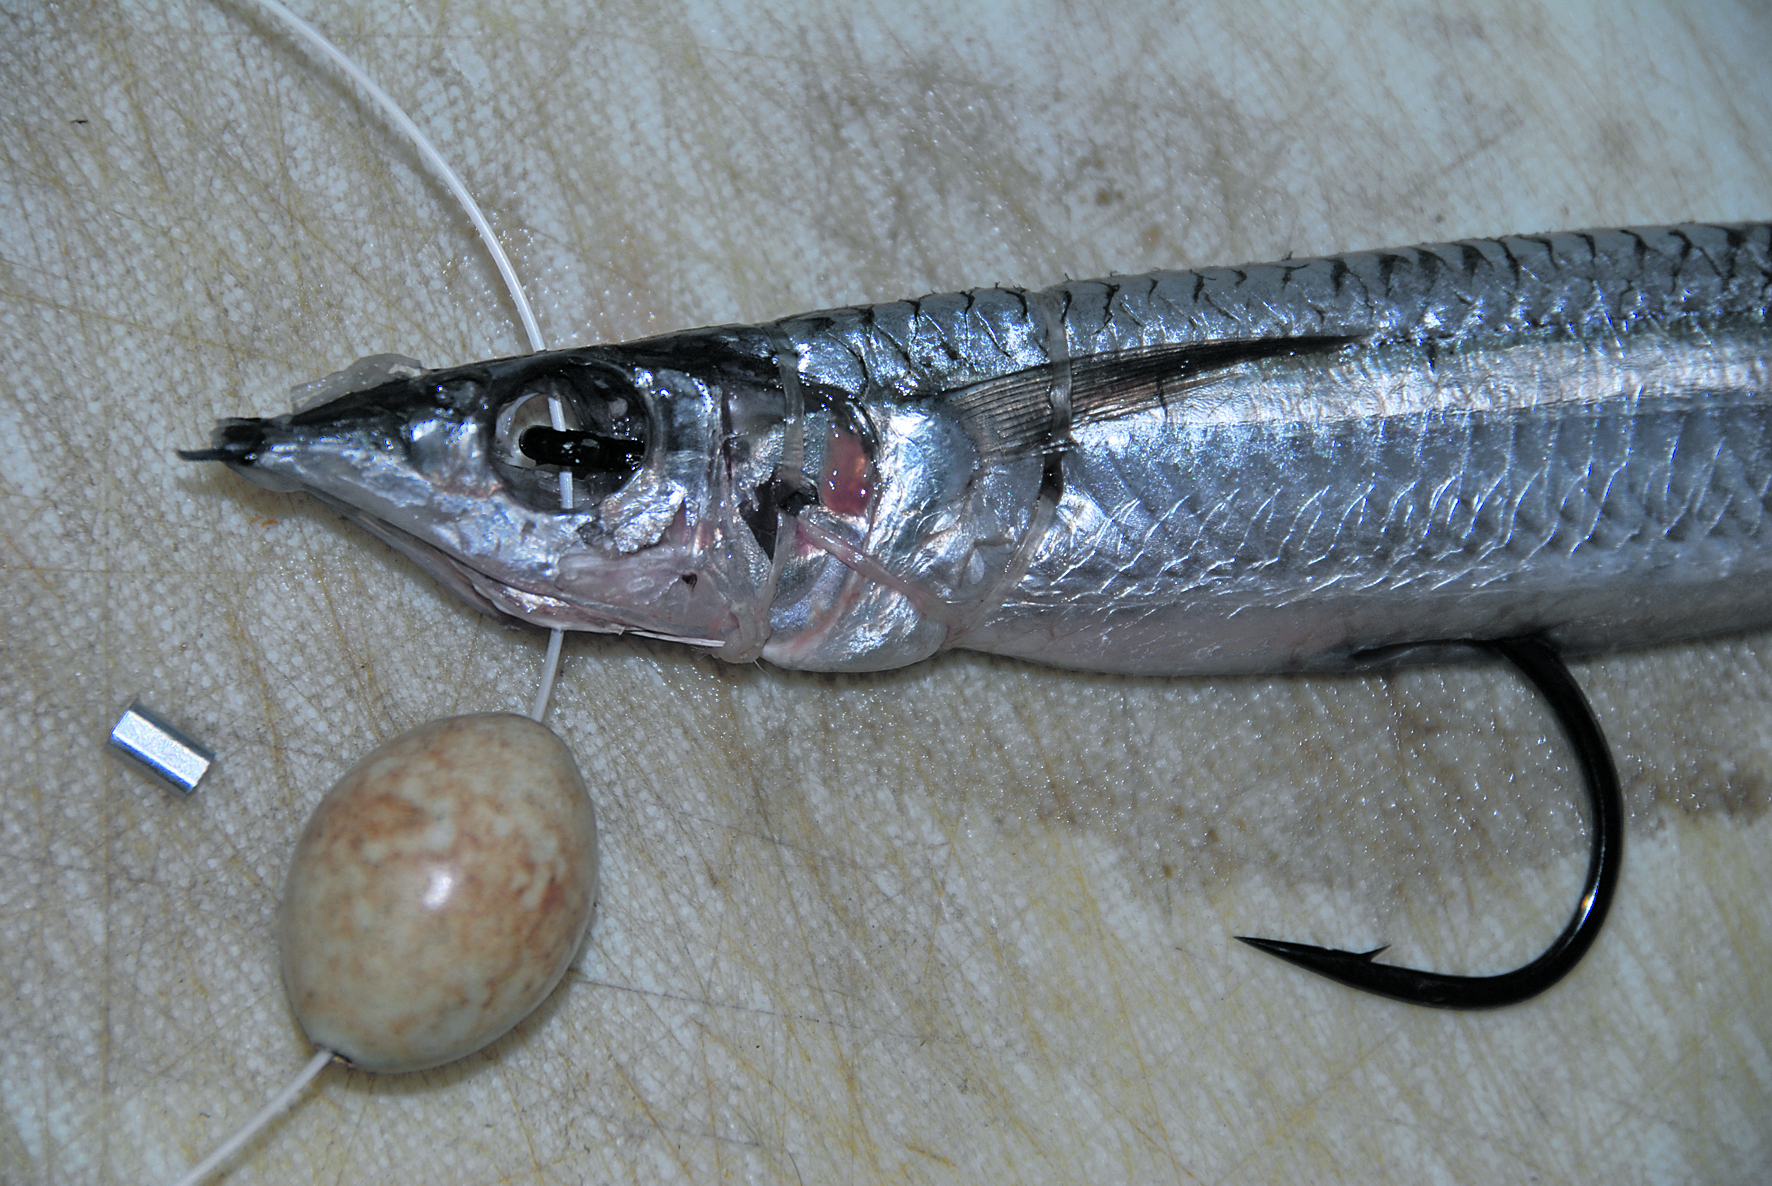
STEP 10.
Crimp the tag end to the leader, leaving a loose loop for the sinker to hang on and the bait to pivot on. If this loop is too tight it will hinder the bait’s action. In the other end of the leader, crimp a small loop to attach to the snap swivel on your main leader. If you’ll then be freezing or refrigerating the gar for a while, work it in a snake-like fashion before putting in the water.