by Gordon Macdonald •
Over the next few months, anglers will notice an increase in the presence of Spanish mackerel throughout the waters of South East Queensland. From Hervey Bay to the Gold Coast, there are numerous renowned areas where Spanish mackerel are readily taken.
While trolling minnow lures and bibless offerings can be especially effective, there is no denying that a quality fresh rigged troll bait can produce a better quality Spaniard. Additionally, it will often produce results when the bite is tough, especially in hard-fished areas. Many people shy away from this type bait presentation, as they believe it is difficult or time consuming to rig a swim-bait. In fact, it is very easy once you know how and have the correct rig.
Over the years, I have rigged a lot of baits utilising different techniques. Some of these include skipping gar and slimies, swimming split-tail mullet and numerous Aussie swim-bait rigs. Additionally, I have tried a heap of variations on these basic rigging methods for numerous baits and also rigged tuna belly flap and flying fish teaser rigs. Some of these rigs are very simple and others a degree more difficult. However, putting that bait in the water and having it swim well, and then having a hungry predator annihilate it, is reward in itself.
Basic swim-baits can utilise species such as gar, mullet, pike, longtom, wolf herring, barb-wire queenfish, tarpon, small tunas, bonito, rainbow runners, finny scad, scaly mackerel, cowanyoung, slimey mackerel, yakkas and numerous others. Basically, almost any species of fish can be made to swim enticingly providing it is rigged with a suitable placement of weight and hook combination.
Obviously, hook placement is especially important. Baits targeted at some species, such as billfish and large tunas, will only require a hook in the head as they will engulf and swallow the entire bait. However, species such as Spanish mackerel and wahoo will initially immobilised their prey by snipping off the tail section; therefore you will need to have hooks right along the length of the bait for maximum hook-up potential.
Larger baits will generally require more weight to keep them under the water and make them swim well and larger hooks to increase hook-up potential.
With many rigging methods (which we will explore more in later articles) the gill plates and mouth on most baits will need to be stitched shut and the eyes removed to stop the bait blowing apart with water pressure when trolled. However with the method we are using today this is not required. This rig is commonly called a chin guard rig due to the first commercially made rig of this type being the Chinguard, which was produced by Tropical Lures. Similar rigs are these days distributed by Surecatch, Citer, Brad Job (Aussie Jigs), Headstart and Tackle Tactics as well as numerous other commercially made and cottage industry brands. Some of these come ready rigged with hooks and others are just a head, which naturally require you to add hooks.
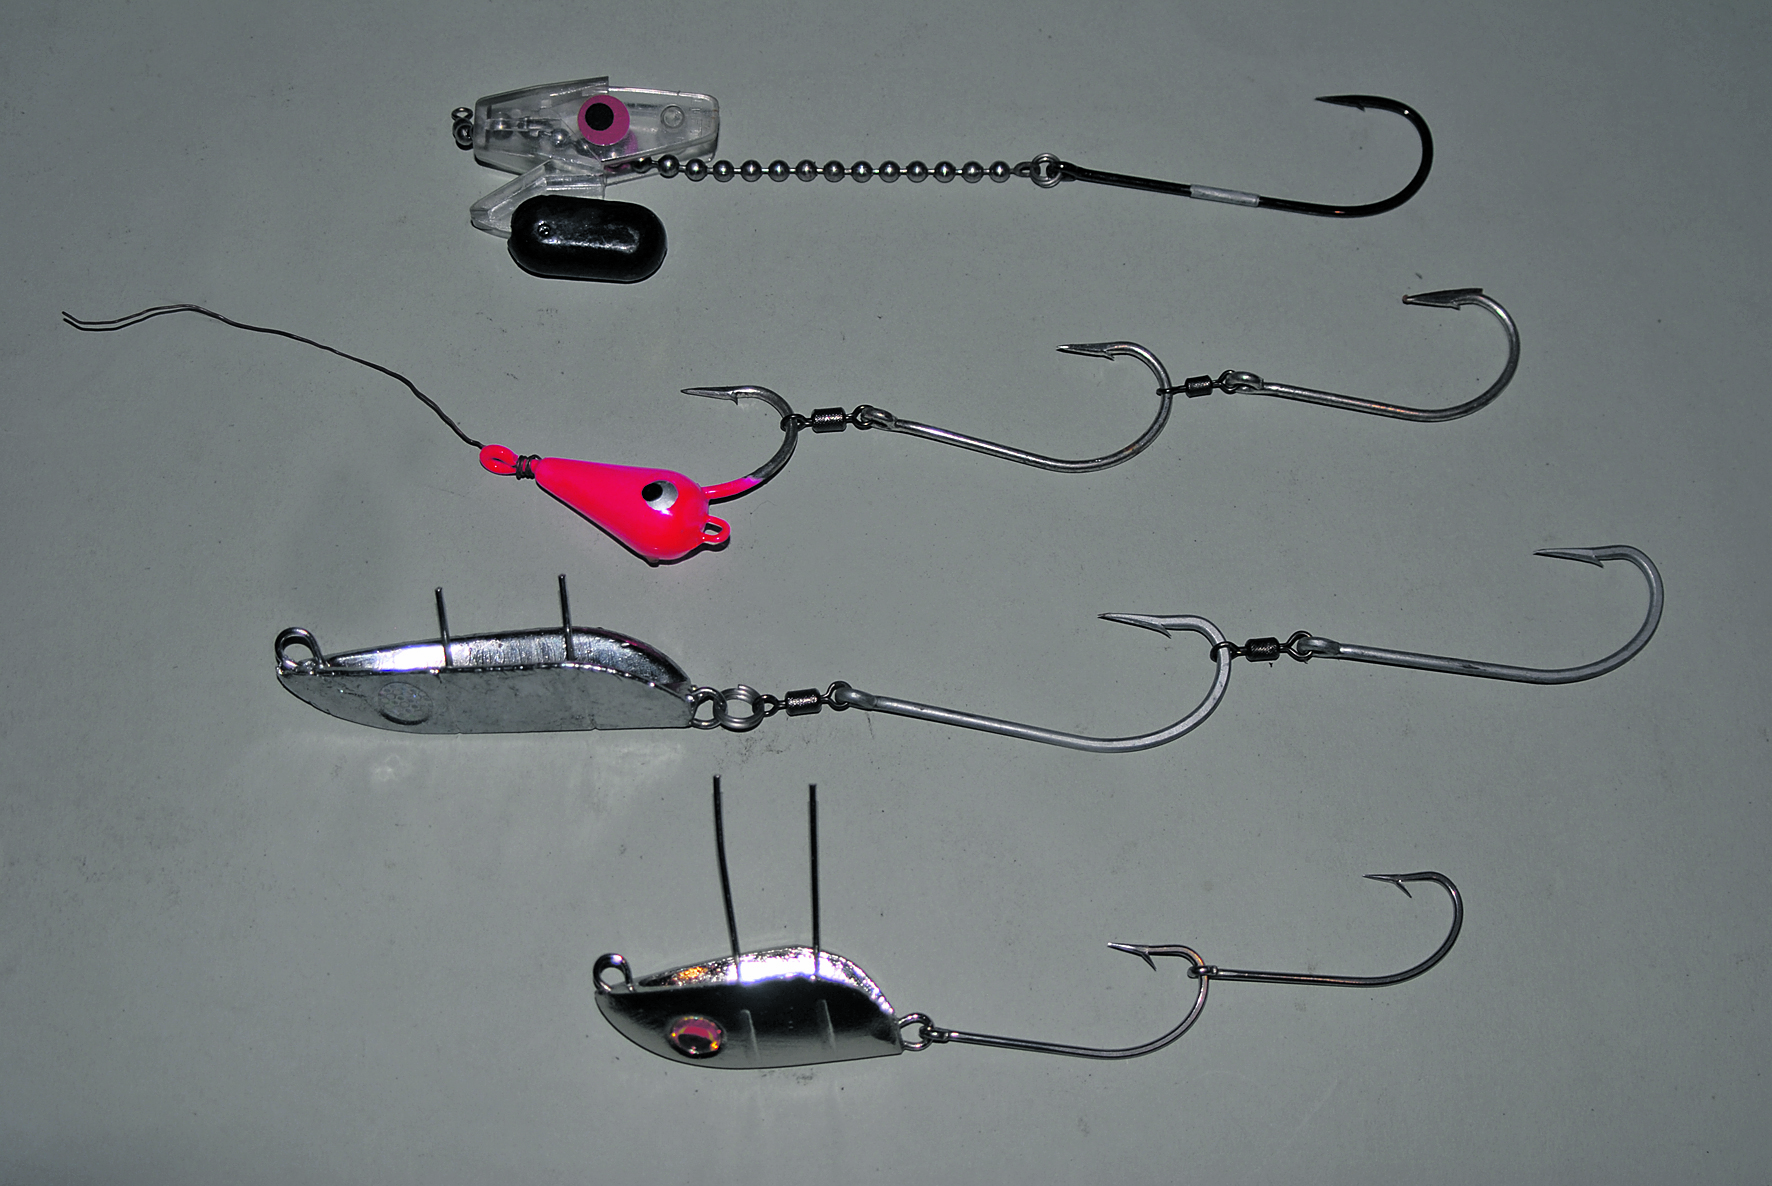
I like my hooks to pivot individually (which decreases torn hooks and increases hooking potential) so I use my own hook rig utilising swivels between each hook, usually made with VMC 9255 and Shogun rolling swivels. The addition of a piano wire leader will decrease bite offs from large Spaniards and wahoo.
As previously mentioned, there are numerous baits that can be rigged to swim, however the ones that best suit the chin weight style rigs for chasing mackerel will include garfish, pike, wolf herring, longtom, sauries and other long thin fish species. I have even successfully used large grinners to catch Spaniards on this rig.
You can stop over deep sounder showings and allow the bait to sink down, before again motoring off. Generally you troll these baits between 3-5 knots, depending on current. Adjust the boat speed whilst initially trolling the bait boat-side to ascertain it swims well and also to work out a suitable troll speed to get the best action out of it. Today we will use a pike for our chin weight rig, which are relatively easy to catch locally and work well for Spanish mackerel.
Choosing which rig to use for your bait can be a personal choice but will generally depend on the size of the bait being used (number and size of hooks) and the amount of weight required to present your offering in the relevant depth and current.
Lay the rig beside the bait to ascertain the penetration point for each hook. If you do not have good hook coverage you may need to add another hook to the rig. Often this rear hook is not inserted into the bait if it is just a fraction too long but as a minimum you will need to have a hook right near the tail of the bait.
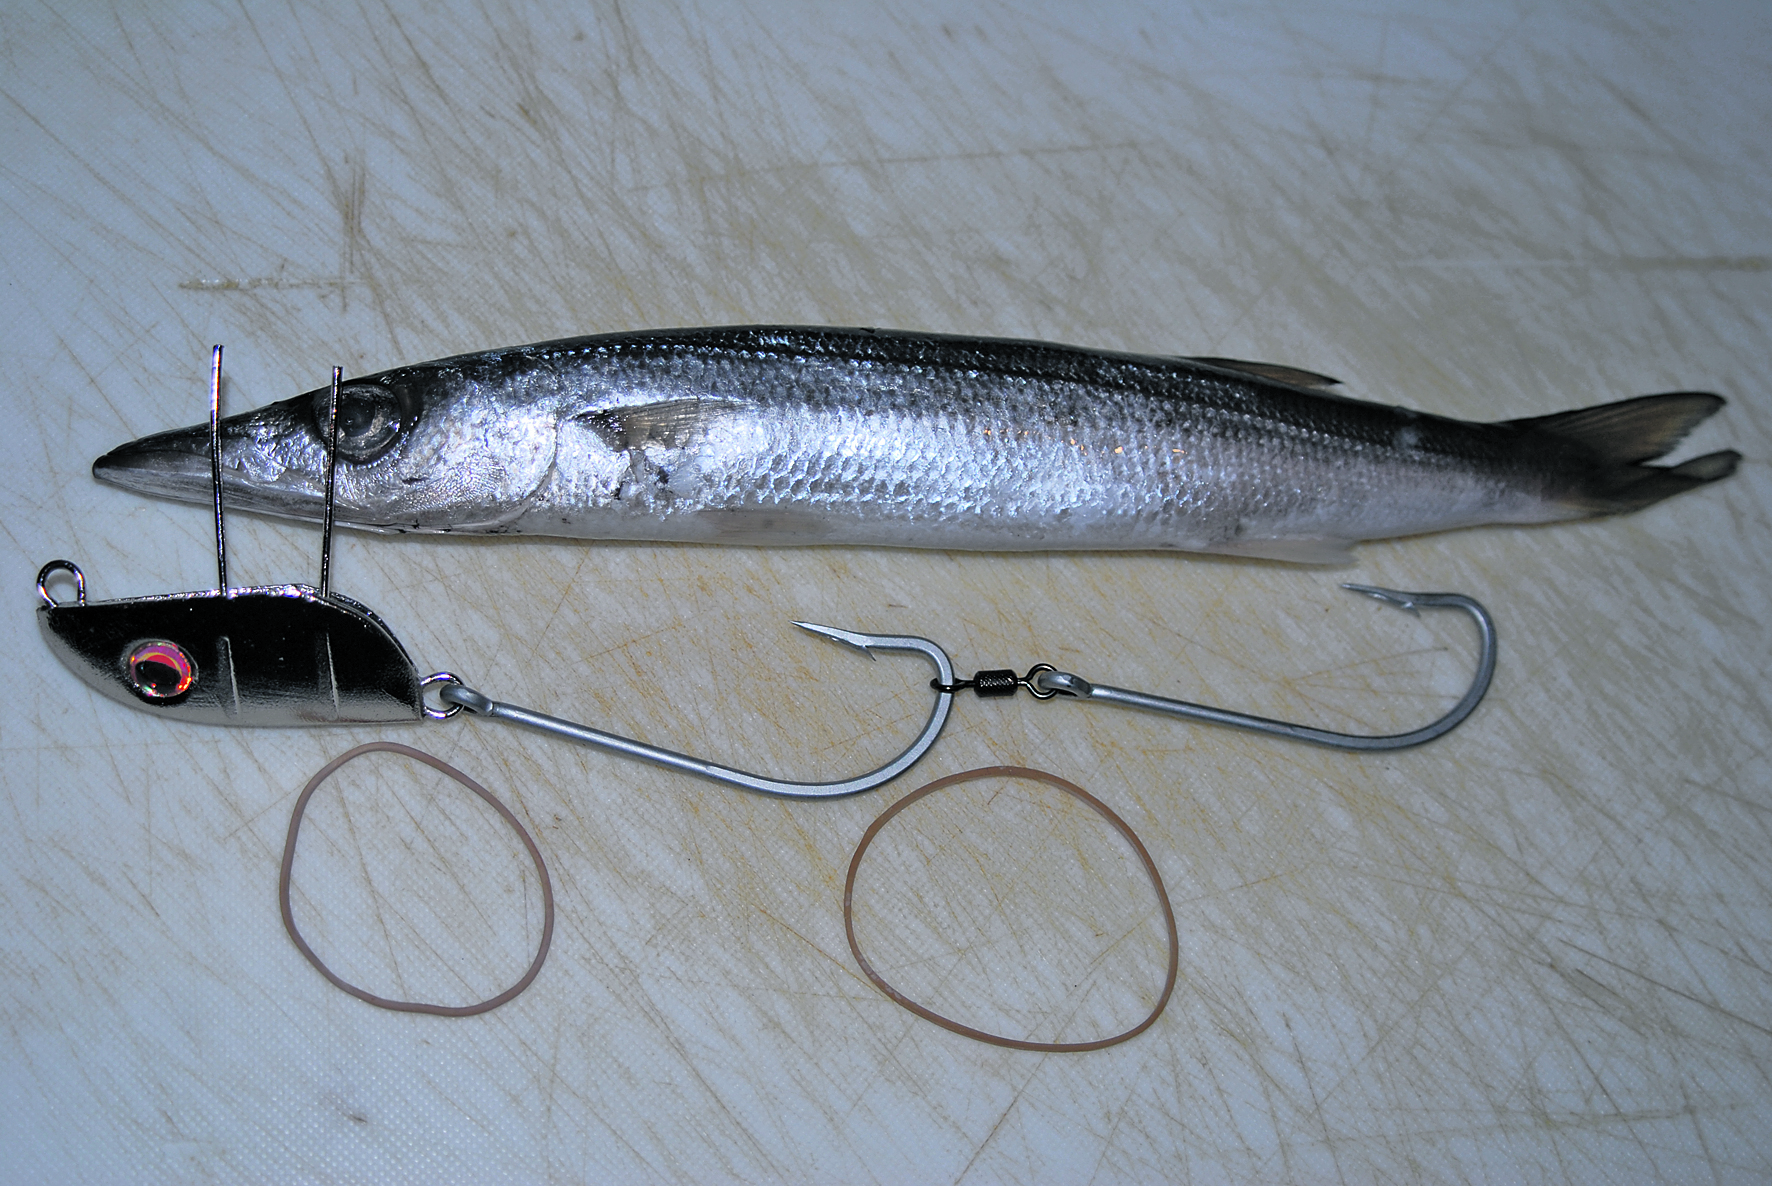
Making sure the chin weight is in line with the head as shown, insert the rear hook at the position that coincides with the rear of the hook bend. Do the same for the next hook in front of this (and so on if you have multiple hooks) until all hooks are set in the bait.

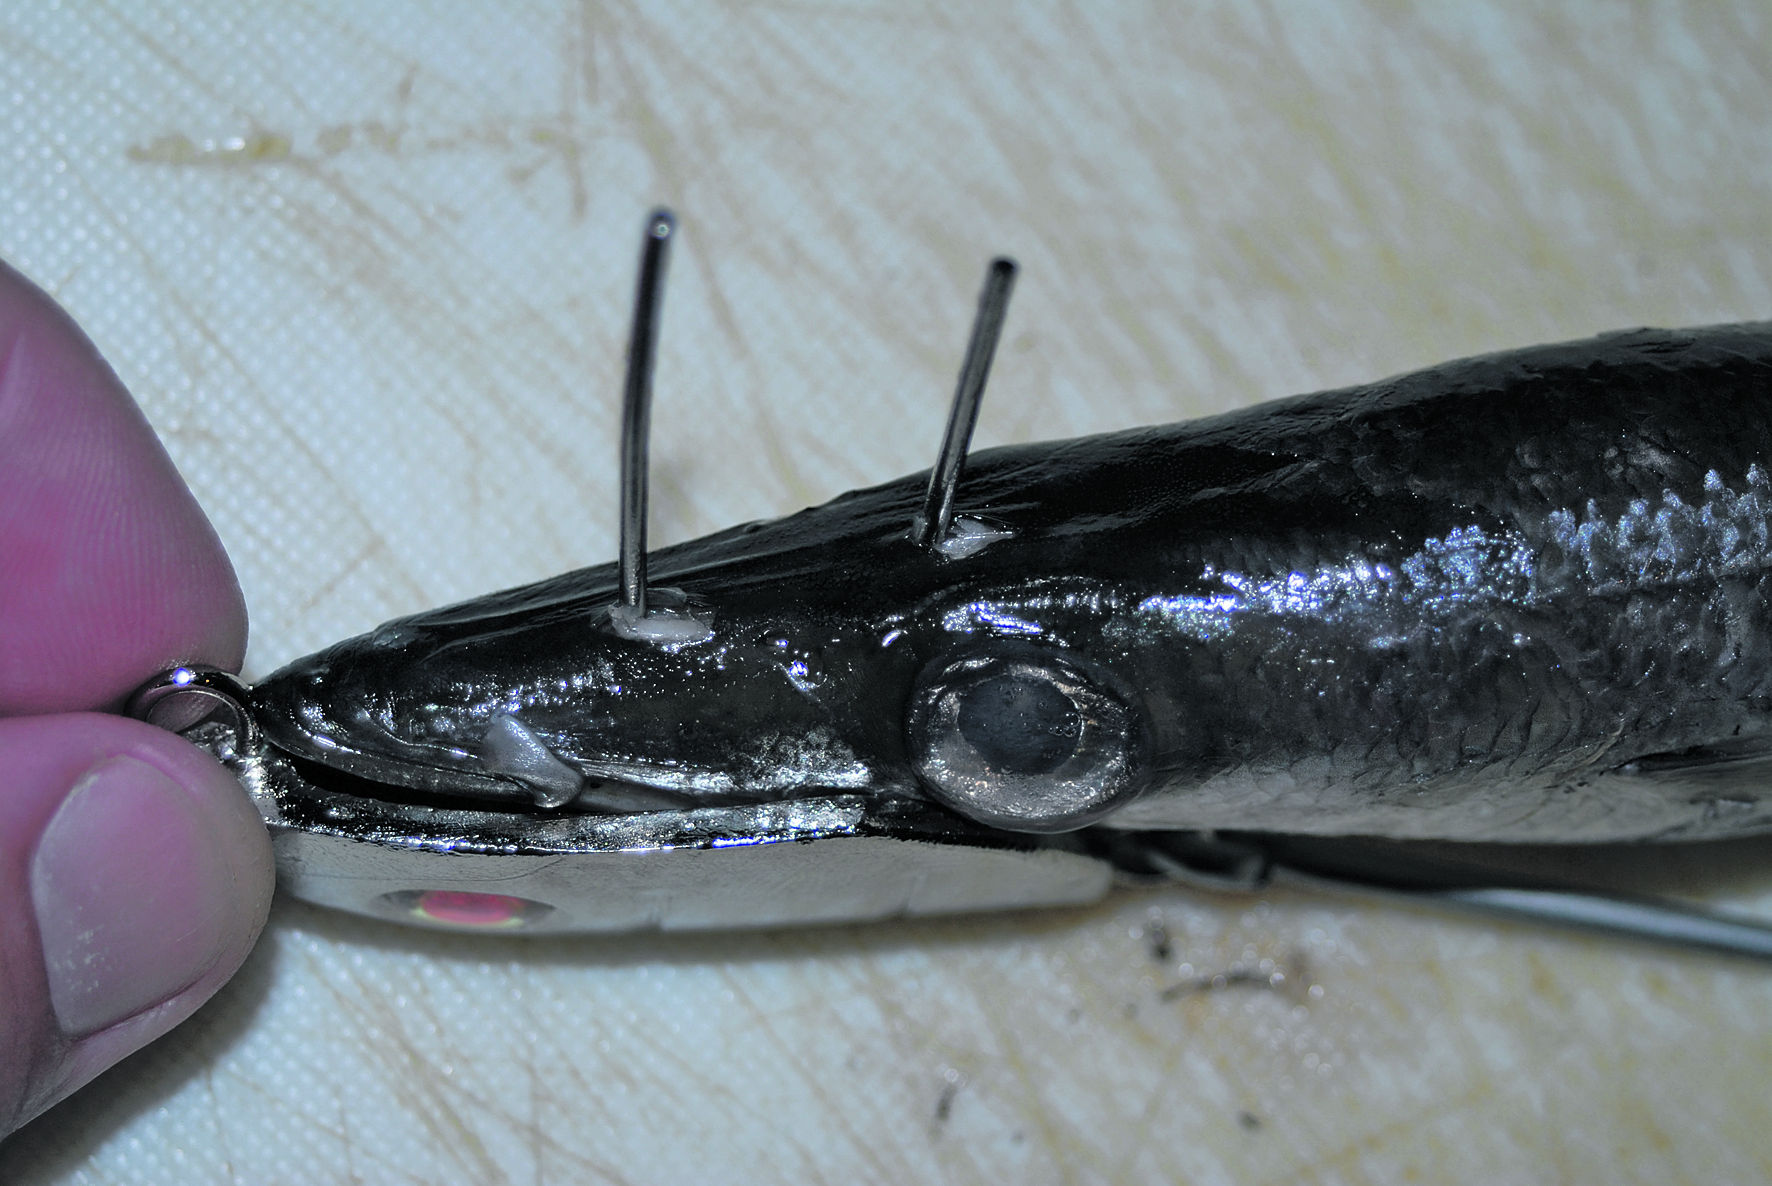
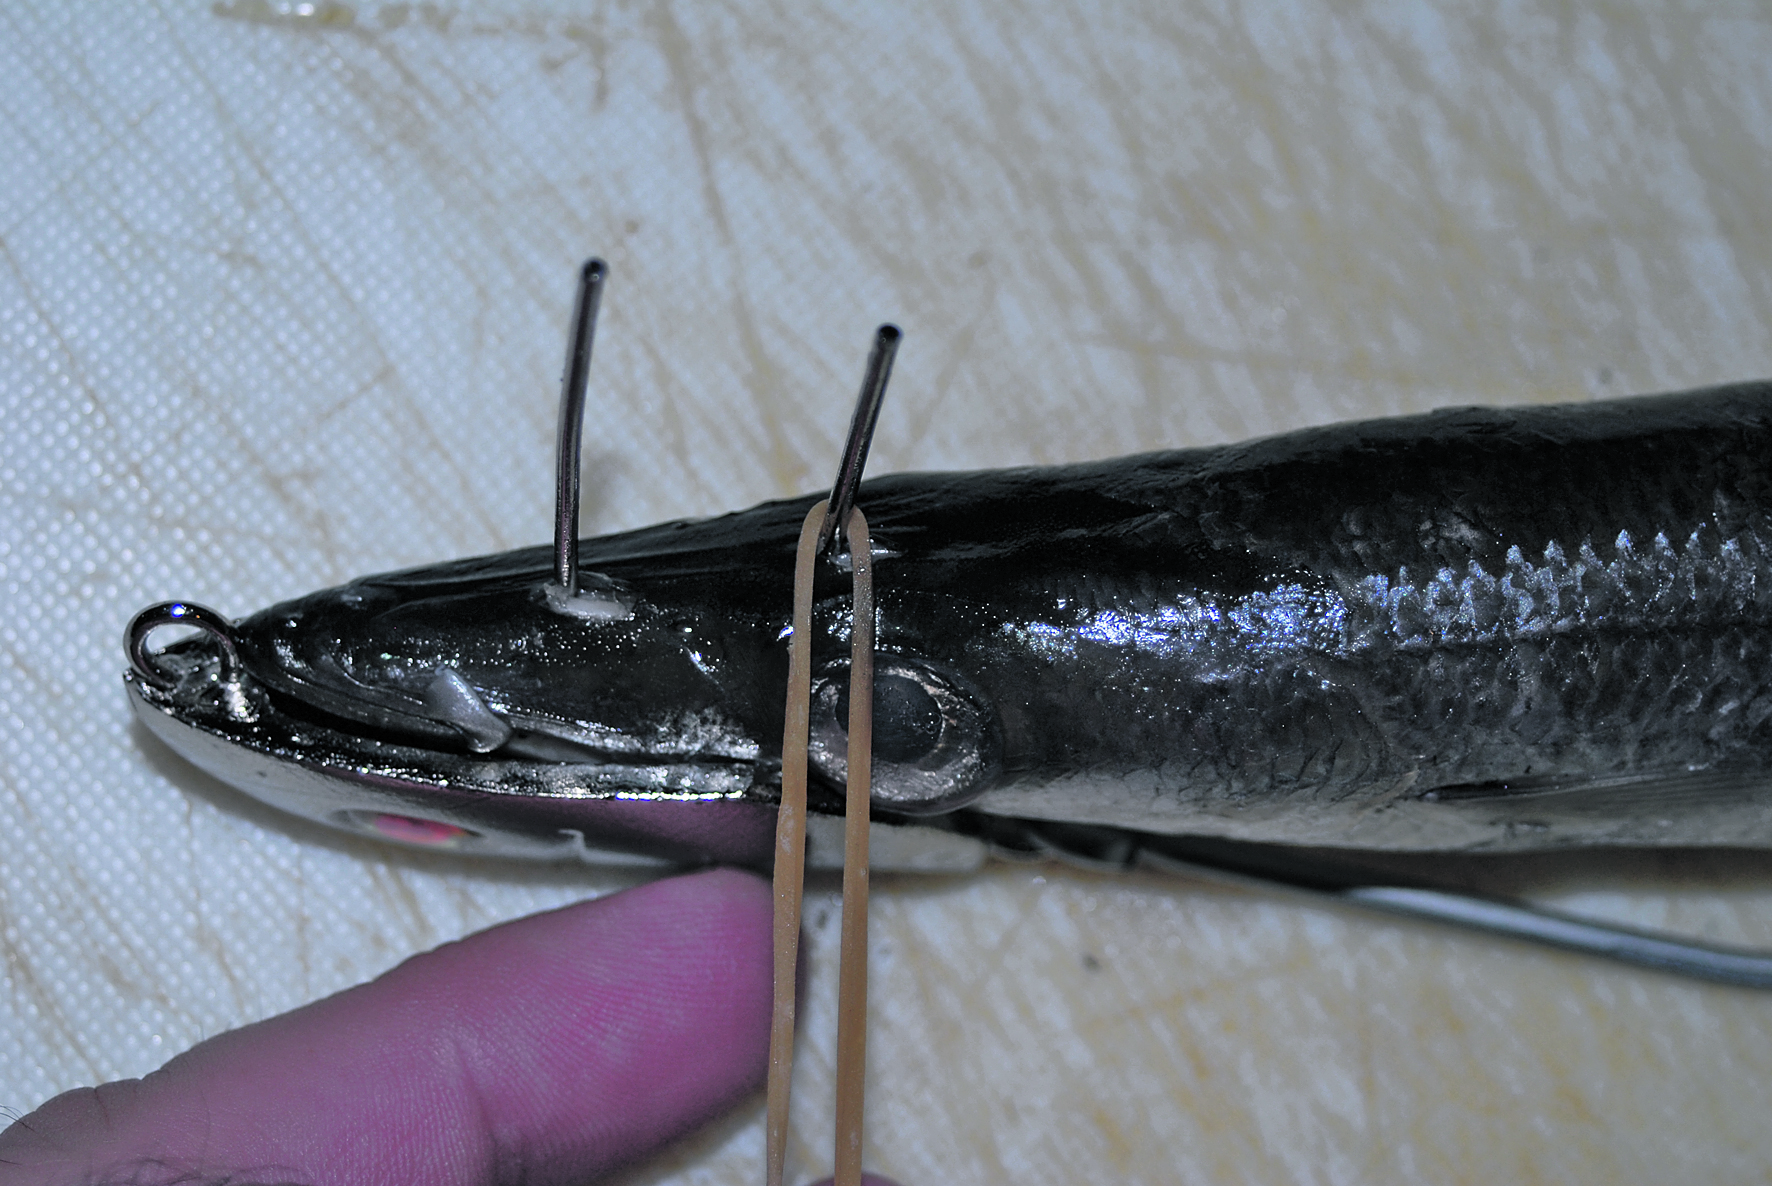
Push the spikes of the chin weight into the chin area of the pike and centrally up through the head so the head of the bait sits in the recess of the chin weight.
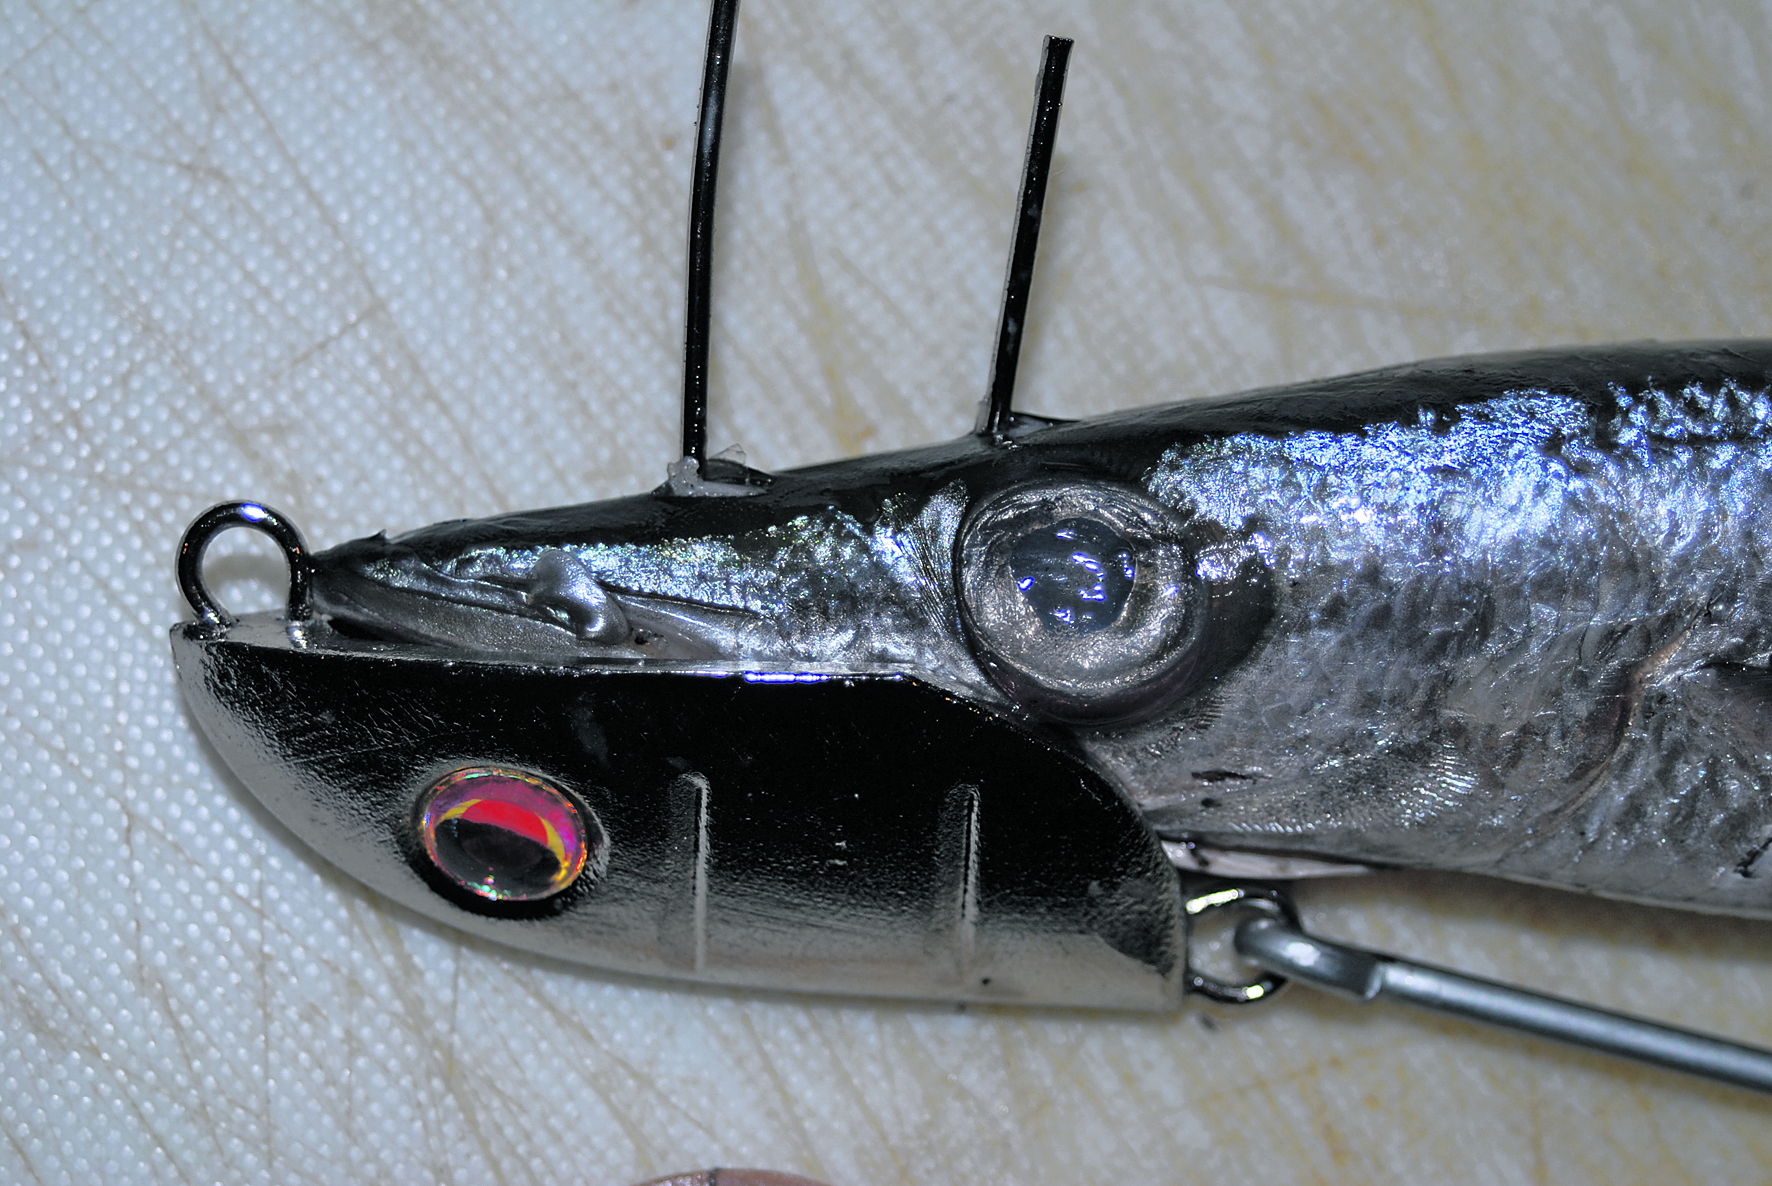
It is fairly important that the spikes are centrally placed through the head to ensure the bait swims well. You can cut the spikes shorter if you want but when leaving them full length, make sure they are straight and in line with each other.
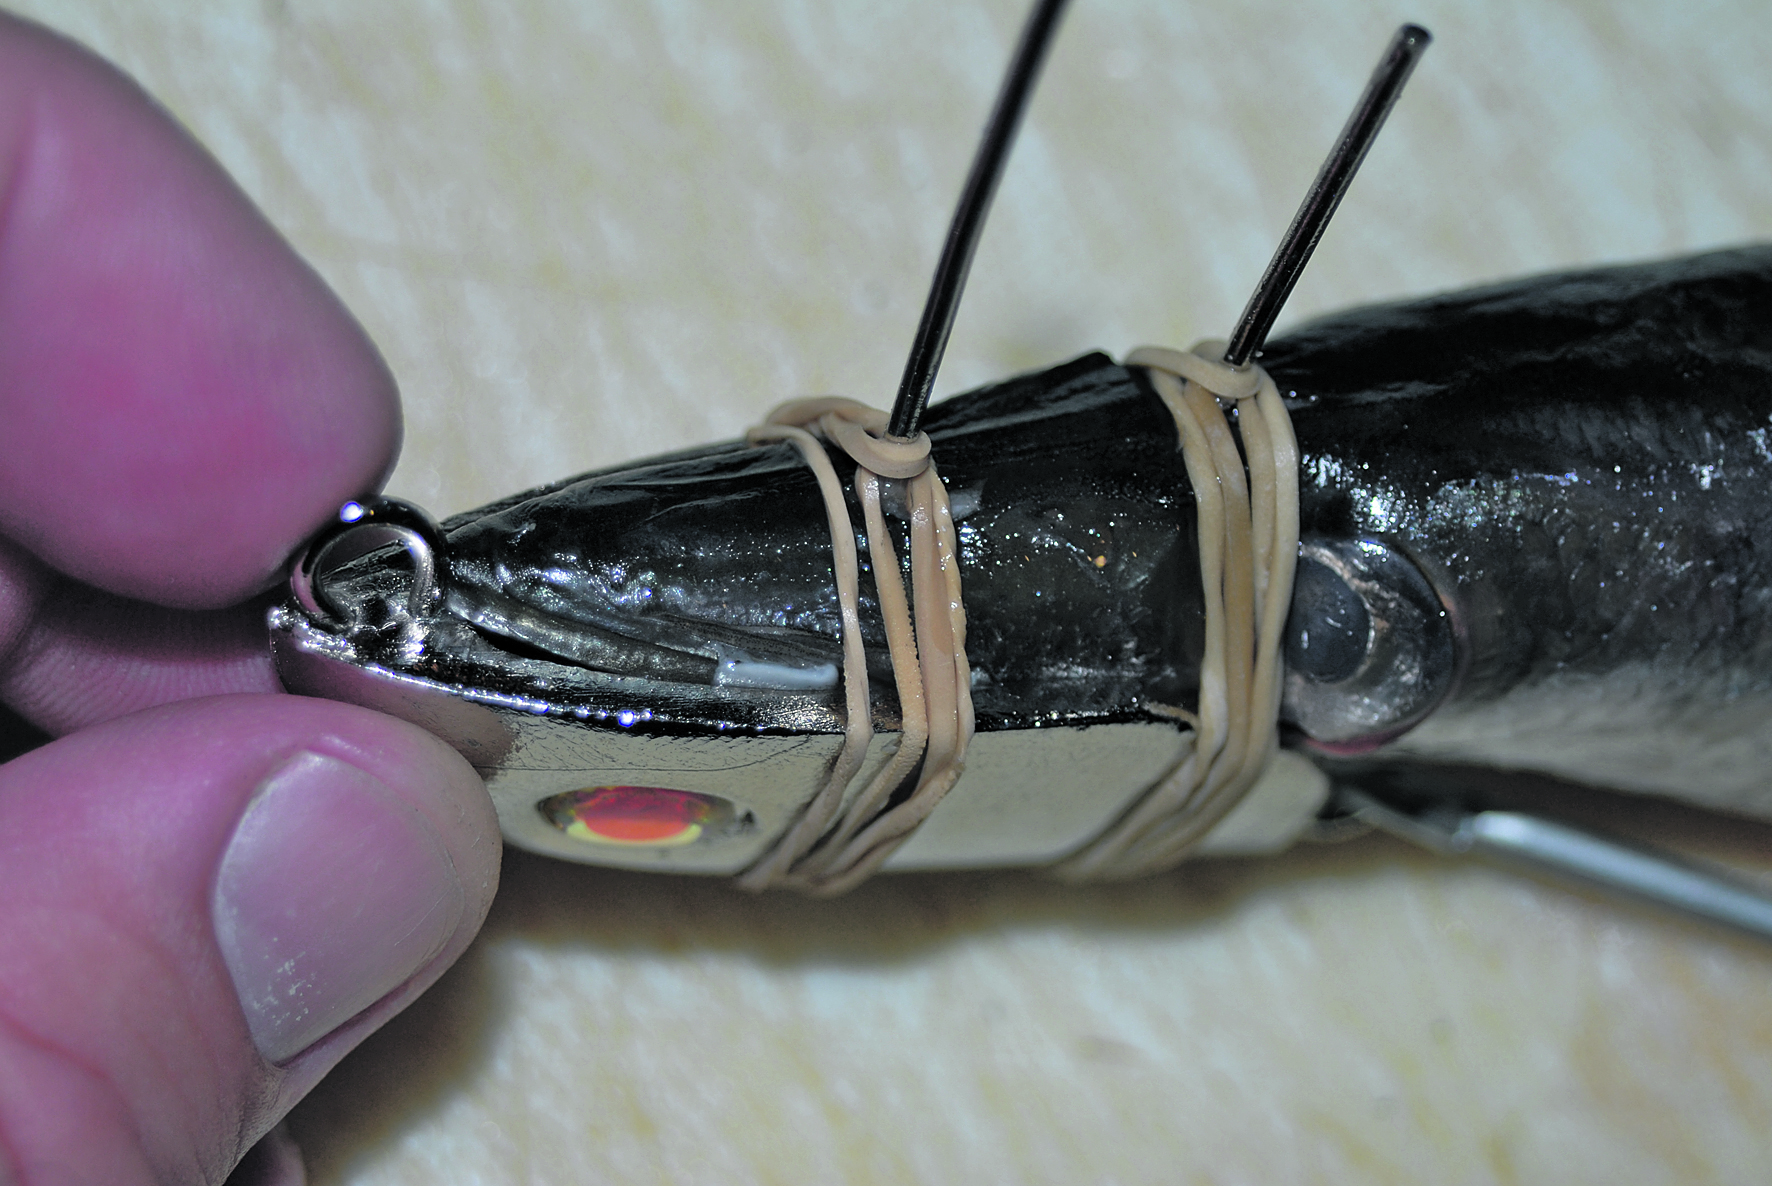
Using a standard thin rubber band, loop one end over the spike. The clear elastic hair bands that girls use for hair ties will work exceptionally well and I usually use these but they didn’t show up well enough in the images to use for this demonstration.
Wrap the band around the head multiple times until the head of the bait is secured to the chin weight before passing the loop back over the spike. Repeat with the second spike. This will ensure the mouth of the bait remains closed when the bait is trolled and decreases the chance of water pressure blowing apart the bait.
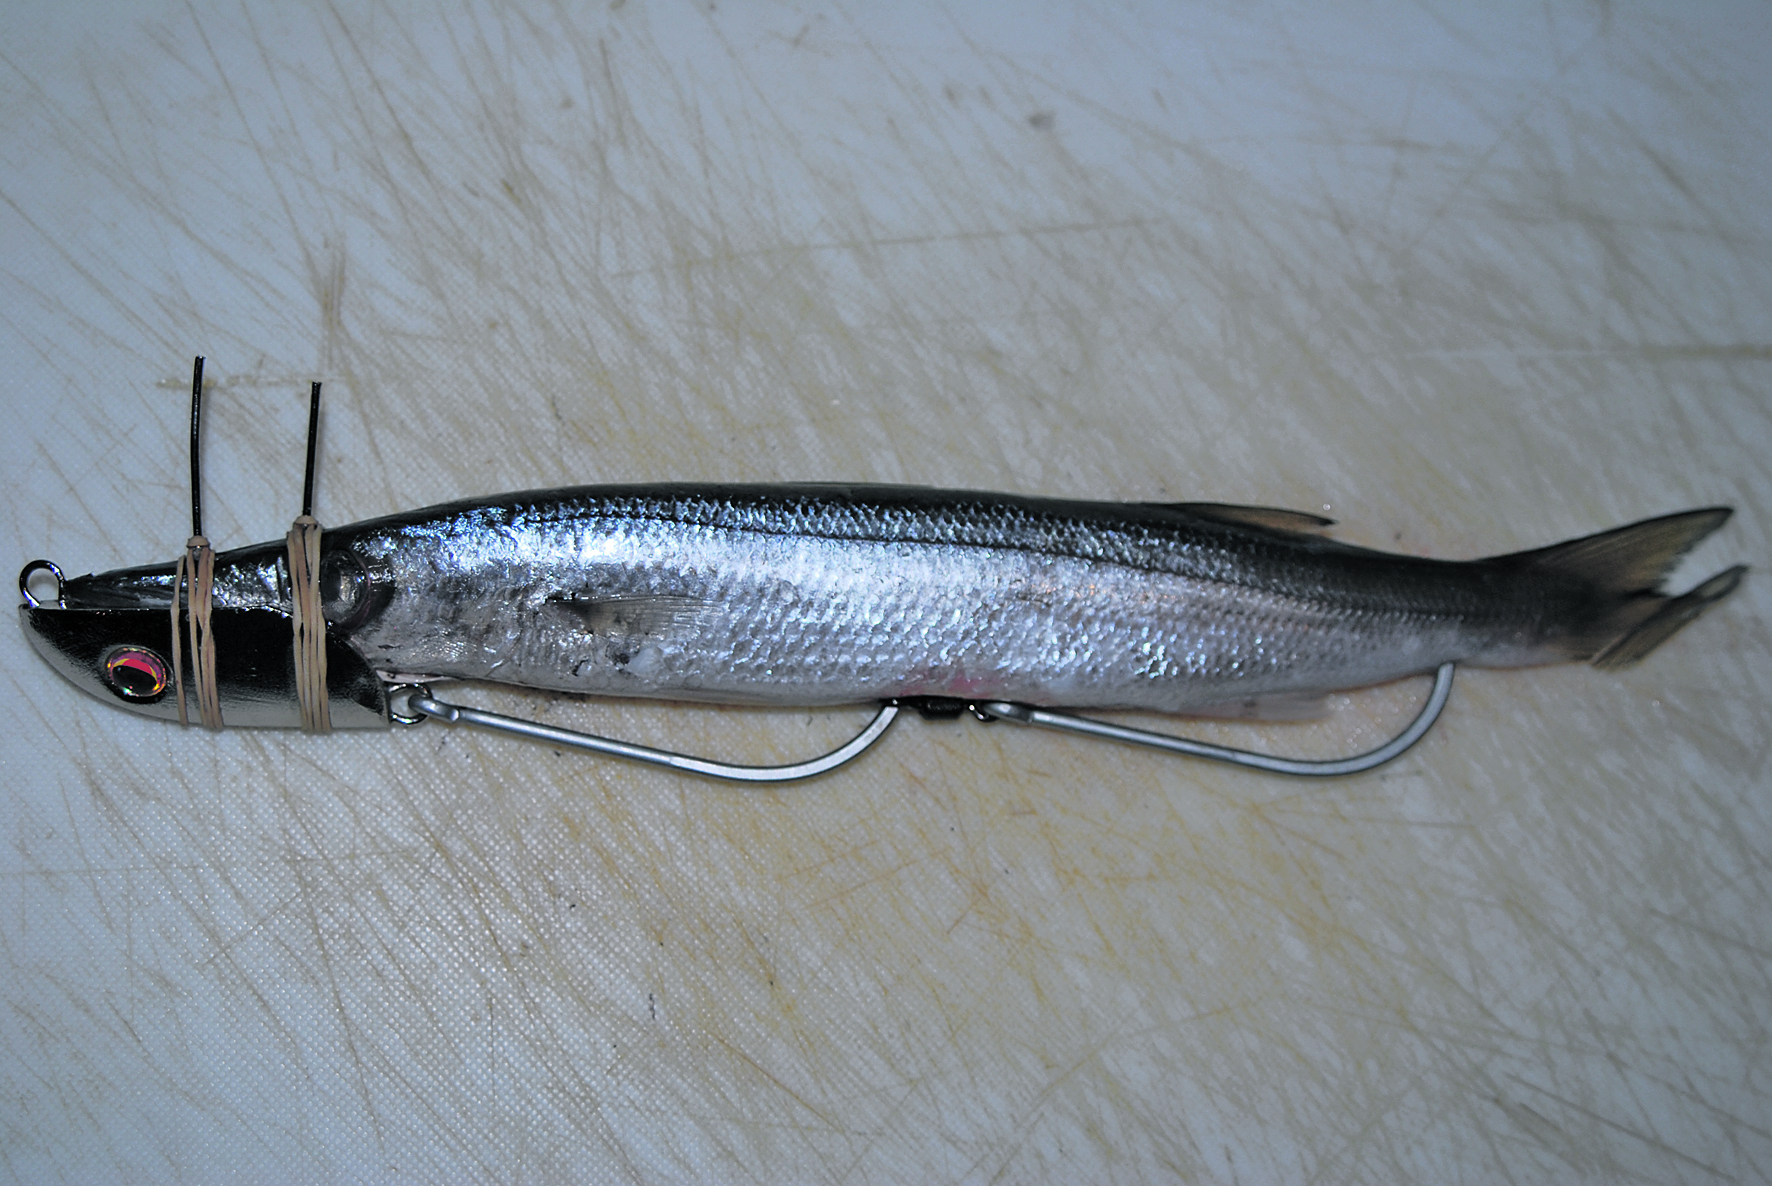
The completed bait should look something like this. Removal of the baits eyes can make it swim better at times but I usually don’t do this with pike. A piano wire (single strand hi-tensile wire) leader is generally added to the towing eyelet.
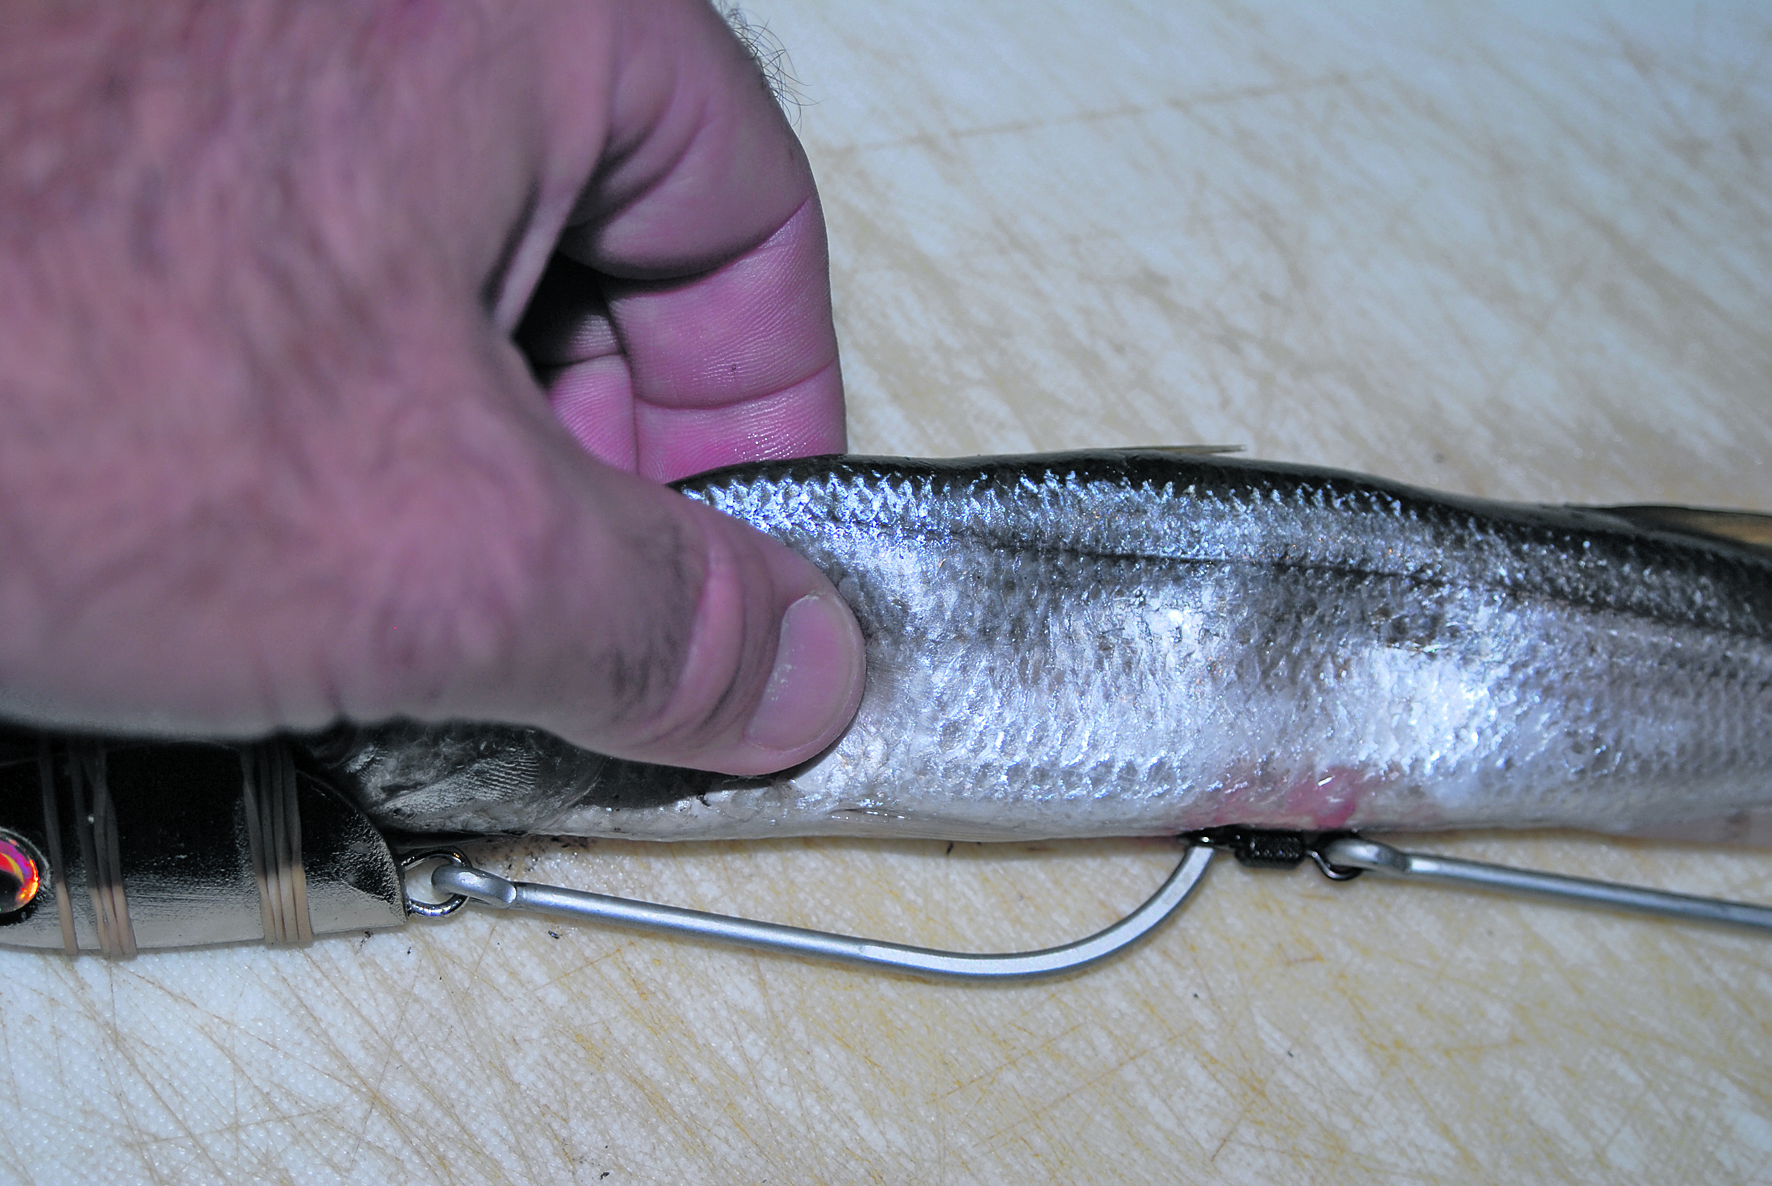
Press along the backbone area fairly firmly to break the meat away from the backbone and separate the vertebrae. You will often feel a little pop or crack as you do this with quality fresh baits. Pressing and bending the bait in a snake like fashion will make it more flexible and supple, which increases the action whilst swimming.
You can rig freshly caught baits before freezing them so they are ready to go when you are. If you cryovac the rigged bait it will increase freezer life and decrease the chance of freezer burn. Some baits can be defrosted and refrozen but many will get too soft and not last long when trolled so try and keep them frozen until just before you need them. Baits rigged in this fashion are dynamite on Spanish mackerel and several other species. As you can now determine, chin weight rigs are easy so give one a go next time you go after a Spaniard.