by Gordon Macdonald •
Most anglers take great pride in their fishing tackle and want to look after it to ensure its longevity. Regardless of the price of the tackle, getting it to and from your fishing destination safely is a necessity.
The last thing you need after driving a distance to your destination is to take your rod out of the car and find that you have a dislodged guide insert or, even worse, a broken blank. There are plenty of rod tubes available that will protect your rod, however most require that you take the reel off. Therefore, being able to transport a rod ready rigged will maximize your fishing time.
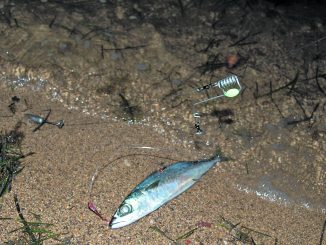
Many anglers enjoy various forms of land-based fishing using lures and baits targeted at an array of species. Sometimes anglers may try several locations during an outing, especially when casting egi for squid, popping for whiting, fishing the shallows for flathead or probing lighted areas of the Brisbane River for threadfin. Unrigging your rod to store it securely in a tube between each location can be rather tiresome. Being able to store your rod ready rigged with a lure or terminal tackle still attached will protect your rod and also eliminate the chance of a hook penetrating the car’s upholstery or another passenger. After trying several options, I have come up with a rod and reel storage tube that works a treat and is simple and cheap to make.
1.
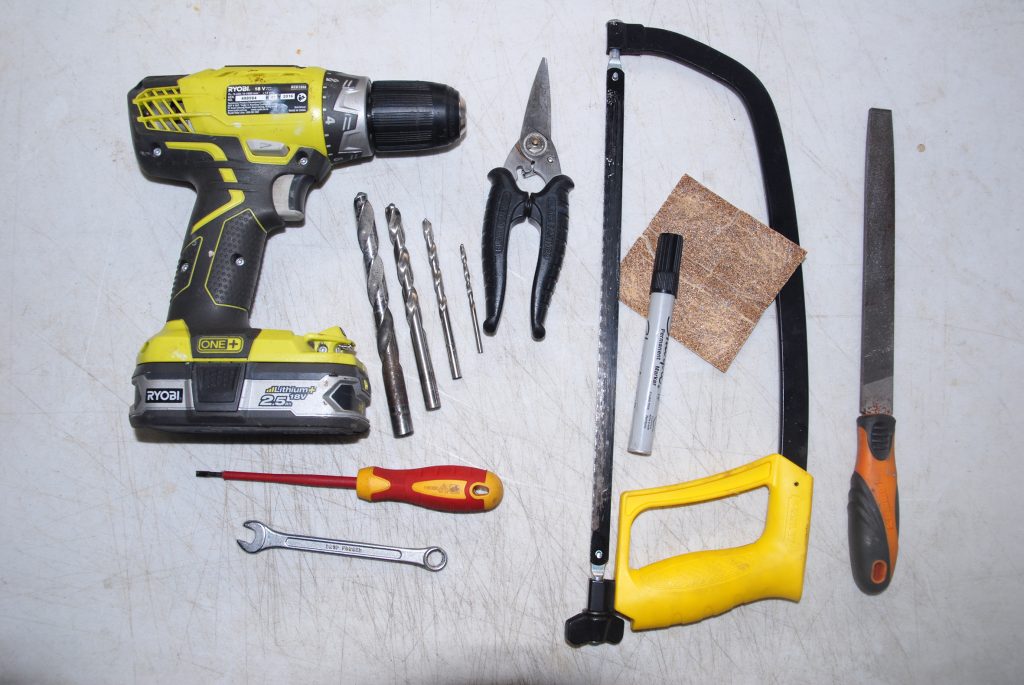
The tools required to complete this project are fairly basic: a drill and an assortment of drill bits from 4-13mm, a hacksaw, coarse sandpaper, file, marker pen, a screwdriver and a spanner to suit the M4 screws and nuts. If you don’t have a drill and drill bits, a sturdy pair of snips will do a sufficient, yet cruder, job. The tools are so simple that this project could even be attempted by younger anglers, with adult supervision.
2.
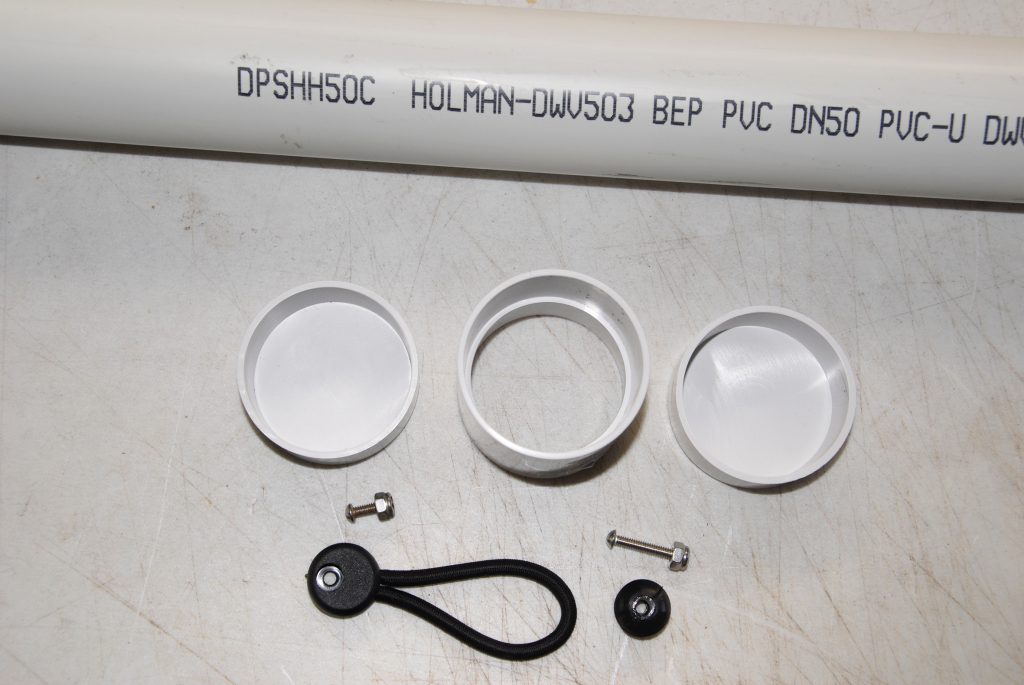
Materials required are a length of PVC pipe (50mm in this case), two end caps and a relevant sized PVC connector. These can all be purchased at a hardware or plumbing supply shop. The PVC pipe can usually be purchased in a 1m length (only suitable for 2 piece rods of 1.95m or less in length) or a 3m length, which will allow you to make at least two tubes for rods to 2.4m. You will also need a bungee strap, button and two screws, which can be purchased at a chandlery outlet. I used M4 (5/32”) 316 stainless bolts with M4 Nyloc nuts, which were just long enough to get the nuts on after attaching the bungee loop and button to the pipe.
3.
The size of PVC pipe will be dictated by the size of the lowest (stripper) guide on your rod. Obviously the tube must be wider than the guide so the rod can be slid in. For this rod I used 50mm PVC pipe, you may need to use the 65, 80 or 100mm. A 3m length of the 50mm PVC cost around $18 but I was able to make two tubes with this. End caps, connectors and other bits needed to completely make two tubes brought the cost to around $40 total, $20 per tube.
4.
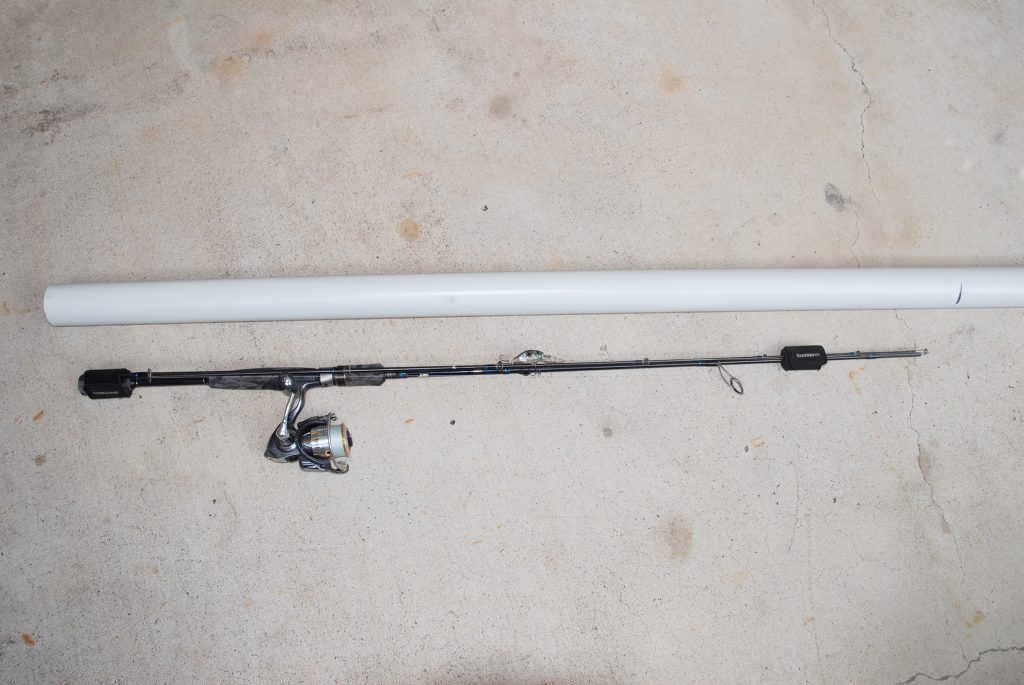
This rod is 7ft (2.12m) total length, or around 1.1m long when separated. I made my tube around 1.2m long so I could use it for other rods that may have different length butts to this one. Rod wraps can be used to hold the two sections of your rod securely together. Lay your rod beside the pipe and mark the overall length you want the tube to be. This will be the first cut.
5.
Place the connector beside the rod so that the lower edge of it is level with the reel foot (stem). Mark the position on your PVC pipe that coincides with the middle of this connector. This will be the second cut.

6.
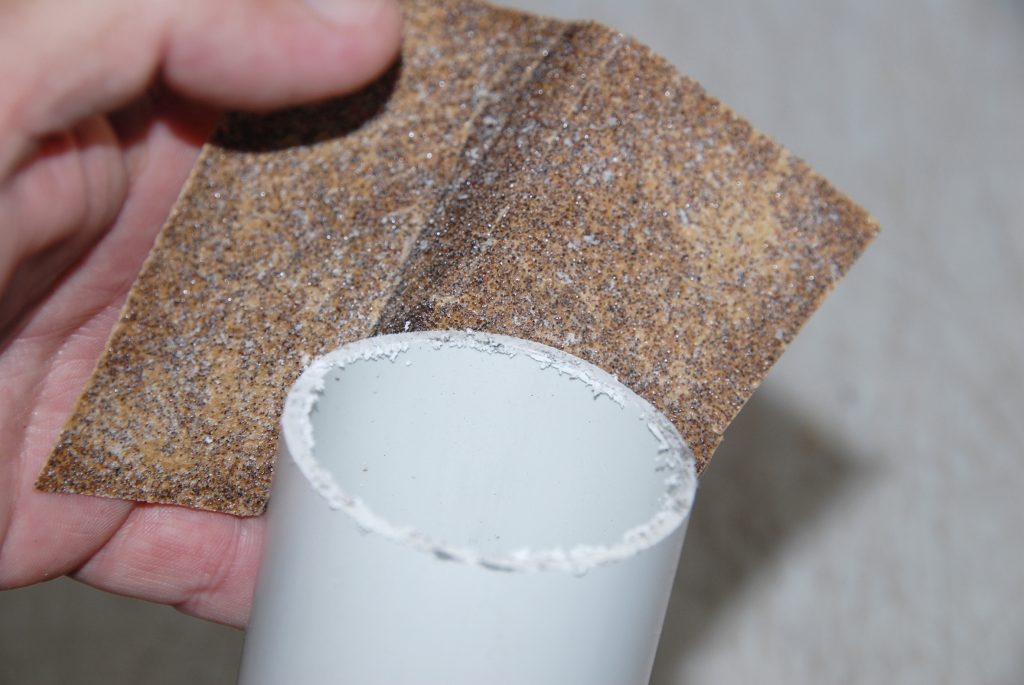
Cut the pipe all the way through with your hacksaw at these two marks. Use sandpaper to smooth off and slightly taper the lip of the PVC where you cut the pipe.
7.
Put the connector onto the shorter section of PVC (which will encase the rod butt) and mark on the pipe where the end of the connector will be. About 10mm below this line, drill a hole with your smallest drill bit. Widen the hole more using the next sized drill bit.
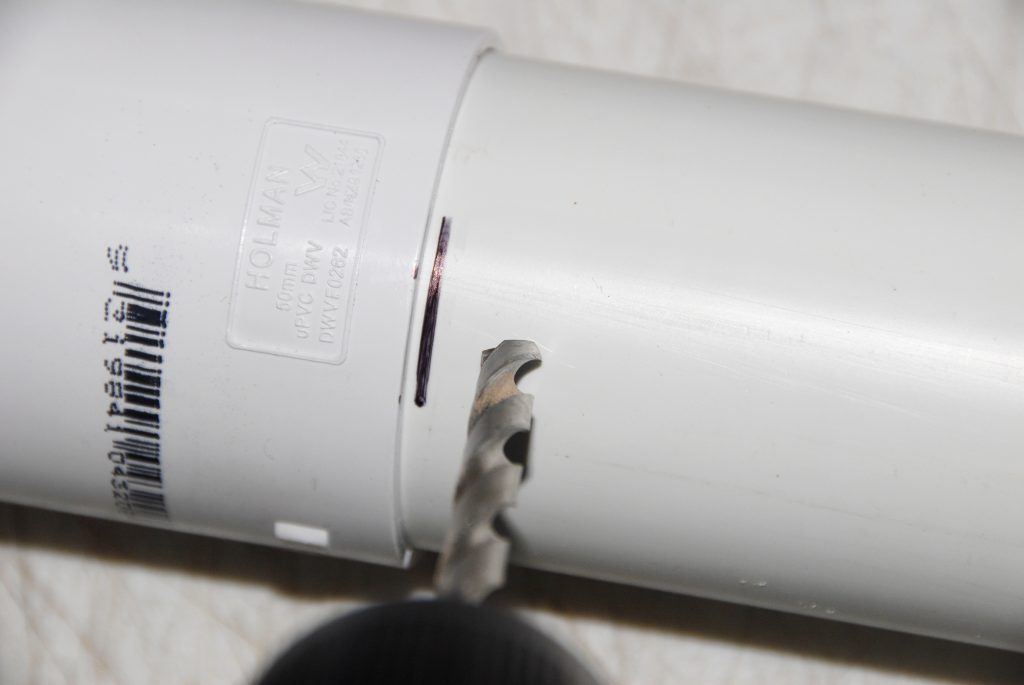
8.
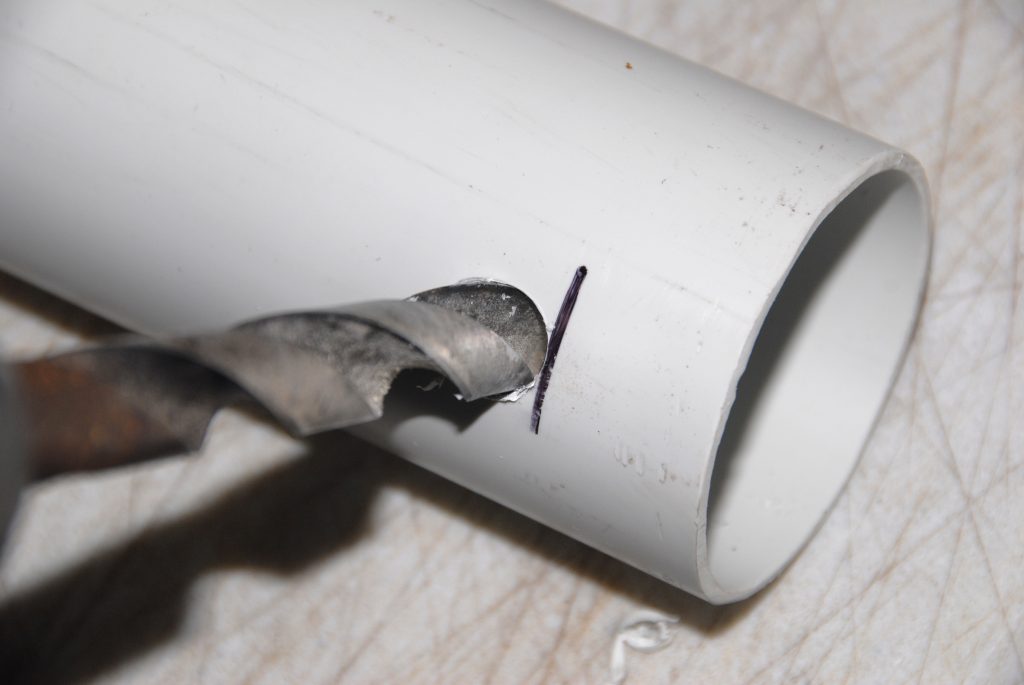
Take the connector off and use your largest drill bit (13mm in this case) to enlarge the hole further. This hole needs to be a fraction wider than the reel foot ╨ you may need to use a file to widen it if you don’t have a large enough drill bit.
9.
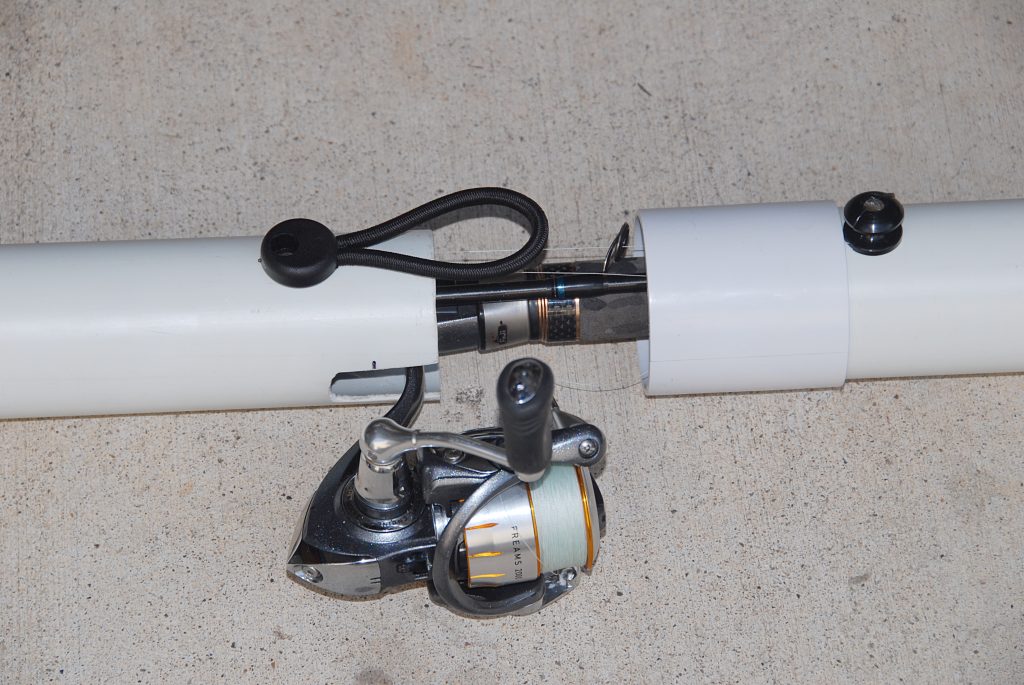
Use a hacksaw or cutters to cut a slot from the edge of the PVC pipe down to each side of the drill hole. Check to ensure it is large enough to accommodate the reel foot as shown. Use the file and sandpaper to smooth the edges of the slot.
10.
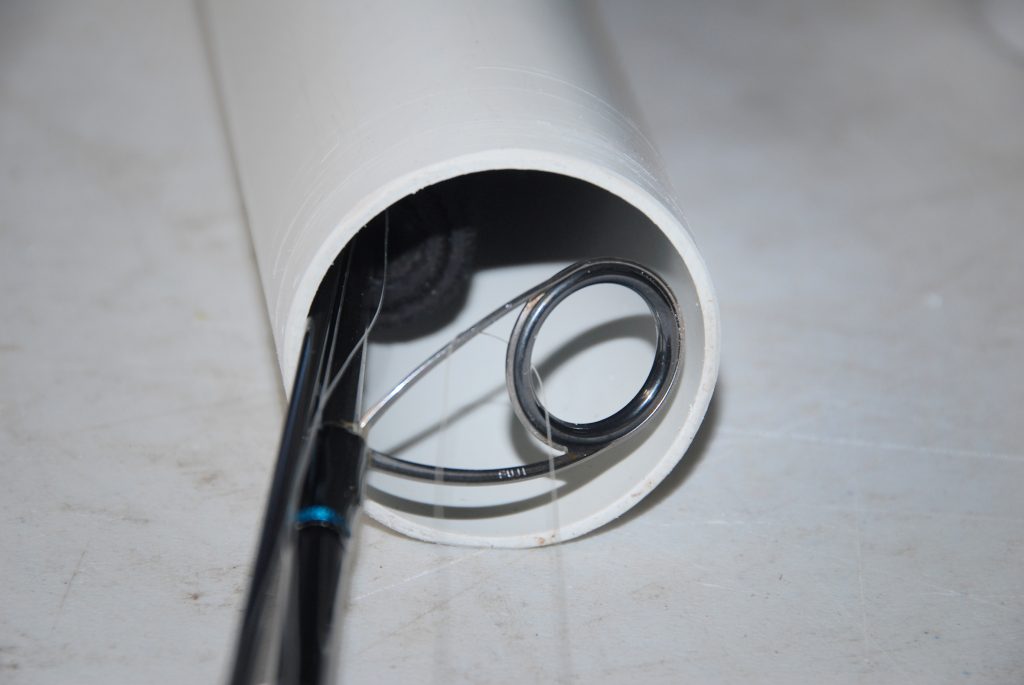
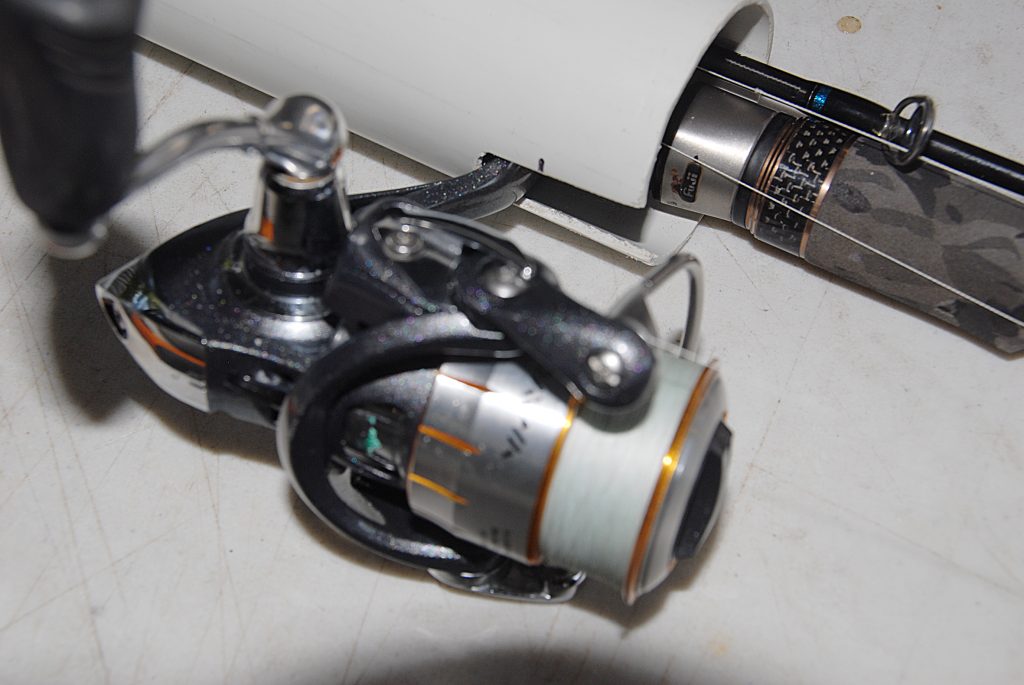
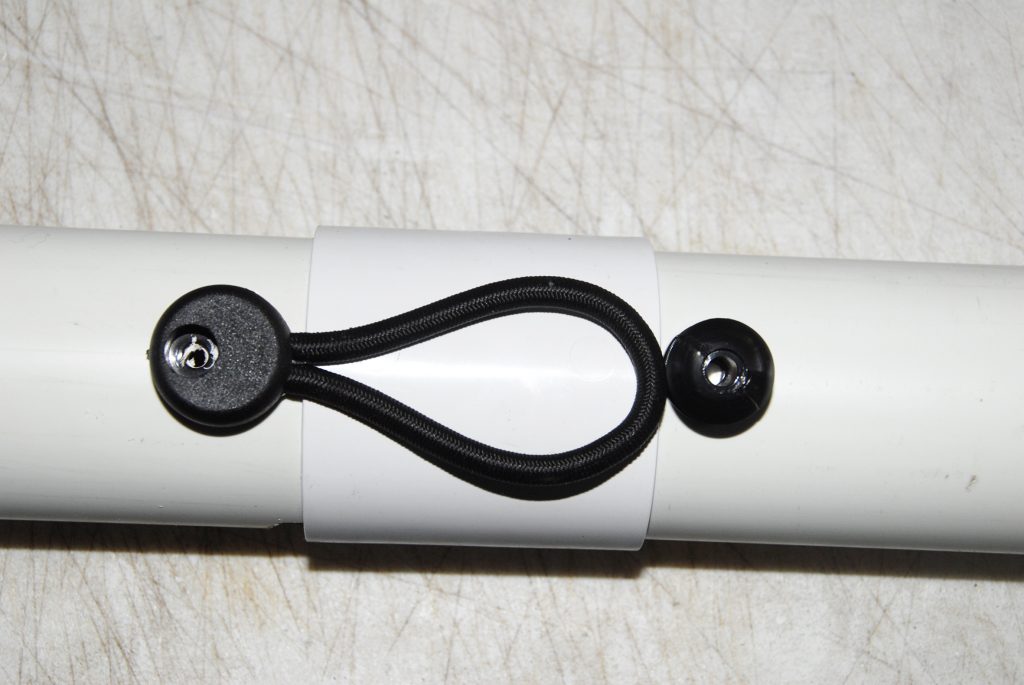
Put the end caps on both pieces of pipe and the connector onto the longer section. Tap these firmly down into position. Use some PVC pipe glue to secure them if you wish. Position the bungy strap and button as shown so that the bungy will stretch slightly to secure over the button. Drill the two holes where these will be affixed with your 4mm bit. I prefer to put the clasp on the side of the tube at 90º to the reel foot slot so the small nuts inside will not rub the rod blank.
11.
Secure the bungy and button in place using your M4 screws and Nyloc nuts. Ensure the screws do not protrude from the nuts or they may scratch your rod as you are putting it in and out. If they are too long, then either use shorter ones or remove, cut to length and re-insert. Your rod can be inserted into the tube (even with a lure on) before the rear section is slid on with the reel stem positioned in the slot. As you slide the two ends of the tube over your rod, ensure there is a little slack in the line because it needs to come back against the reel stem.
12.
Once the two sections are slotted together and the bungy clipped over the button, you can add a quality reel bag to further protect your reel. This particular one will go around the rod tube and fasten. The neoprene flap also covers the bungy and button. You can paint the tube if you wish or attach a few stickers. Once at your destination, you only need to take the rod out of the tube, connect the two sections together and you are ready to fish. This tube is not only convenient but, more importantly, it will protect your ready-rigged rod from mishaps while in transit.