by Gordon Macdonald •
With the prawning season already in full swing, many will be using their cast nets on a regular basis. Most of the prawns have been in the shallower creek and river systems, however, over the next month or two they will move out into Moreton Bay.
A lot of the areas around the bay islands are in rather deep waters, where a 20m cast net lead rope is required to allow you to reach the bottom. With most cast nets, this will require an extension to the original rope or for a new rope to be added to the net. Additionally, over time the lead rope on a cast net will become frayed and may need replacement.
There are a lot of different styles and qualities of cast nets on the market. One thing they all have in common is a lead rope. This keeps the caster connected to the main net and allows the net to be retrieved once it hits bottom. Many cheaper quality nets come with only a couple of metres of thin lead rope. This will suffice when only using the net in shallow water, however are insufficient for the deeper areas. Additionally these thin ropes can be very hard on your hands over a period.
The deep areas around the bay islands where prawns tend to congregate over the coming months will often require around 20m of lead rope to ensure your net reaches the bottom while the lead rope is still slack. If there is any tension on the lead rope as it sinks, the net will begin to close, which limits the efficiency and the catch. The thin lead ropes that come on many of the cheap nets are very hard on your hands during a long session of prawning and have a tendency to tangle, especially with a bit of twist in them. Replacing them with a longer, slightly thicker rope is a necessity if you want to prawn in the deeper waters with a 12ft top-pocket net. Even with smaller bait nets, a thicker, low tangle lead rope is desirable.
There are a lot of good rope types that can be used and some prawners have a preference for a particular type on their net. Today I will show you one of the easiest rope types to work with that I have found to be exceptionally good for cast net lead ropes.
STEP 1
There are numerous reasons why you would need to add a new rope to your cast net. Many of the cheaper nets have the lead rope bound on with thin twine. If this twine breaks or wears out, the lead rope will eventually come free and you will probably lose your net. Secondly, you may want to increase the length of your lead rope to allow you to use your net in deeper water.
STEP 2
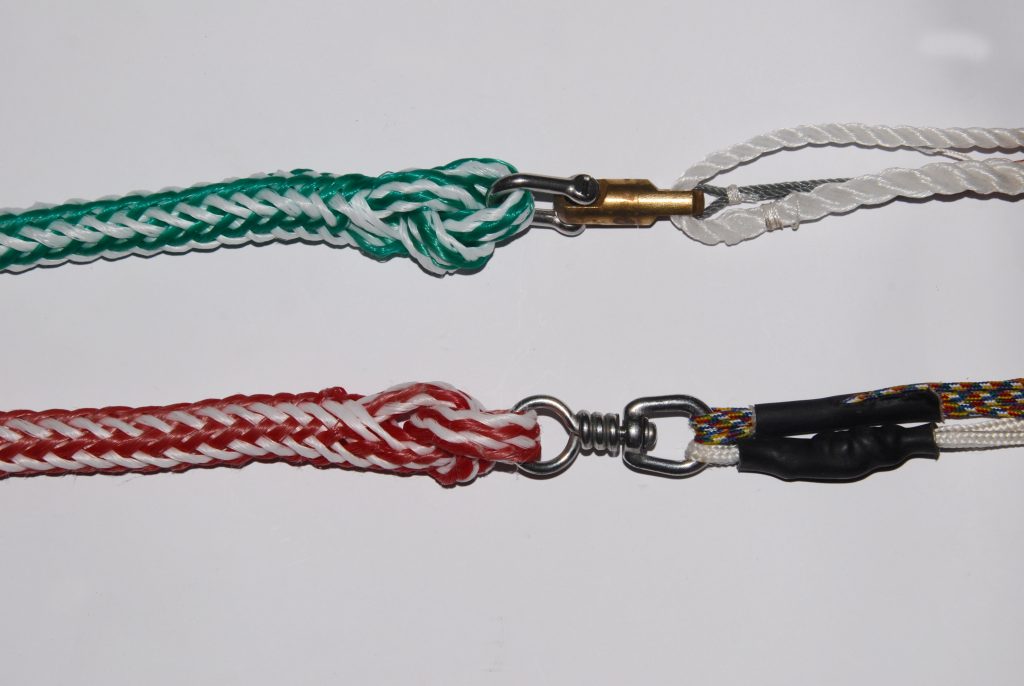
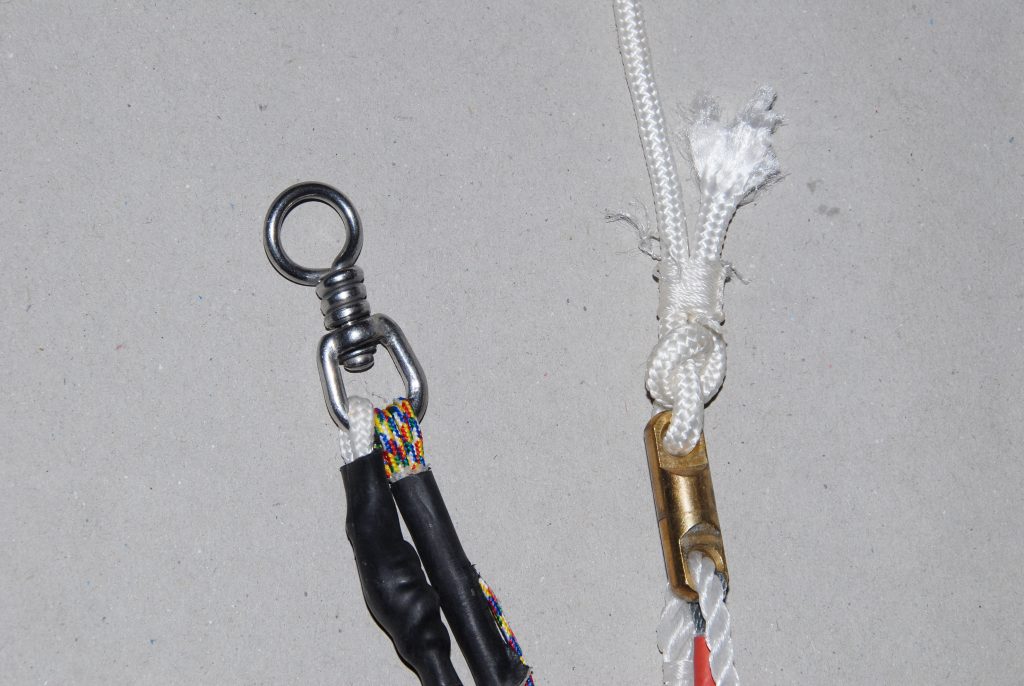
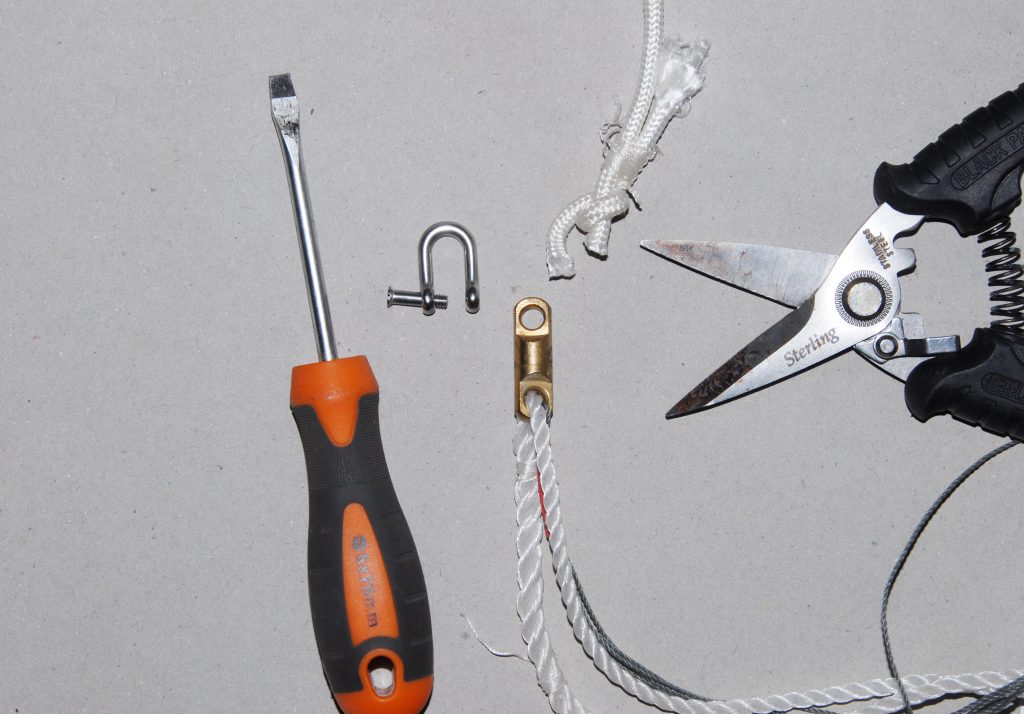
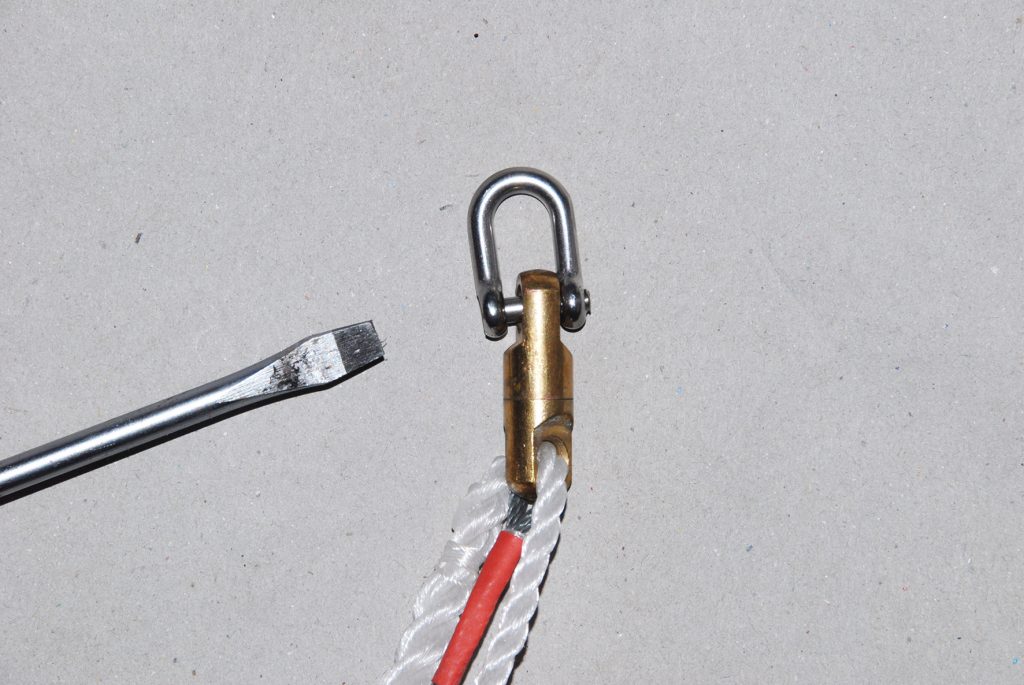
The torpedo swivel on some nets will limit the diameter of the rope that can be used. To replace the rope on this net, I want to add a 8mm diameter rope that will not fit through the eyelet of the swivel. Cut away the old rope first.
STEP 3
By adding a stainless steel D-shackle we can now add a much thicker rope to the cast net. This D-shackle has a 4mm pin that will easily fit through the eye of the torpedo swivel and is exceptionally strong. Using a slotted D-shackle (one where the pin is screwed in with a screwdriver) is desirable as the pin is very flush once inserted and therefore the net won’t catch on it.
STEP 4
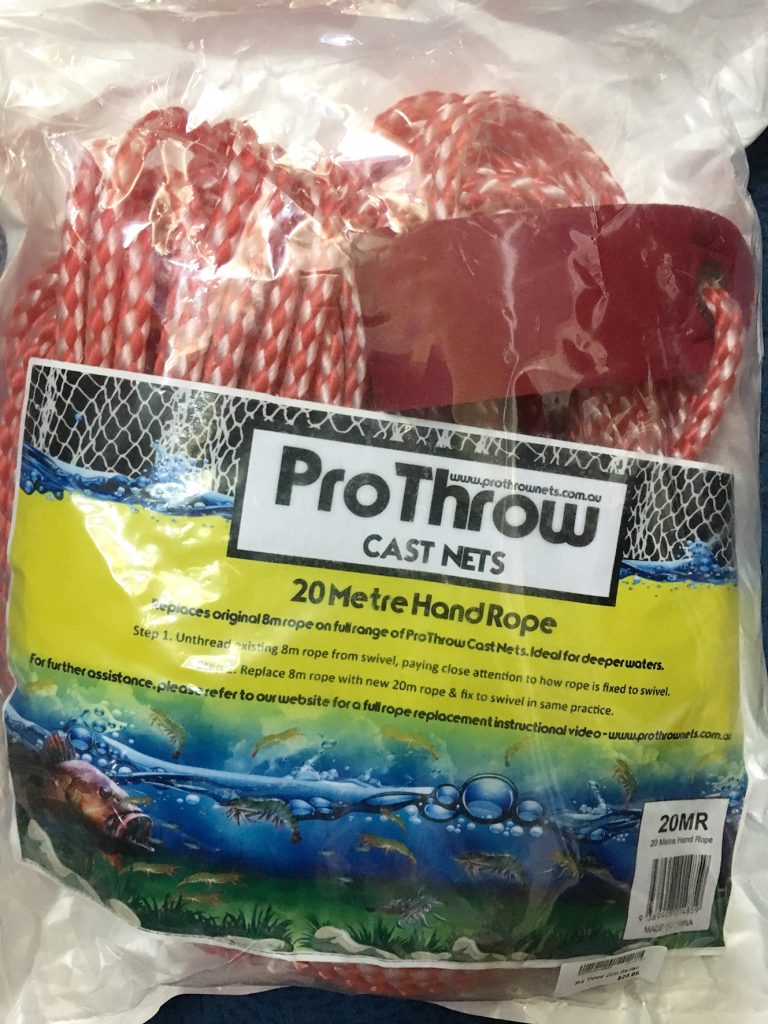
Pro Throw produce a pre-assembled 20m replacement rope that is extremely easy to add to your net and comes with all the relevant instructions. It is made from 8mm ski-rope and has a neoprene wrist lanyard, which eliminates chafe on your wrist during casting and is easy to slide on and off the wrist. Most specialist tackle stores will have these available. These are the best addition to your cast net and I have one on my main prawning net.
STEP 5
Ski rope is great as a lead rope as it doesn’t absorb water, is gentle on your hands and is extremely easy to work with. You can get it in 6mm, 7mm, 8mm and 10mm diameters, and I found this 23m hank of 8mm at Bunnings. With a 850kg breaking strain it will almost never break. You could use thinner if you wish as it would still be plenty strong enough, however I find the 8mm tangles less and is easy on the hands when pulling a 12ft net loaded with prawns up from deep water with current. You will also need a lighter or paint stripper gun and a pair of good cutters for this task.

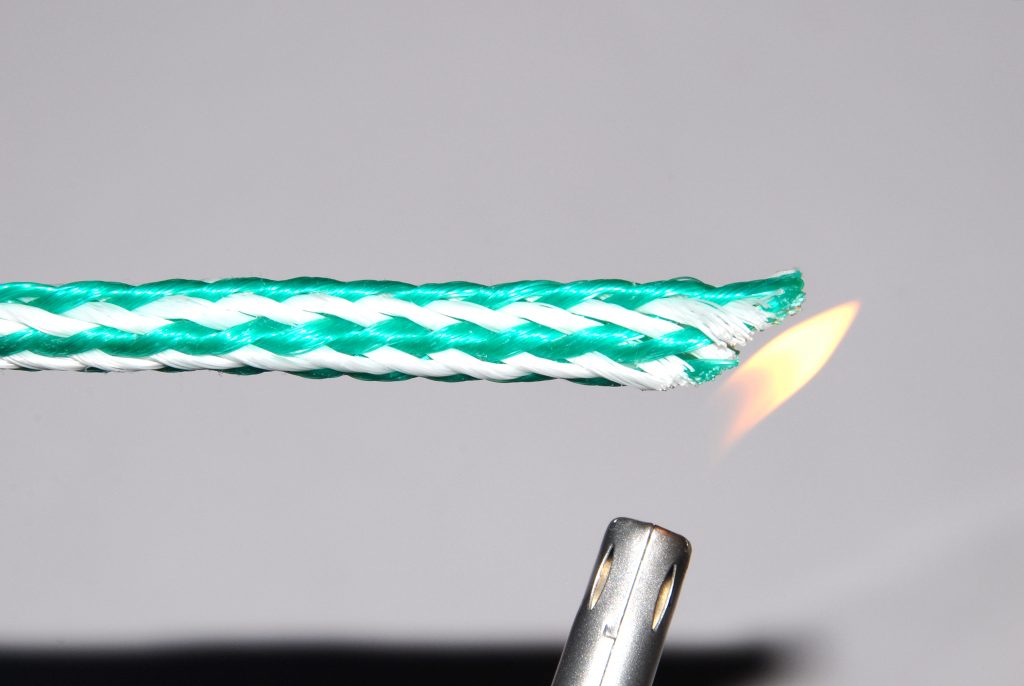
STEP 6
Cut your lead rope to the length you require. For prawning in the southern bay islands you will need around 20m. If you are just adding a rope to a net used for bait around the estuaries then 6-8m will suffice. Cut each end on a slight slant and then use your lighter to begin melting the fibres. Wet your fingers and then shape the end of the rope into a blunt point.
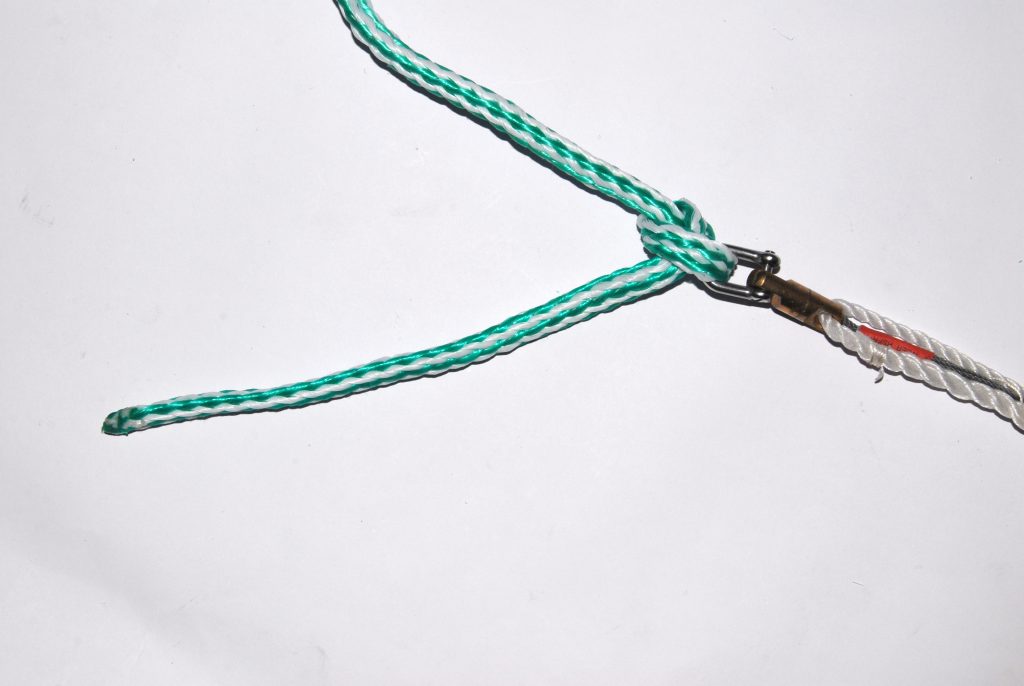
STEP 7
Pass the rope through the swivel attachment (or in this case the D-shackle) and tie a basic overhand knot leaving around 20cm of tag end.
STEP 8
If you hold the rope in two places and push together you will notice how the rope bunches. This ski rope is tubular (hollow in the middle) and when spliced back inside itself has exceptional holding power. A basic connection like this can hold a skier or tube rider, so it will easily be strong enough for your cast net.
STEP 9
While bunching up the rope as shown, insert the tag end of the ski rope through the fibres on one side and into the centre core close to the knot. This will be a lot easier than you first expect.

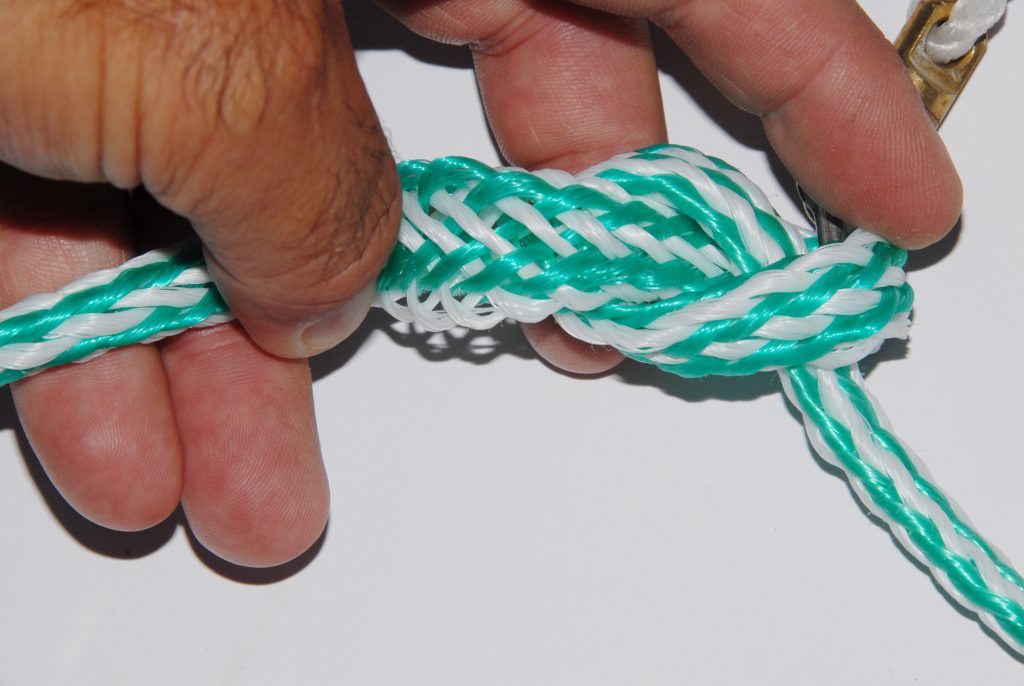
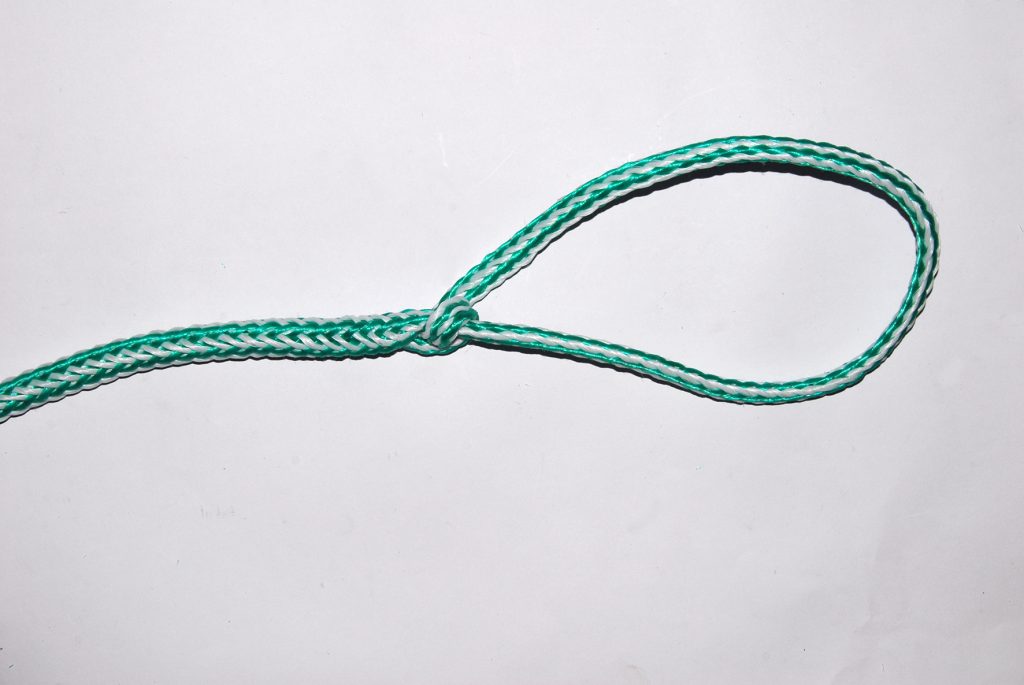
STEP 10
Insert the tag end all the way up through the centre of the rope. You can do this easily by pushing the main rope forward to make it expand and bunch up, before tightening your grip to secure the tag end and then pulling forward to drag it back through the centre recess. You will probably have to do this a couple of times, however the process is very simple. Once completed the tag end will be inserted fully into the core and it should look like this picture.
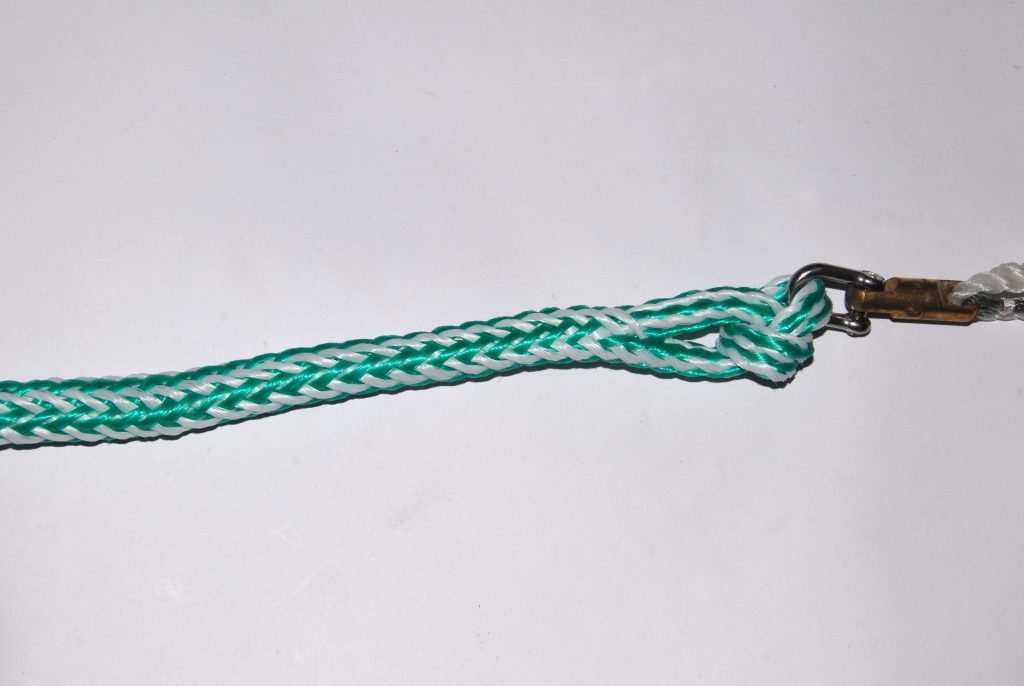
STEP 11
You will repeat this process in the other end of the rope to make a loop for your hand. On my bait nets I attach the rope to my wrist, yet on my prawning net (which I throw using the American Shrimpers method) I attach the rope to the rail of the boat and have a large carabiner snap on the end of the lead rope to allow it to easily be changed from side to side.
STEP 12
For nets with large swivels already on them, you will be able to attach the rope directly without using a D-shackle. The expansion and gripping properties of the rope make this a very simple yet very strong connection, regardless of the diameter of the ski rope you choose. Due to the simplicity, ropes can quickly and easily be removed or added to a net, even while out on the water.