by Gordon Macdonald •
With the tailor season well and truly upon us, I thought I would show you how simple it is to make your own ganged hook flasher rigs. This combination of bait, and artificial material to give it some more action and appeal, goes back a long way.
I remember watching Mal Florence videos back in the ‘70s and ‘80s where he would drop baits on a bucktail jig over the reef. Mal was one of the pioneers of sportfishing in this country at the time and fished baits like this because it gave the bait some increased appeal and movement. Additionally, it gave him a better chance of landing a big coral trout or cod after the pickers had been attacking the bait profusely and decimated it.
Addition of materials to the hook helps the bait look more lifelike because flash material wafts and reflects light enticingly. The splash of colour also helps the bait to be noticed and initially makes it standout in the marine environment. Many materials even have glow in the dark or UV properties that help it standout in low light conditions or enhance the lifelike appeal under natural UV light.
For anglers targeting tailor on ganged hook flasher rigs, the addition of the material also doubles your chances. If you miss the strike and your pilchard is ripped off the hooks, you still have a chance of hooking it or its mates as you crank in your baitless rig. The ganged hook flasher rig now acts like a lure or fly and tailor will slash at it as it goes through the water. Let’s have a look at making some tricked up tailor rigs for yourself.
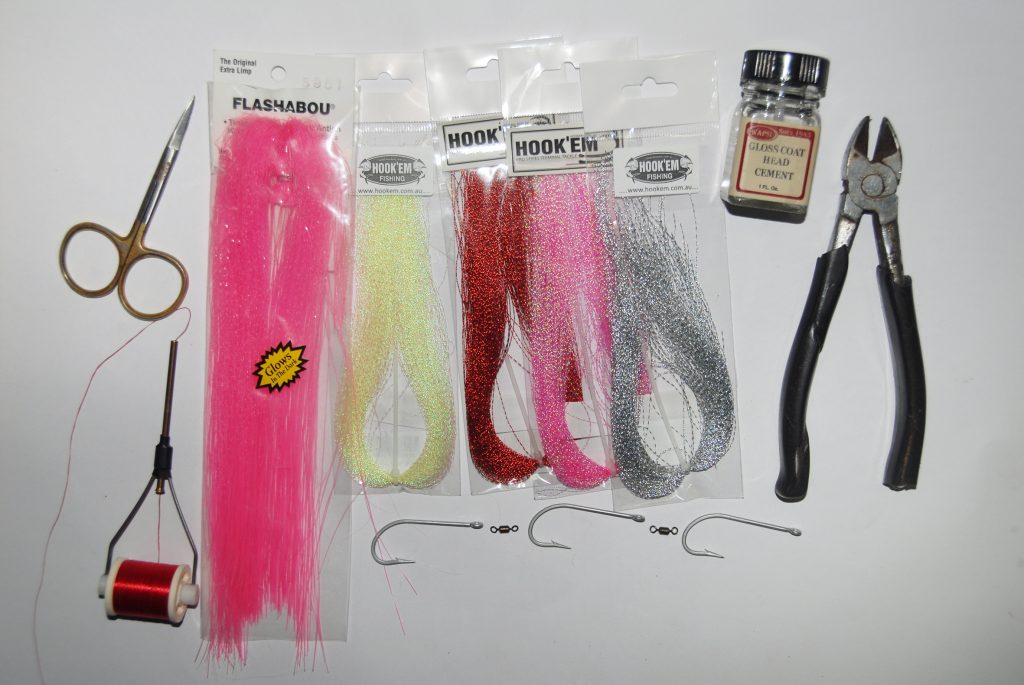
You will not need a lot of materials to complete this task. Some thread (preferably flat-waxed nylon) and bobbin will make the task a lot easier. Side cutters or similar will be required to open the hook eyes and scissors plus a selection of streamer materials. Some form of fly tying head cement or other glue is desirable to increase longevity for these rigs. Hooks and relevant sized swivels will depend on the bait choice and preference.
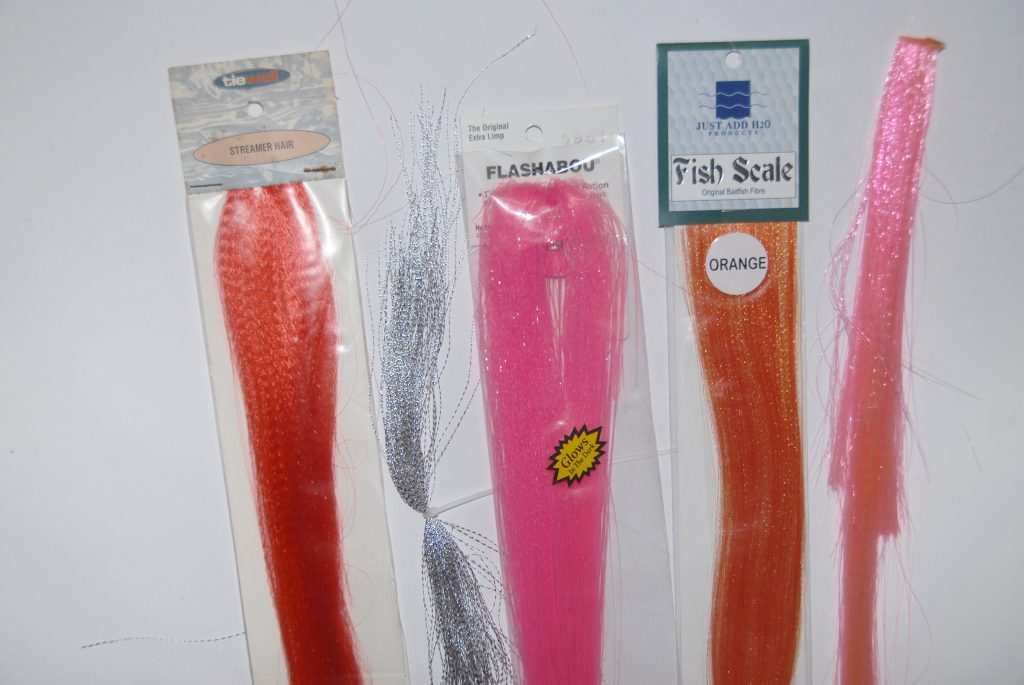
If you visit your local fly tying supplier you will notice a huge array of flash and streamer materials available. While most of these look enticing, not all are desirable for this application. Many are too crinkled, tangling easily and subsequently meshing with the hook points or tangling around the leader. Slightly stiffer, straight materials such as Krystal Flash, Fish Scale, Streamer Hair, Flashabou and Firetail are some of the better options. Firetail is by far the toughest and stiffest of these and is made locally by Platypus Lines.
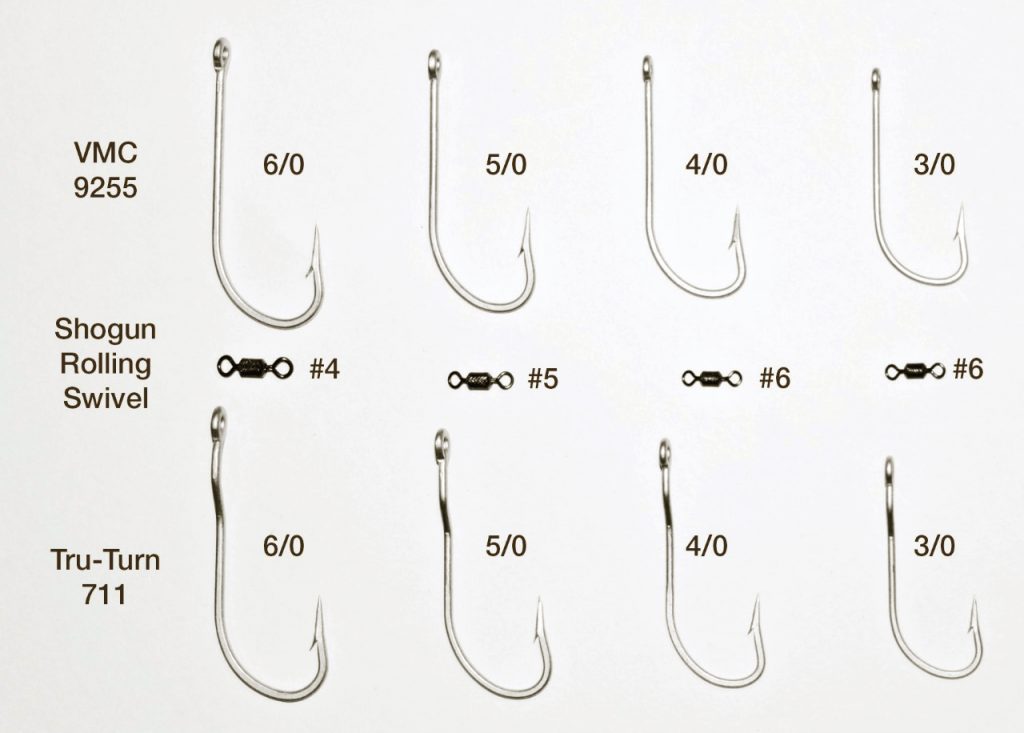
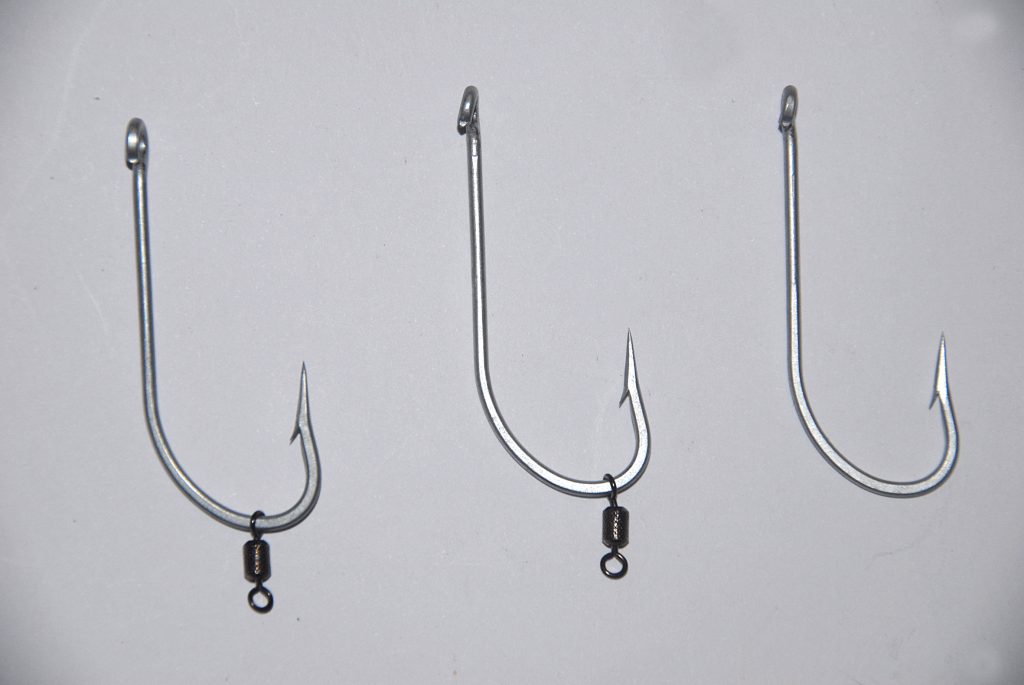
Hooks for your ganged rigs can be a personal choice, however, I like the VMC 9255 (as used here), Tru Turn 711 and the Gamakatsu Straight-Eye ganging hooks. There are quite a few other options including the Mustad 4202D and 4200D and VMC 8755. I have found the Shogun Rolling Swivels to be reliable and readily available, although you may prefer to use another type or brand.
Your main concerns should be that it is strong enough for the task and has an eyelet large enough to go over the shank yet small enough so it can’t pass over the hook barb. Check out the chart for some hook to swivel size recommendations.
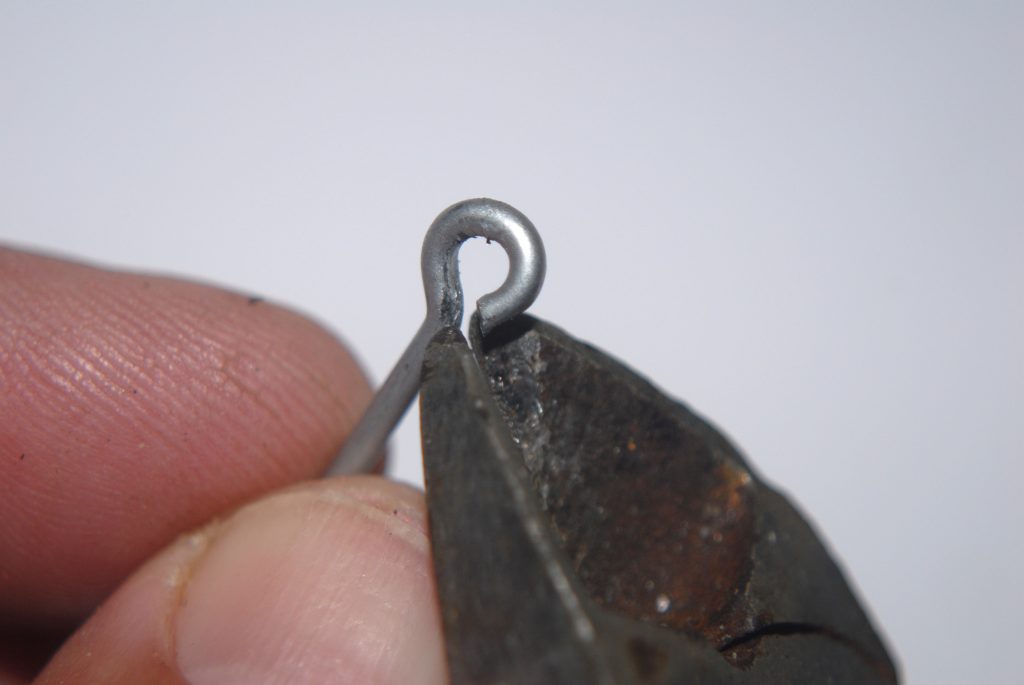
1
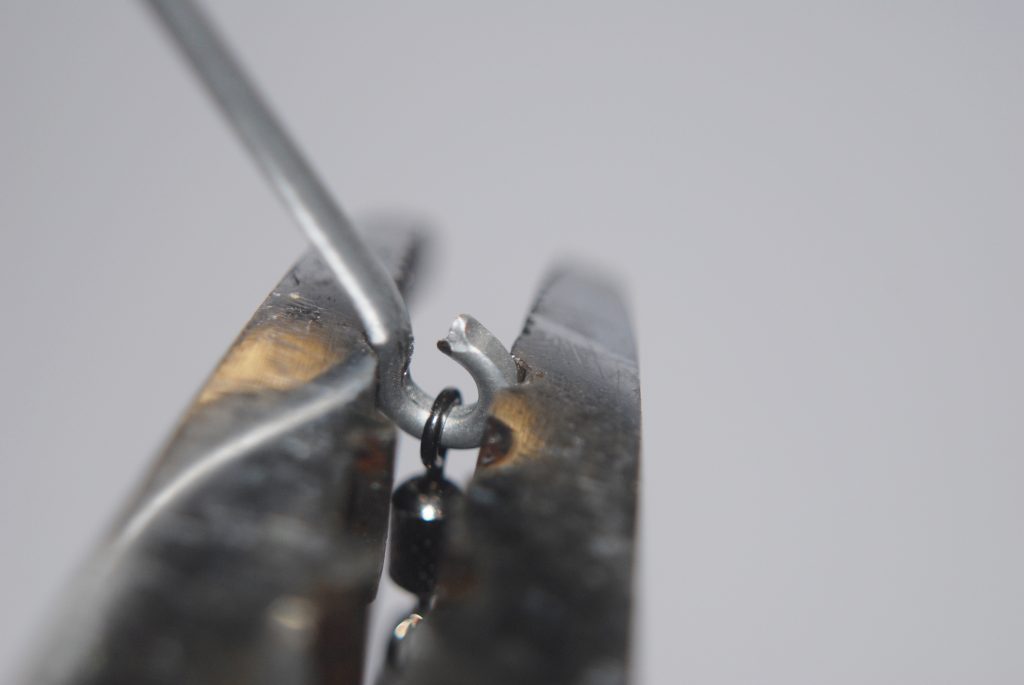
Use your sidecutters to open the hook eye by positioning the jaws over the gap where the eye turns back around to meet the shank. Squeeze down firmly with your pliers and then lever your hand outwards to pry open the eye just enough so that the swivel can be put onto the shank.
2
For a basic three-hook ganged-rig, open the eye of all three hooks and place a swivel on the shank of only two of them. When making longer rigs all hooks will have a swivel on them except one, which will be the tail hook in the rig.
3
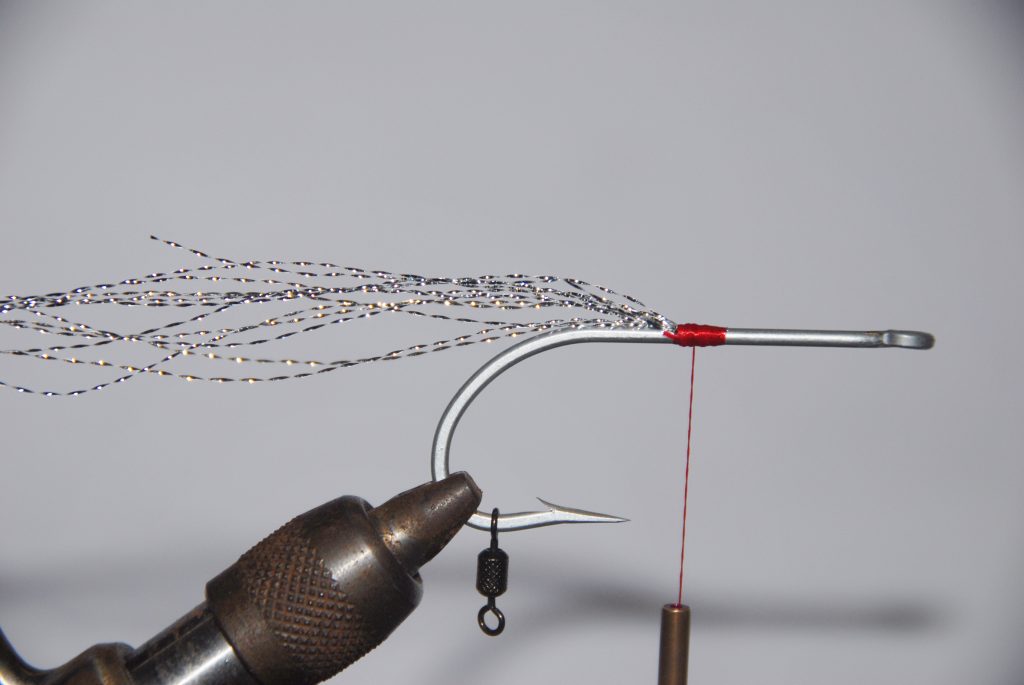
Having a fly vice to hold your hook will make the task easier, however, you can hold it by hand with a pair of locking pliers or in a vice. For this rig we will attach the flash to the leading hook (one of the ones with a swivel on it). Attach the thread with a basic knot or by overwrapping the tag end roughly halfway along the shank.
Cut a dozen or more strands of Krystal Flash that are roughly as long as two of your hooks and affix at this point with a series of thread wraps. Having a bobbin will aid in this task but is not essential. Do a couple of half hitches of thread around the hook shank with the thread.
4
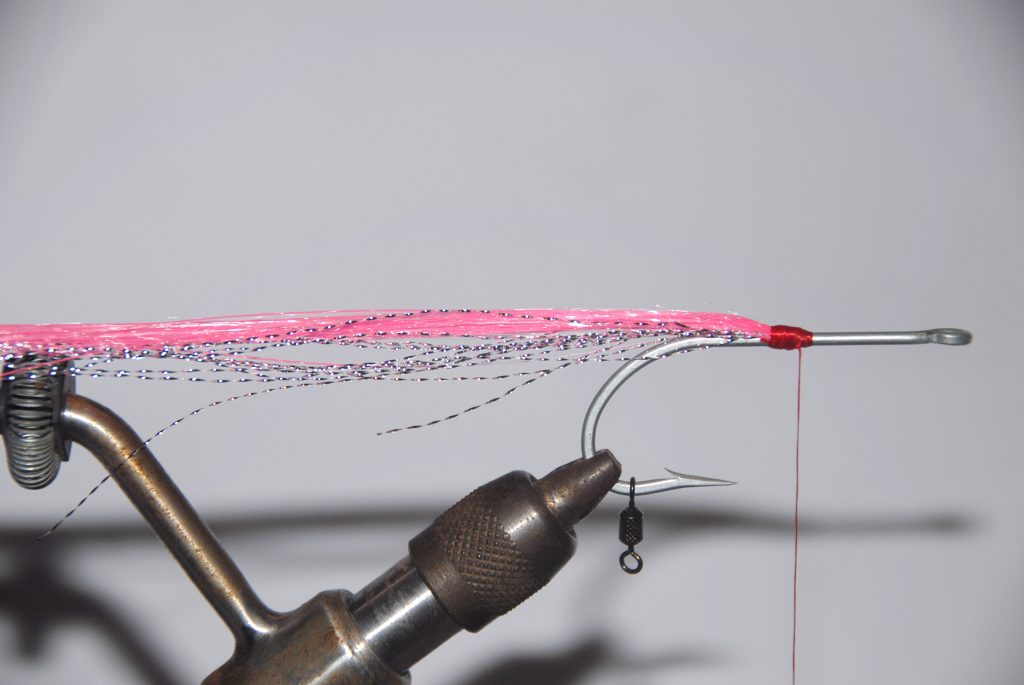
Next, cut a portion of another material. This time I am using a pink glow-in-the-dark Flashabou and will cut a good portion around three hook lengths long. Having the strands staggered in length will create greater movement in the fibres. Other colours can be added if you like, you don’t have to limit it to two.
5
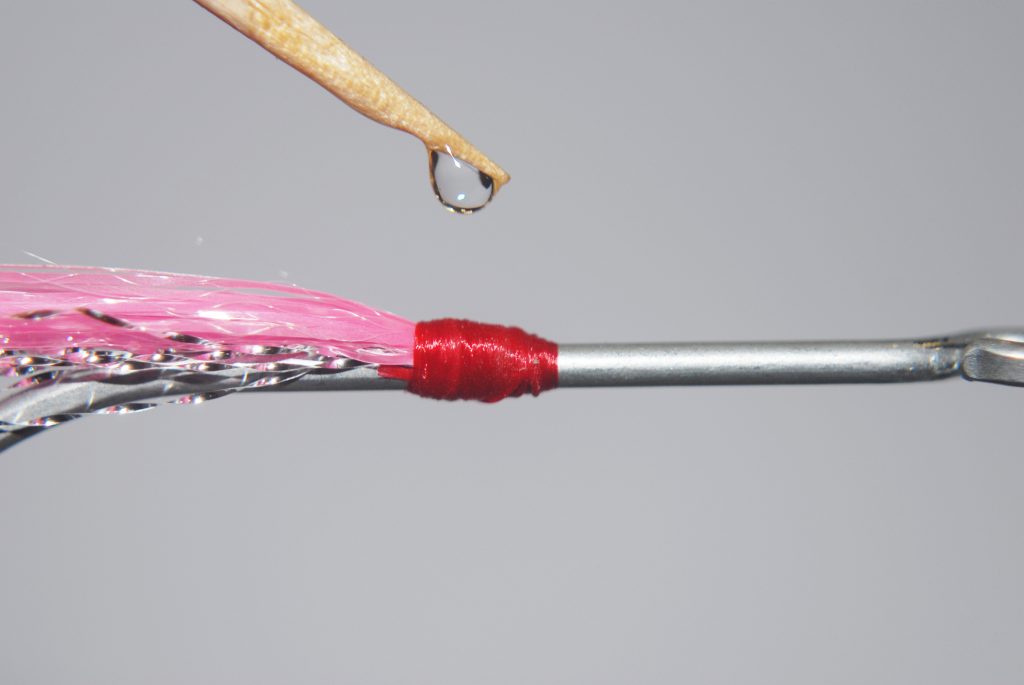
Do several half hitches of thread around the hook shank and then trim away the remaining tag end. I finish the tie in point by adding some head cement (a fly tying adhesive) but you can coat the thread in any decent glue that prevents the whole lot unwrapping if one strand of thread gets nicked by a tooth.
6
Then assemble your rig by linking the hooks with the swivels. Use a sturdy pair of pliers to close the eyes of the two lower hooks over the swivels and also the front hook where the leader will be tied.
7
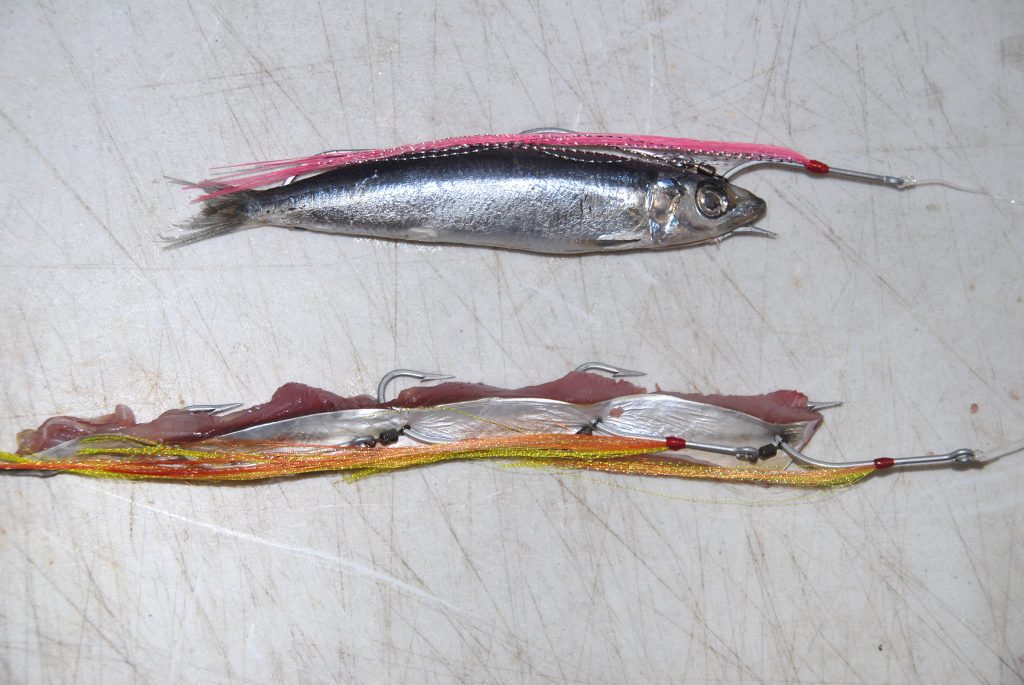
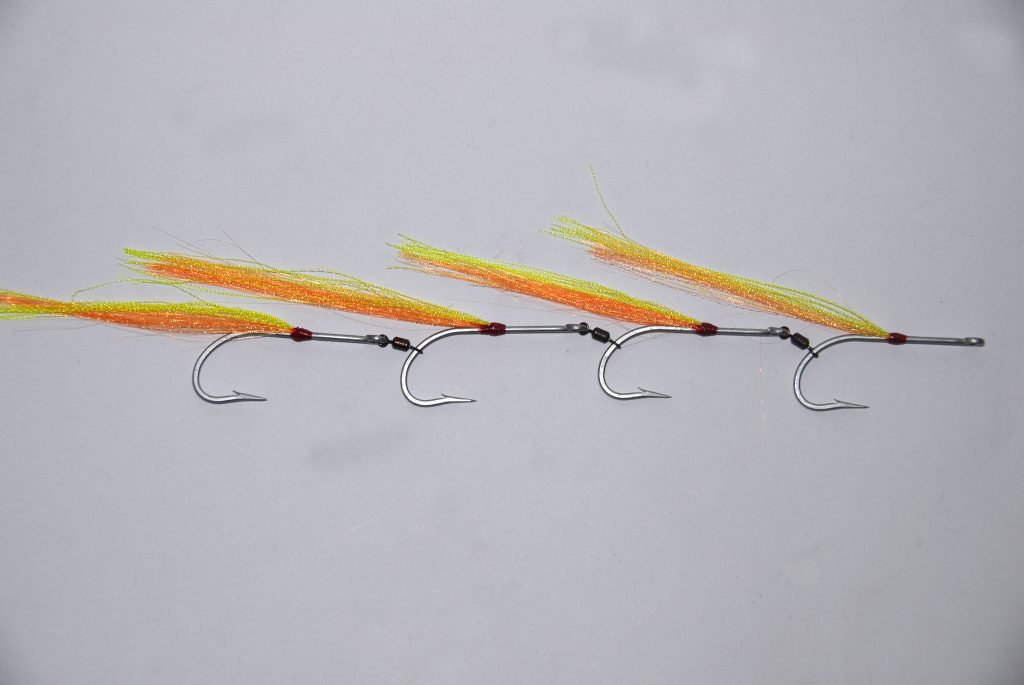
Your completed rig will look somewhat like this. The combination of material type and the colour of it is not imperative ╨ you can assemble any combination that you like. As flash materials give the impression of volume, you do not need to use a massive amount to create great effect.

8
Another option when making these rigs is to use a shorter length and decorate every hook or every second hook. This is a better option in turbulent water as it eliminates tangling of the material around the leader or hook points.
9
When inserted into the bait, the ganged hook flasher rig really adds some appeal. Popular offerings for those chasing tailor will include pilchards, garfish and bonito strips and all can be fished on the ganged hook flasher rig. While these rigs are not imperative for success, they can be an advantage in many situations. Many anglers swear by their effectiveness.