by Gordon Macdonald •
Spanish mackerel can be rather cagey and hard to tempt at times, especially on trolled lures. Years ago, anglers began exploring ways to present natural baits in a manner where they could be trolled, therefore allowing large areas of water to be covered with natural presentations.
While there are a lot of rigs around, the garfish wog rig is one of the early offerings that anglers realised would swim well and catch Spanish mackerel. They were so successful that many commercial mackerel fishers would use these rigs, especially in the north.
The garfish wog rig still works well nowadays and is a great option when you know mackerel are in a general area. It is still used by a lot of commercial mackerel fishers to this day. If you are trolling and sound out a fish down deeper, pull the motor out of gear and let the rig sink until you think it is close to the depth the fish is holding. Begin trolling again and there’s a good chance your rod will load and the reel will scream under the efforts of a solid, silver slab. The realistic swimming action of the garfish, the extra pulsing movement provided by the wog’s skirting material and the simplicity of the rigging technique makes this one rig that you need to have in your techniques arsenal. Let’s see how easy it is.
1.
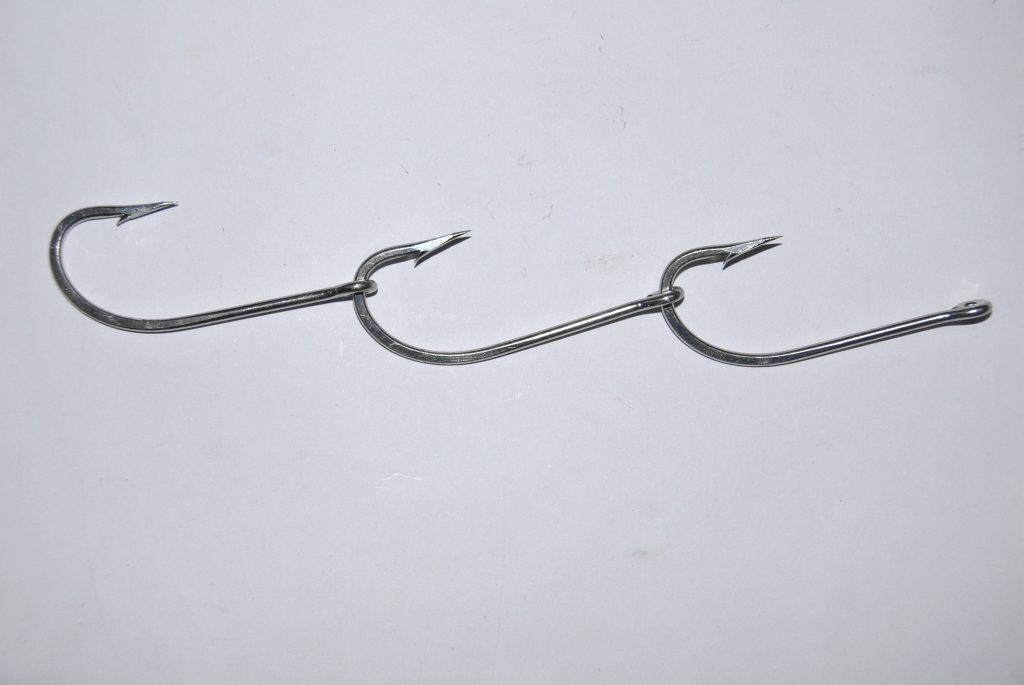
When choosing a hook you need to consider a couple of things: firstly, the hook cannot be offset, the point must be in line with the shank; secondly, the hook needs to be very strong as you will be hooking some big fish on this rig; thirdly, you will need to match the size of your hook to the size of the garfish you are going to troll. Some good hook patterns include the VMC 9255, Mustad 7766 and Mustad 3407AD.

2.
Hook eyes can be prised open with a pair of side-cutters and then closed again with a sturdy set of pliers to create a three or four hook ganged rig as shown. I like to have sets of various sized hooks ganged together ready as the size of garfish available can vary a bit. If you have large garfish (often called 3×2 garfish) then 3×8/0 hooks ganged together will be ideal. If using shorter shanked hooks, such as 7766 Mustads, then you will possibly need four hooks ganged for a bait this size.
3.
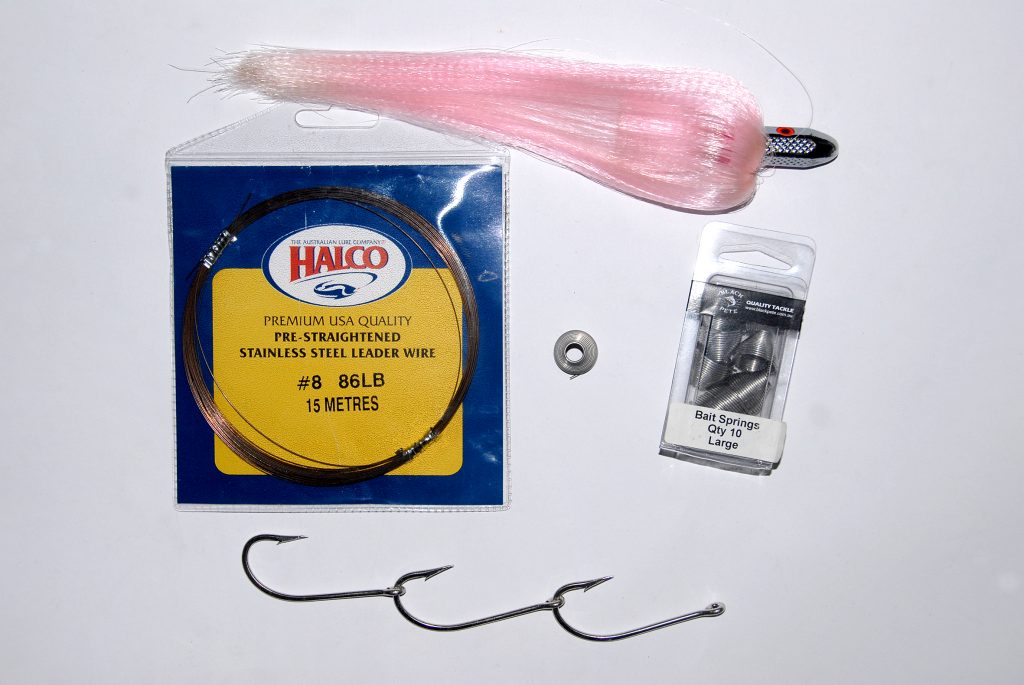
For this rig you will need some single strand piano wire (86lb or 105lb), your ganged hook rig, a bait spring (or a rubber band) and a wog. There aren’t many companies who make wogs, however you can make your own with a heavy sinker and some skirting material. This particular wog is a TT McWhog.
4.
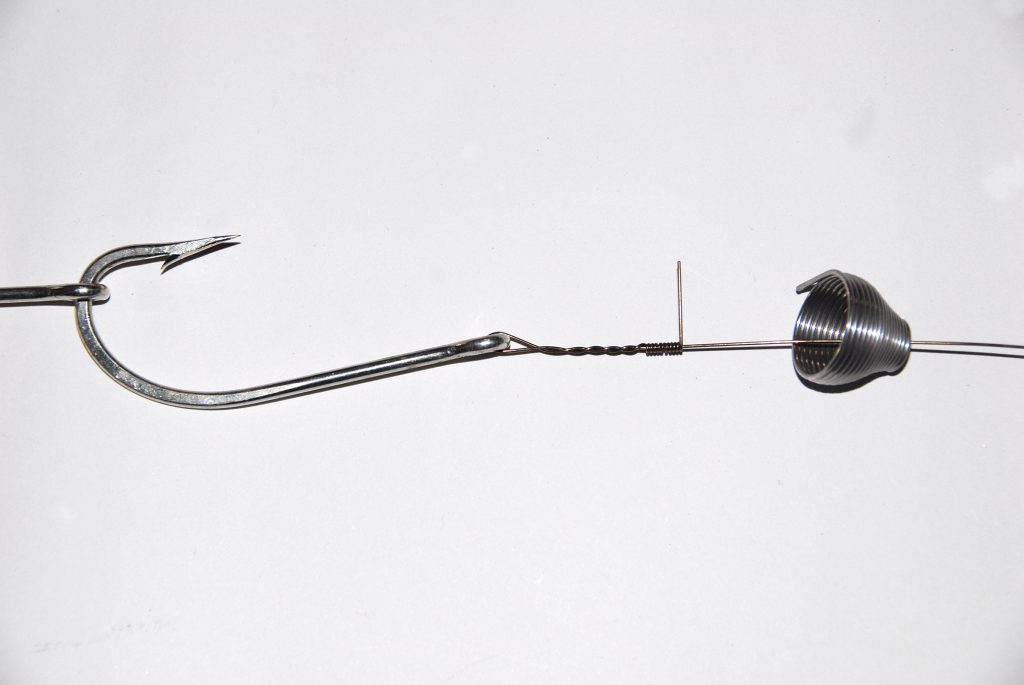
Cut a length of piano wire around 80-100cm long. Attach this to the hooks using a haywire twist (see QFM September 2019). Do not trim or break away the tag end. Instead, leave it about 2cm long and position pointing straight up and in line with hooks as shown. Pass the leader through a suitably sized bait spring.
5.
Pass the leader through the wog head and then put a loop in the end, again using a haywire twist. We will attach the snap swivel on the wind-on leader when we are ready to use the rigged garfish.

6.
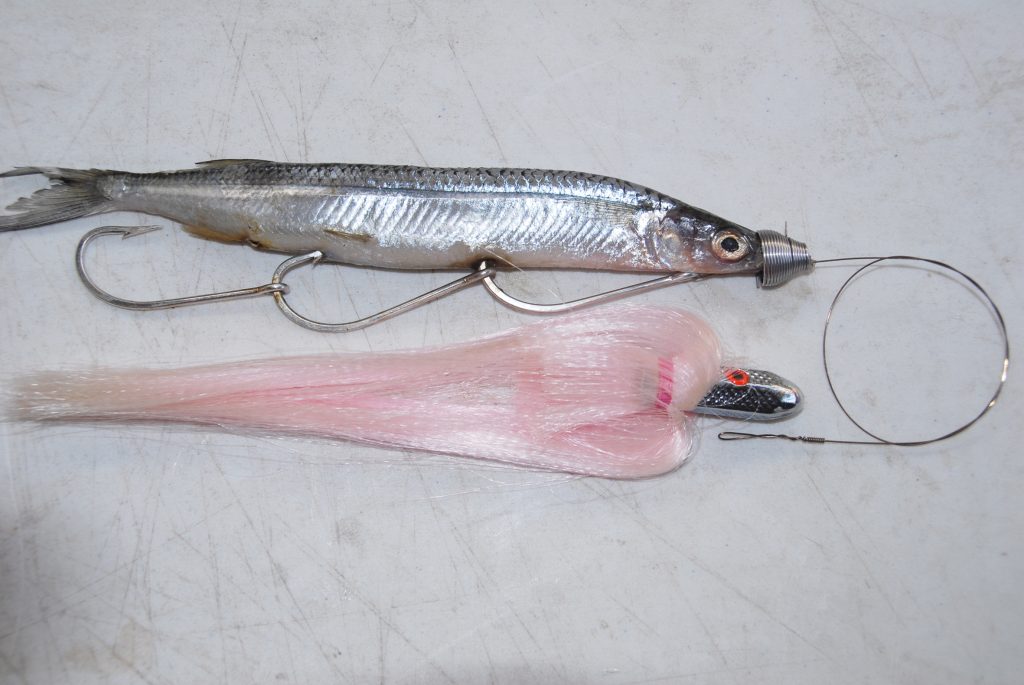
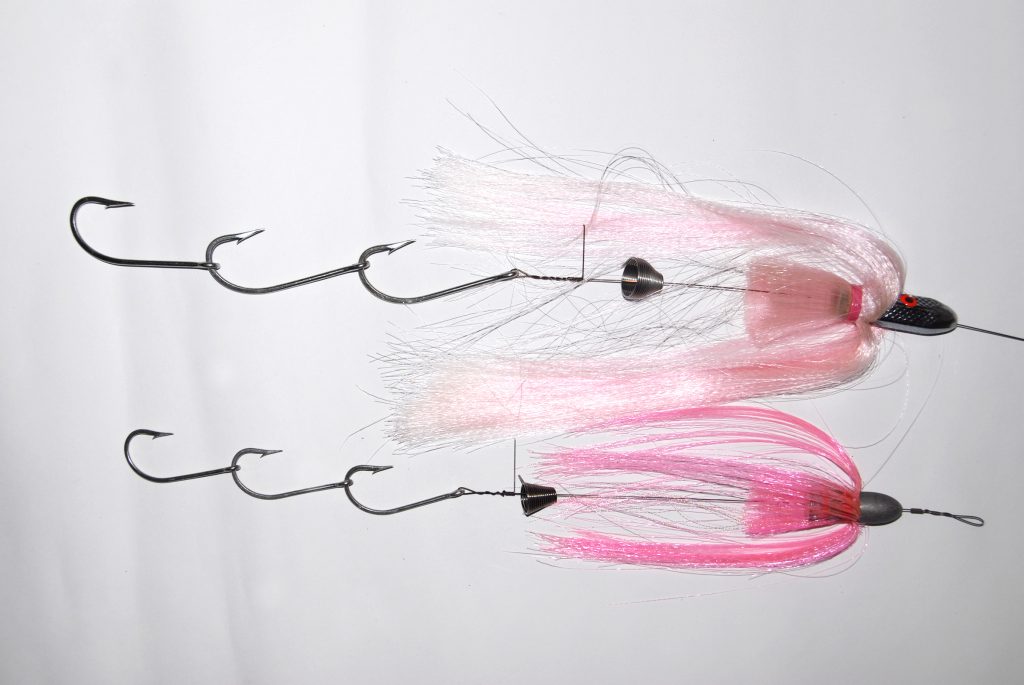
Completed rigs will look something like this. The wog does not necessarily need to be pink ╨ any colour is fine to try. I like to have rigs of numerous sizes pre-made so that I have a rig ready, regardless of the size of the garfish. The bigger the gar, the better! However you will often get a few smaller gar in a bag too. The second wog used here is a home-made one using an old lead lure head and some firetail.
7.
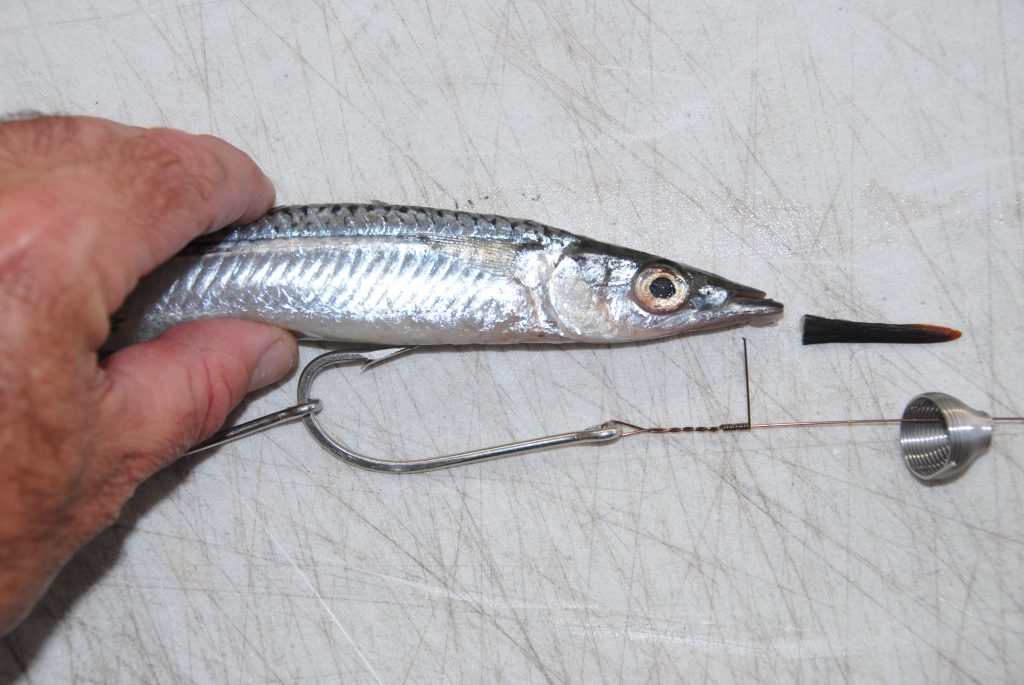
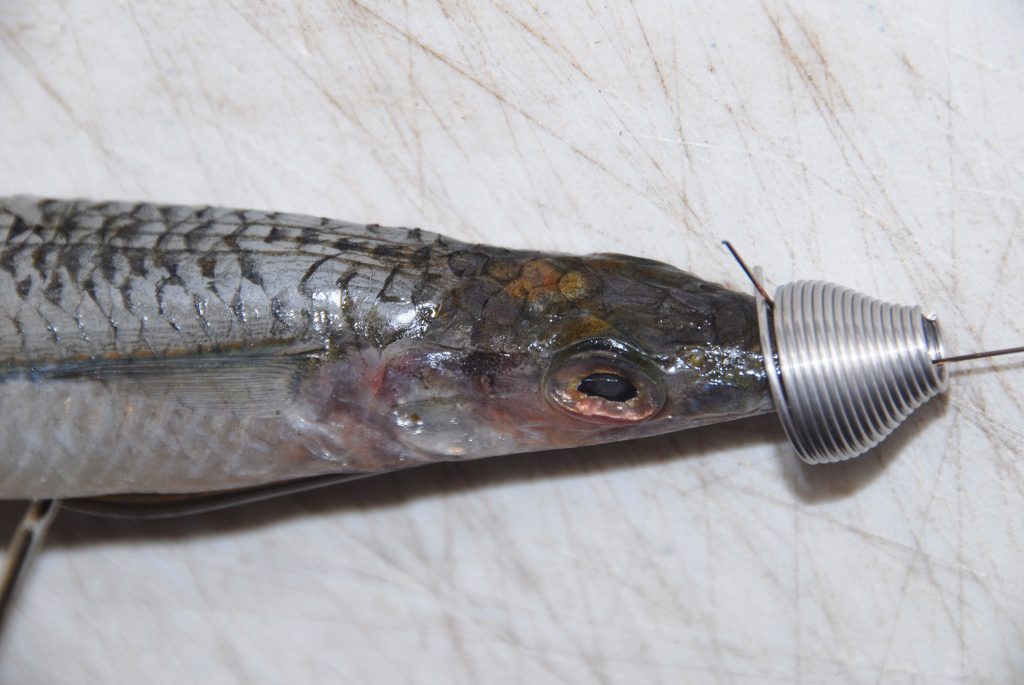
Rigging up the garfish with this rig is so easy that you will probably think you are missing something. Trim the bill off the gar approximately level with the upper jaw. Position the wire tag end just in front of the jaw hinge. Use your thumb to mark the position that now coincides with the bend of the front hook.
8.
At the position marked with your thumb, insert the point of the front hook up into the gut cavity. The rear two hooks are generally just left hanging. These two hooks are left proud of the bait. The hook points face upwards and will offer great hook-up potential. Some anglers use swivels between their hooks, however, the hook points will then often ride downwards which greatly increases the chance of them picking up some weed or tangling when the wog is allowed to sink. Push the wire tag centrally through the head at this position and start to put the bait spring on as shown.
9.
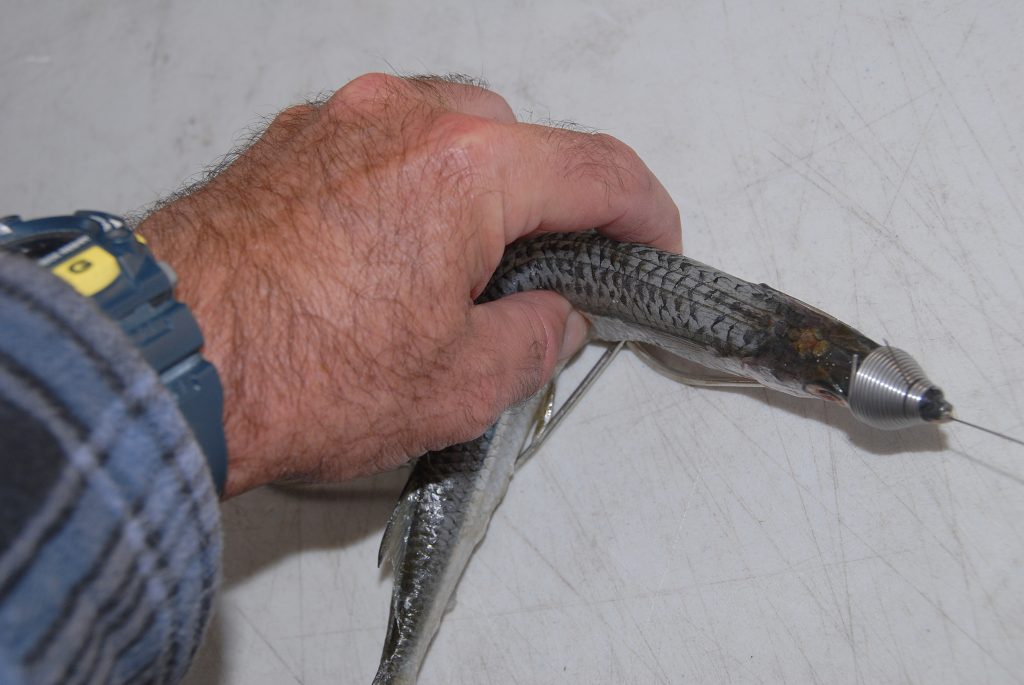
Wind the bait spring on fully until it is firm and holding the mouth of the gar closed. Pinch firmly along the backbone until you feel a small pop which will be the flesh breaking away from the backbone. Twist the garfish in a snake-like manner so that it is now supple. This will allow it to swim freely.
10.
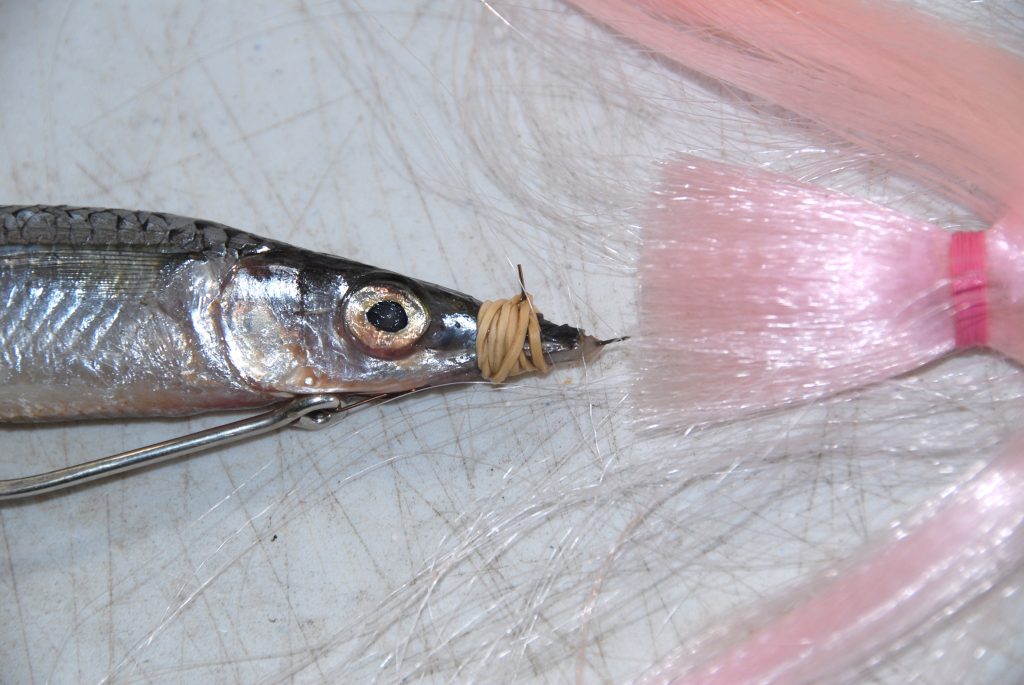
If you don’t have a bait spring then you can always just use a rubber band to keep the mouth of the gar closed. Once the bait is rigged with either the bait spring or rubber band, slide the wog down to rest against the nose of the bait.
11.
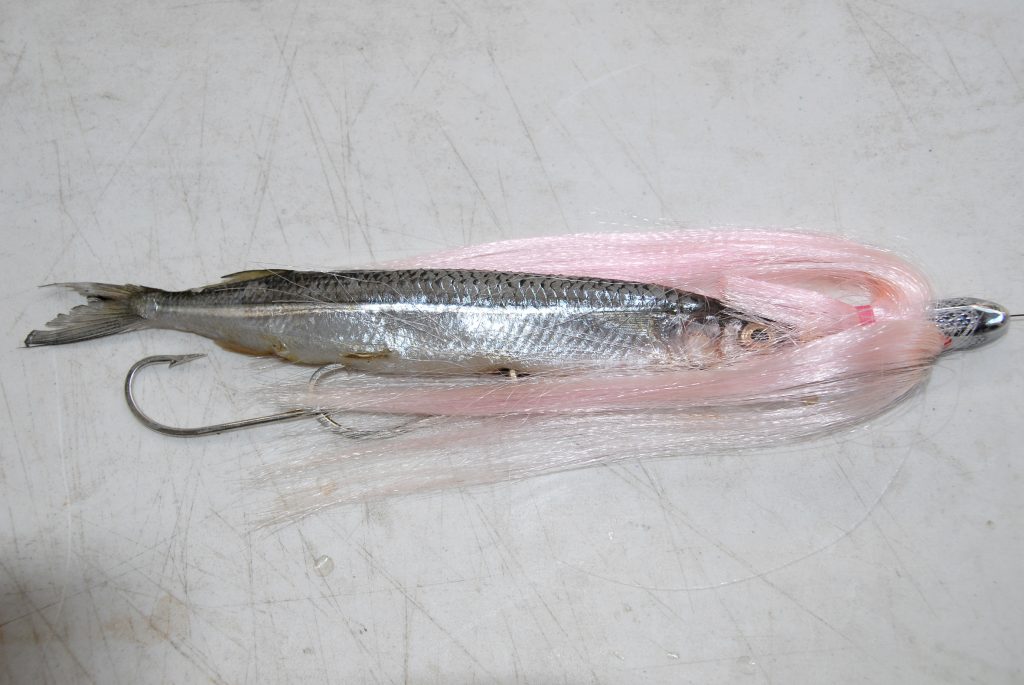
With the rig completed it will look similar to this. I only penetrate the middle hook lightly into the flesh if preparing rigs with fresh gar and then cryovaccing for later use as it prevents the hook point penetrating the plastic. Do not have the rear two hook points in the bait as they can restrict the action a little. If the hook rig is the correct size, the rear hook should coincide with the tail, which is ideal because mackerel will immobilise prey by snipping off the tail.
12.
I like to flatten the tow loop in the leader until it can pass through the wog. This allows the wog to be removed for storage. Therefore I can prepare numerous baits and just put the wog on before I put it in the water. With the leader coiled and baits individually wrapped, it only takes a few seconds to get a bait into the water.