by Gordon Macdonald •
Over the last few years, slide baiting has become a popular technique for anglers targeting large game from the beaches and rocks. This technique basically allows you to deploy a large bait further from shore than previously possible. You don’t cast the bait, only the sinker. After you have cast the sinker, you attach the slide bait rig with bait attached and float it out using the current, or a gentle lifting of the rod tip. After numerous large Spanish mackerel to over 40kg were caught with this technique at Fraser Island, more anglers have been keen to try this exciting form of fishing.
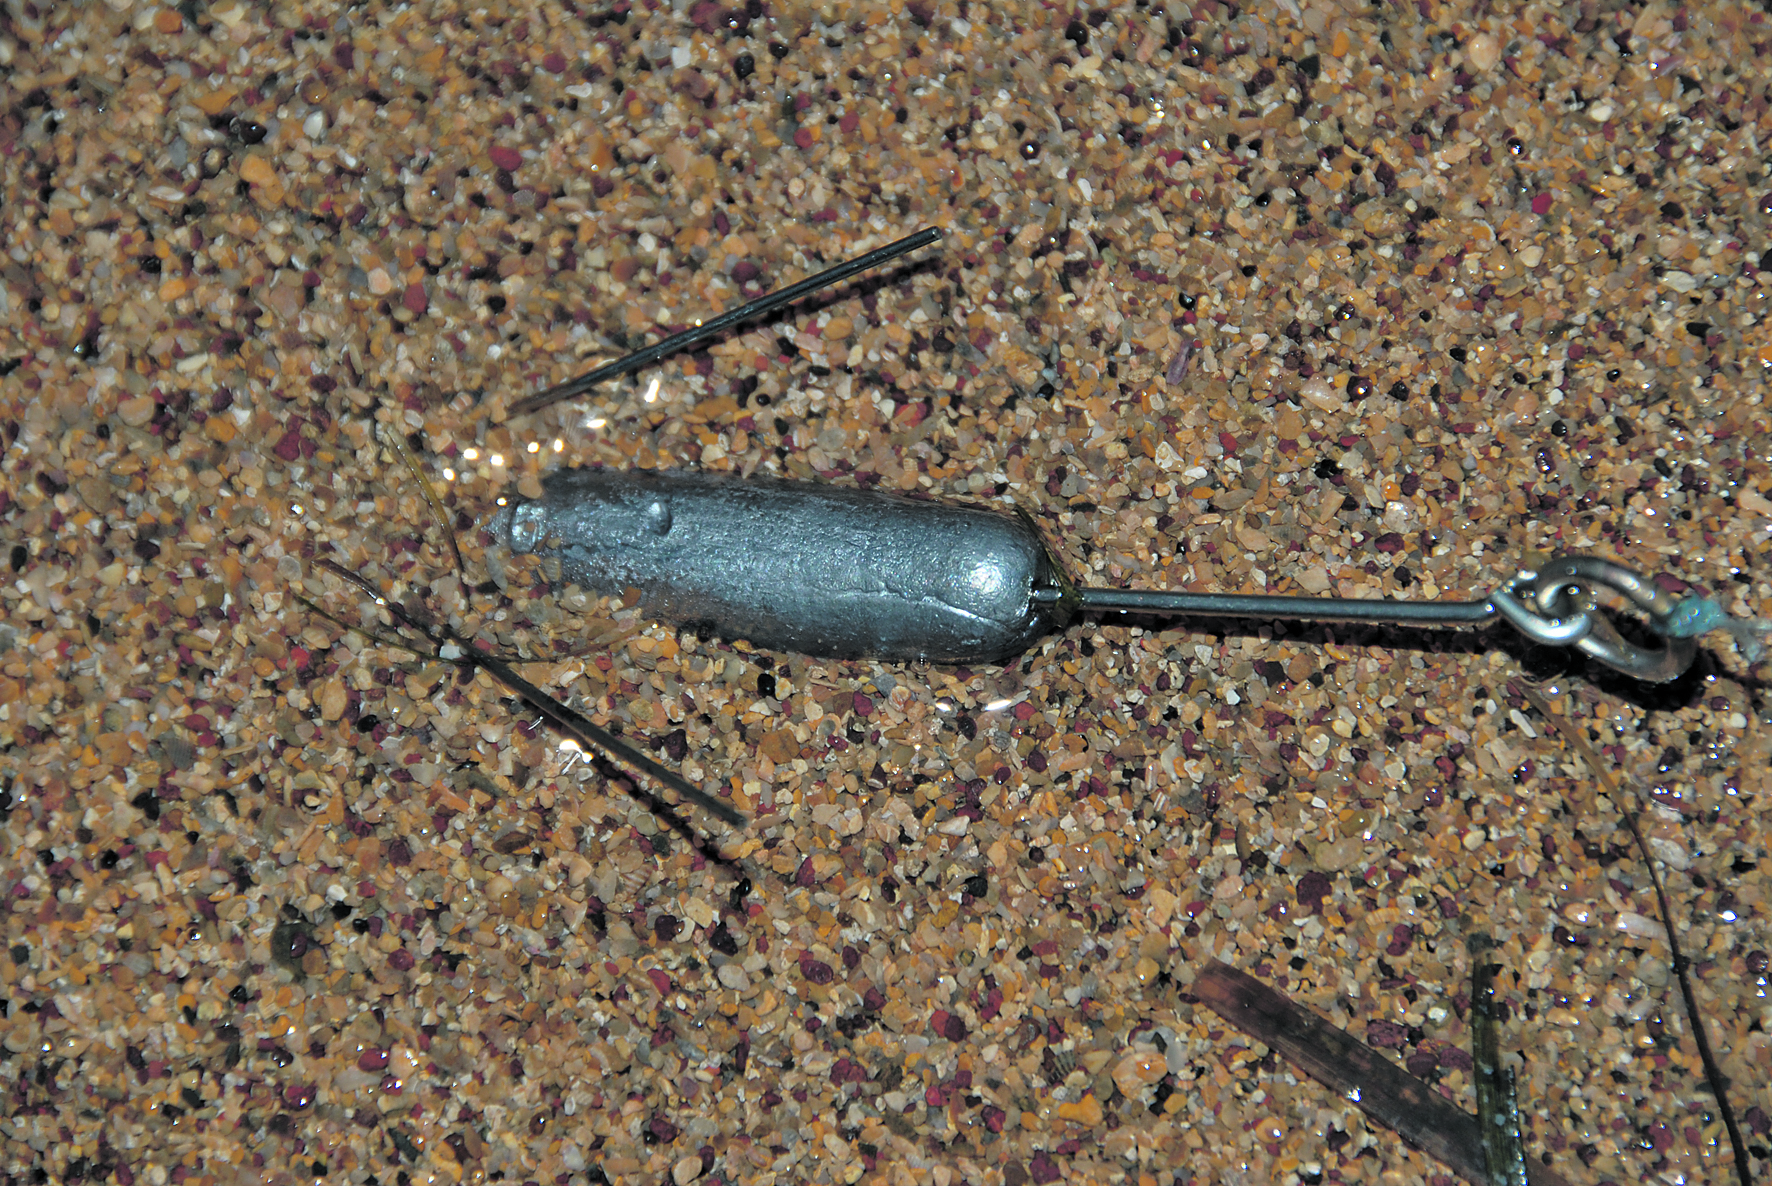
The sinker commonly used is a grapnel (sometimes referred to as an anchor sinker) which has forward facing wire arms which help it bed down and hold into the sand or debris on the bottom. Many of these sinkers have the arms fixed in place but some have a release system where the arms fold back when extra pressure is applied. This is usually when the angler lifts the rod abruptly to wind in or a fish grabs the bait and goes for a run. Once the sinker has hit the bottom you need to do small lifts with the rod tip (without retrieving line), tightening and relaxing the line to get the sinker to bed into the sand.
Once your slide bait rig is set up with the bait, you attach it to this taut main line and put it into the water where the wave action and decline of the line angle will coax it to gradually make its way out to the sinker. This approach allows you to cover a broad area of water and permits you to deploy a large (often live) bait out as far as you can cast the grapnel sinker.
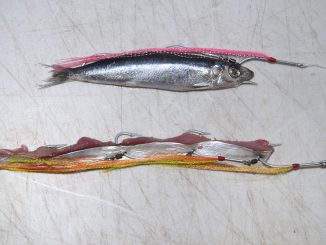
For large baits, live bait sliders are ideal. Casting only the sinker and not the weight of the bait will greatly increase the distance out that the bait can be fished. Additionally, live offerings will be a lot healthier as they aren’t subjected to the forces involved during the cast, or from plummeting into the water. Slide bait rigs have accounted for some pretty spectacular fish in the few years that they have been fished in Australian waters and are fast becoming an essential piece of any serious beach or rock fisher’s arsenal.
There are numerous types of slide bait rigs on the market, some locally-made and others imported. They can be made with hi-tensile wire ranging from 1.2mm to 2.2mm in diameter. Locally, anglers fishing the surf and rocks commonly use the 1.6mm and 1.8mm rigs. If larger sharks are your target, 2.0mm and 2.2mm would be your best choice. The smaller rigs are used for lighter lines or where the target species is not likely to be large.
Most slide bait rigs are of the non-return variety, which means they are shaped so that a bait can only go down the line. If a live bait turns and swims towards shore, the rig slightly kinks the line and limits the bait’s transit shorewards.
Slide baiting is very popular in New Zealand and South Africa, and there are specific rods made for this form of fishing, with tapers designed to increase casting distances with large sinkers. Their length increases the angle in relation to the water which aids in getting baits out more efficiently. Many hard-core anglers use overhead reels for this type of fishing but large spinning reels and Alveys will suffice.
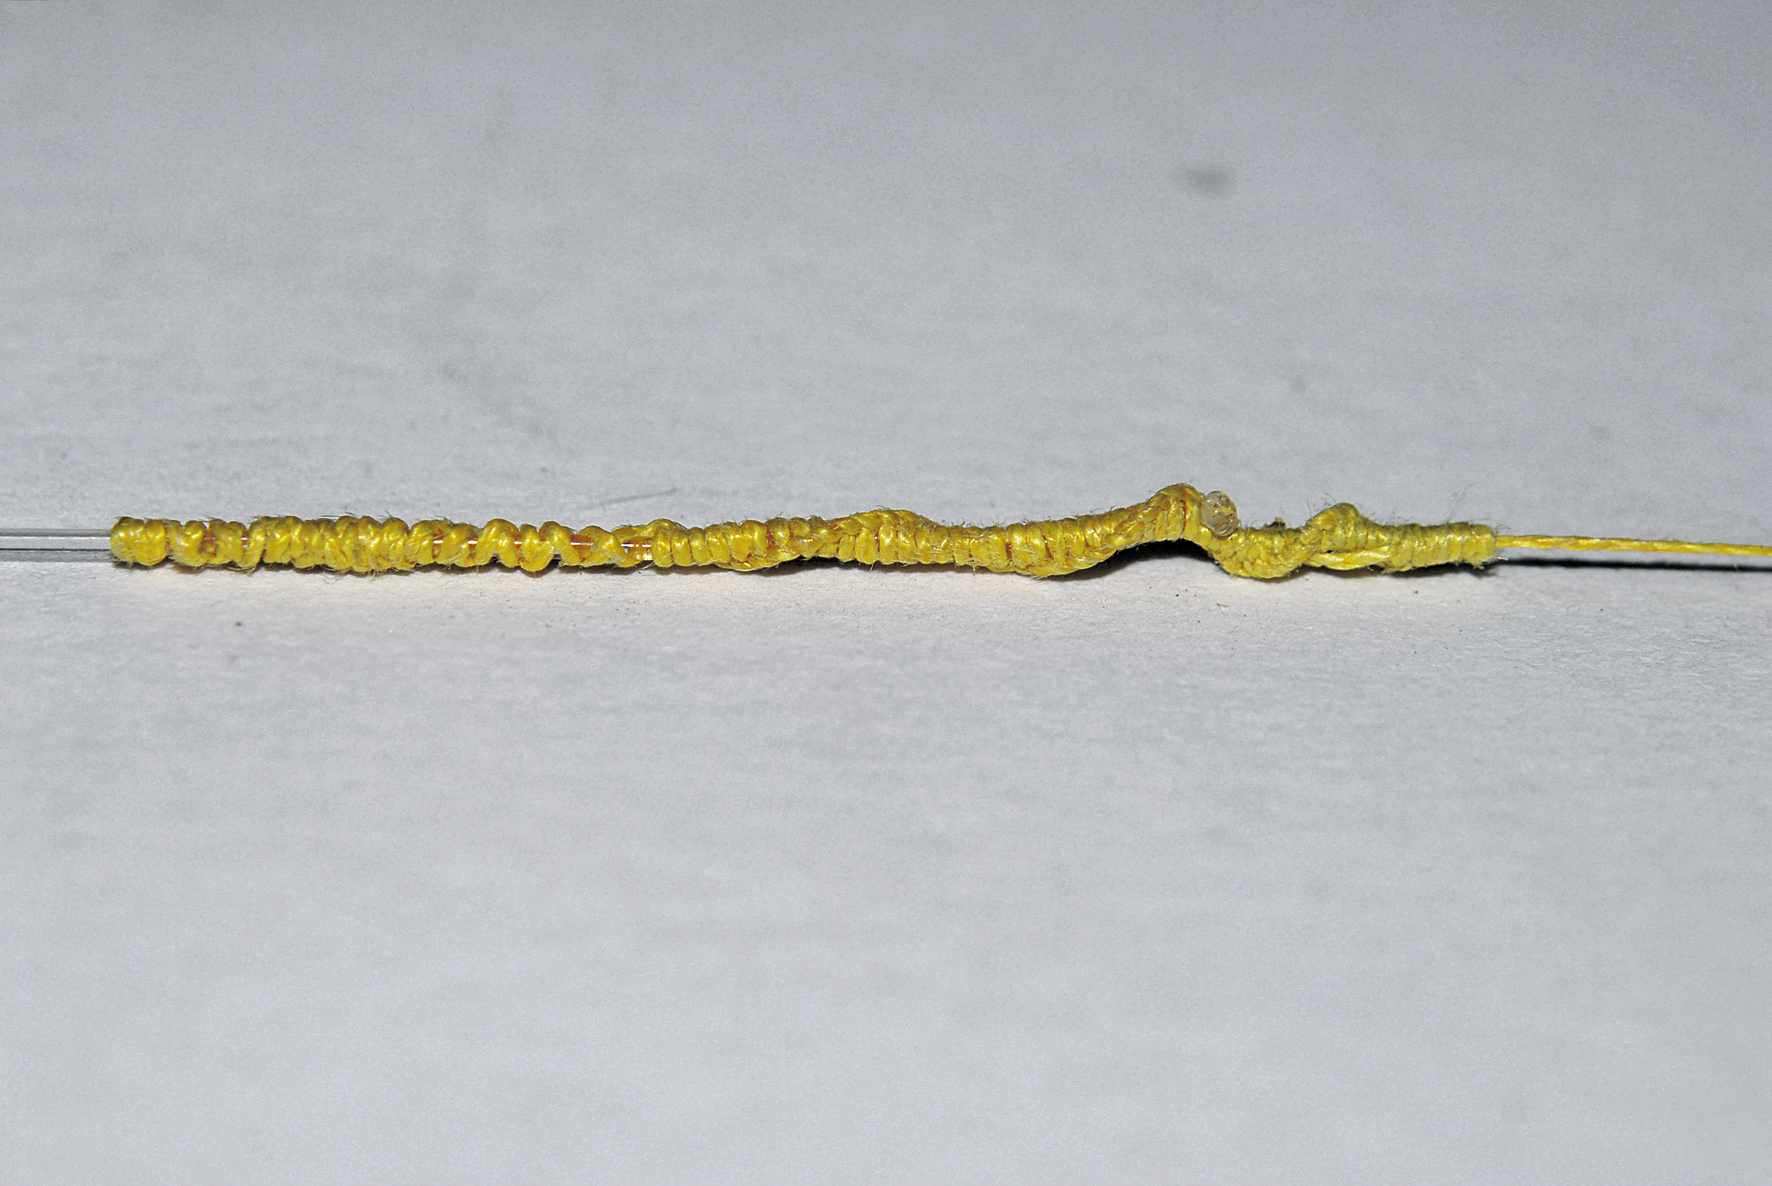
Monofilament is reputed to give the slide bait rig a smoother transition down the line, so many anglers solely run mono on their reels. However, for increased capacity, some anglers predominately load their reels with braid and just use mono for the final 100-150m that the rig slides on. If they hook a predator which takes heaps of line, they always have a good capacity of braid backing line, which will increase their reel’s line-holding abilities. If you want to add a mono leader or top shot of mono to your braid, you’ll need to use a low profile knot. This will let the slide bait rig pass from the braid to the mono leader easily, or for the top shot to exit and enter the guides without fouling. This is an FG knot shown here, however PR knots and similar could be used.
For setting up your basic rig for fishing the SEQ surf you will need a 1.6mm or 1.8mm slide bait rig, some 20-40lb mono or fluoro, some 60-80lb mono or fluoro, some live bait hooks and a grapnel sinker. Quality scissors or mono shears will also be useful. An alternative to heavy mono is wire, which may be required if you are going to target some toothy creatures.

For the attaching the sinker you will generally use slightly lighter line than your main line. This will break first if the sinker becomes snagged, so you won’t lose the entire rig and hooked fish. Generally the length between the sinker and the swivel will be 0.5-1.5m, depending on the ability of your outfit to cast this length and how far off the bottom you want the bait to rest. The swivel and solid ring combo should be supplied in the packet with your slide bait rig. Attach one end of the leader material to the grapnel sinker and the other to the swivel.
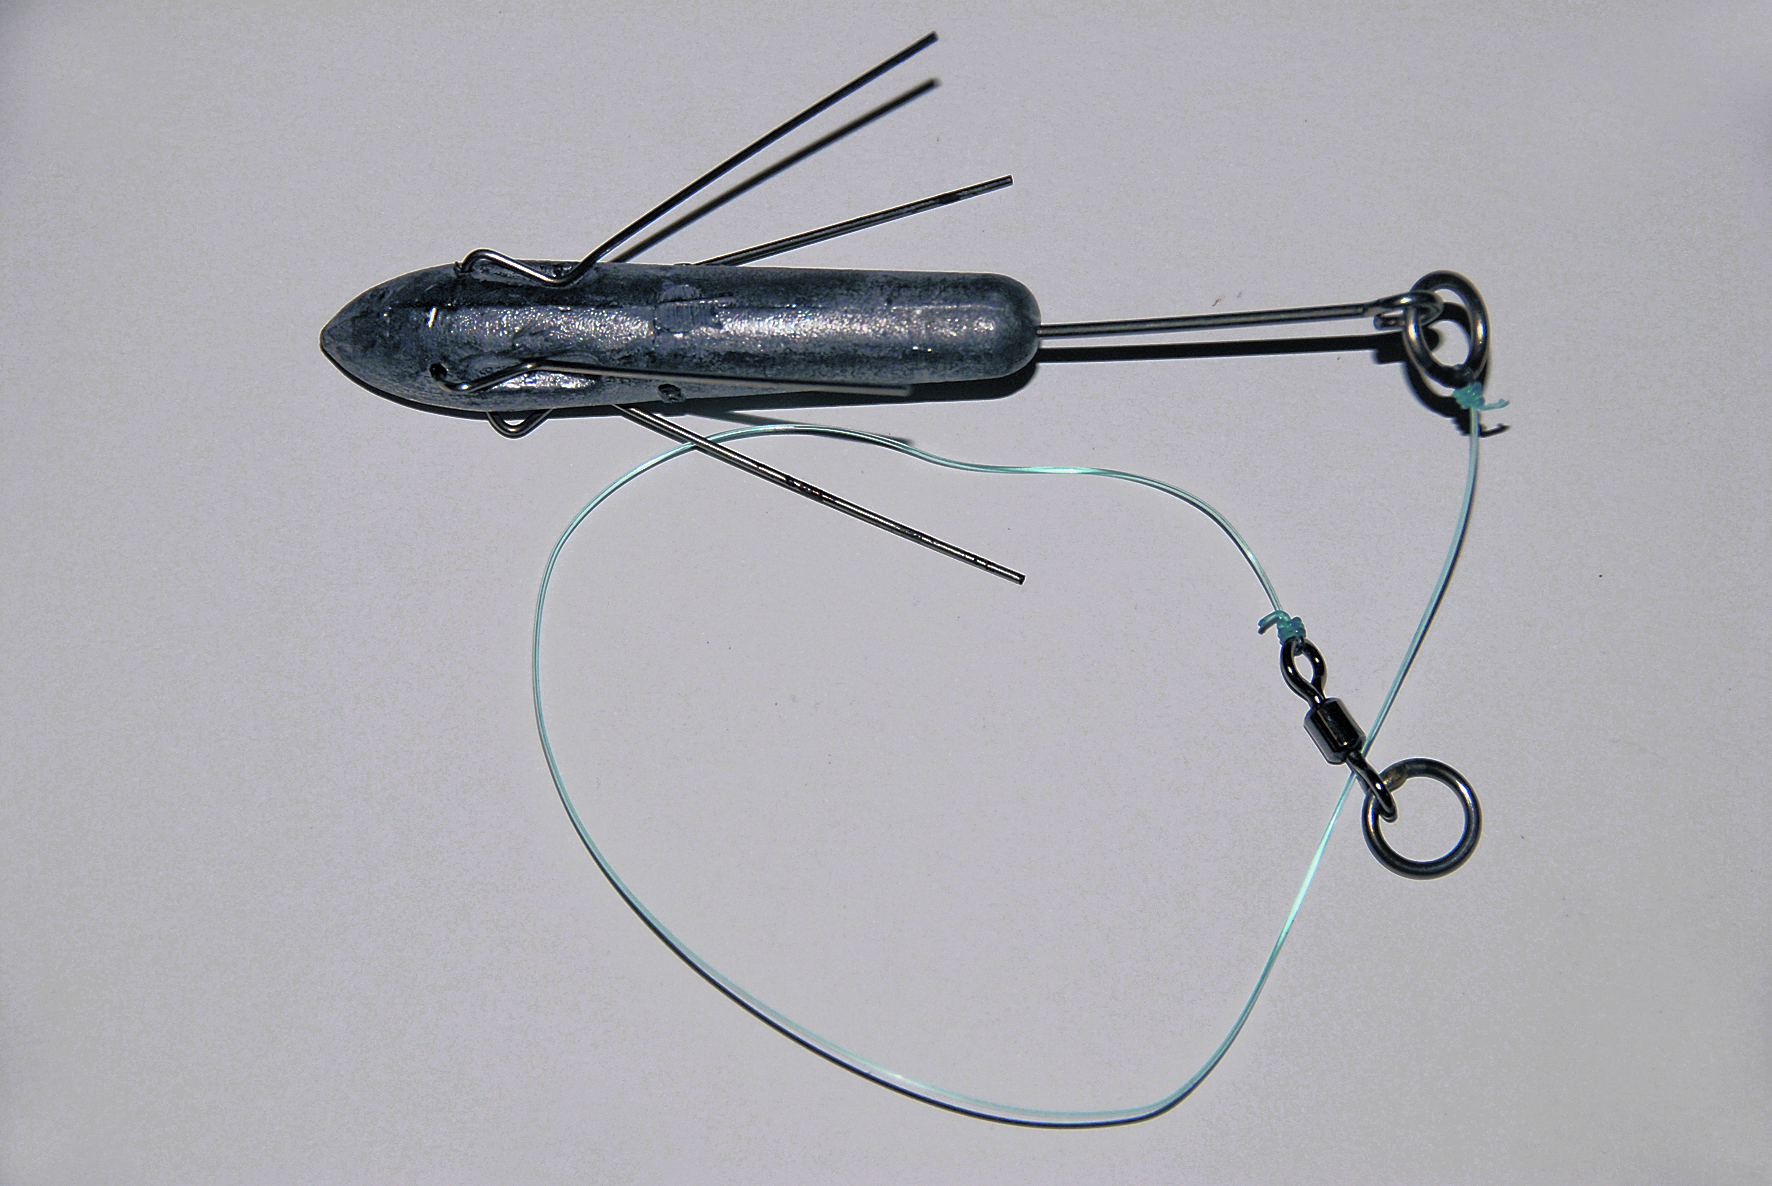
Attach the main line or leader to the solid ring with a sliding uni or a blood knot. It is important that this part of rig is the correct way around, as the slider needs to rest against this solid ring once the bait is fully deployed. The sinker is now ready to be cast out and allowed to settle on the bottom.

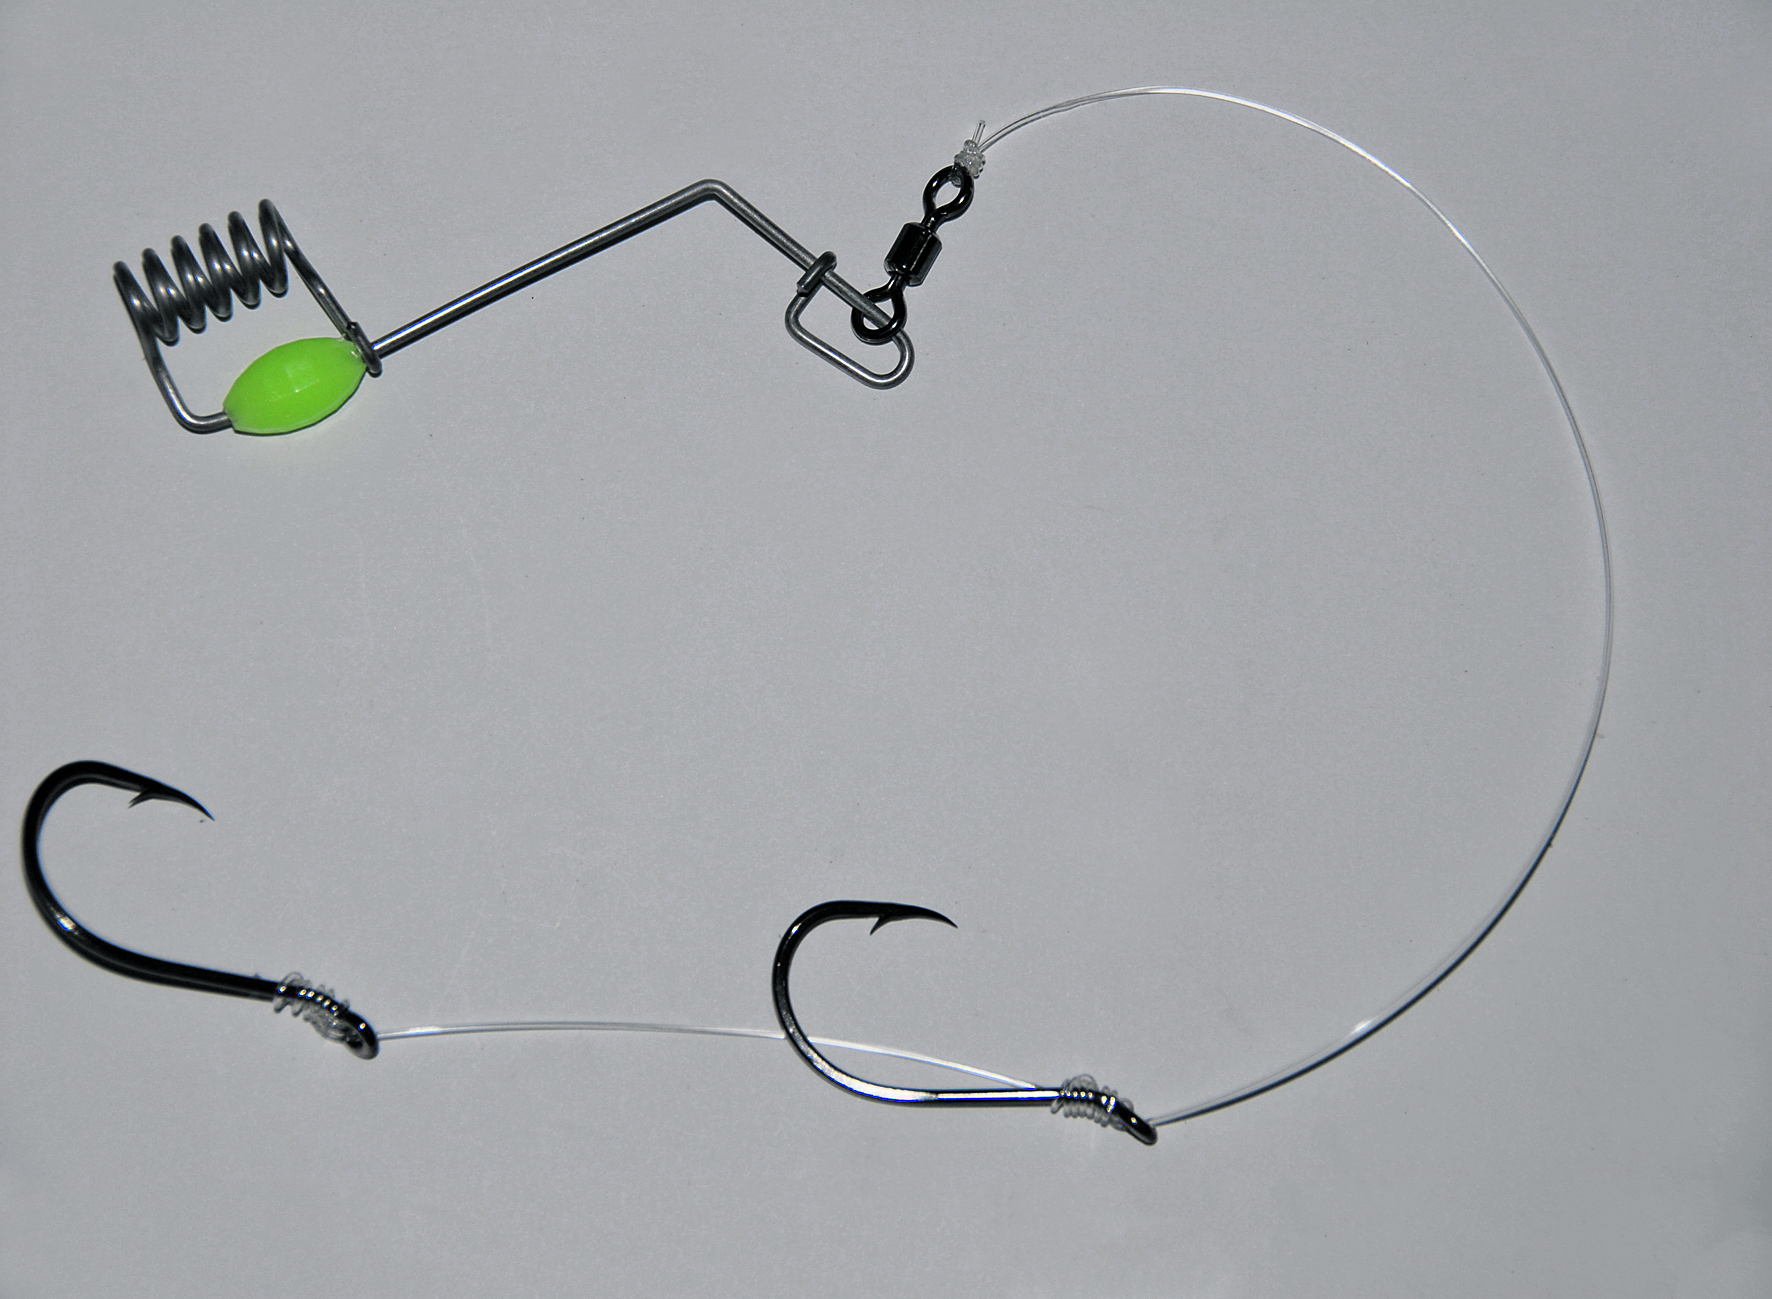
The rig you use for your bait can vary. If you’re targeting mulloway, snapper and the like, a mono leader will suffice. I usually attach two or three hooks to the leader using a simple snell. How large the hooks are and the distance they are spaced apart will vary depending on the bait being used. For toothy creatures such as large greenback tailor, Spanish mackerel and sharks, you will need a wire leader. You may decide to run only a short length of wire between the hooks and then use mono as your main portion of hook rig leader. The leader configuration is generally determined by the possible target species.

Attach the hook rig leader to the swivel on the slide bait rig. I generally keep this leader less than 1m long in turbulent waters as it decreases tangling with the main line. However, in stronger currents and when using larger live baits, a longer leader is desirable.
Once you’ve cast out your sinker and it has bedded in the sand and silt, the next step is to attach the slide bait rig to the main line. The rig needs to be put on so that the arm of the rig is facing towards the sinker and the spiral portion is facing towards the rod. Hold the front of the slider rig and the main line (going to the rod) between your thumb and forefinger of your left hand. Pass the line around the back side of the rig (furthest from you) then between the main arm and opened clip before winding it around the spiral closest to your left hand.
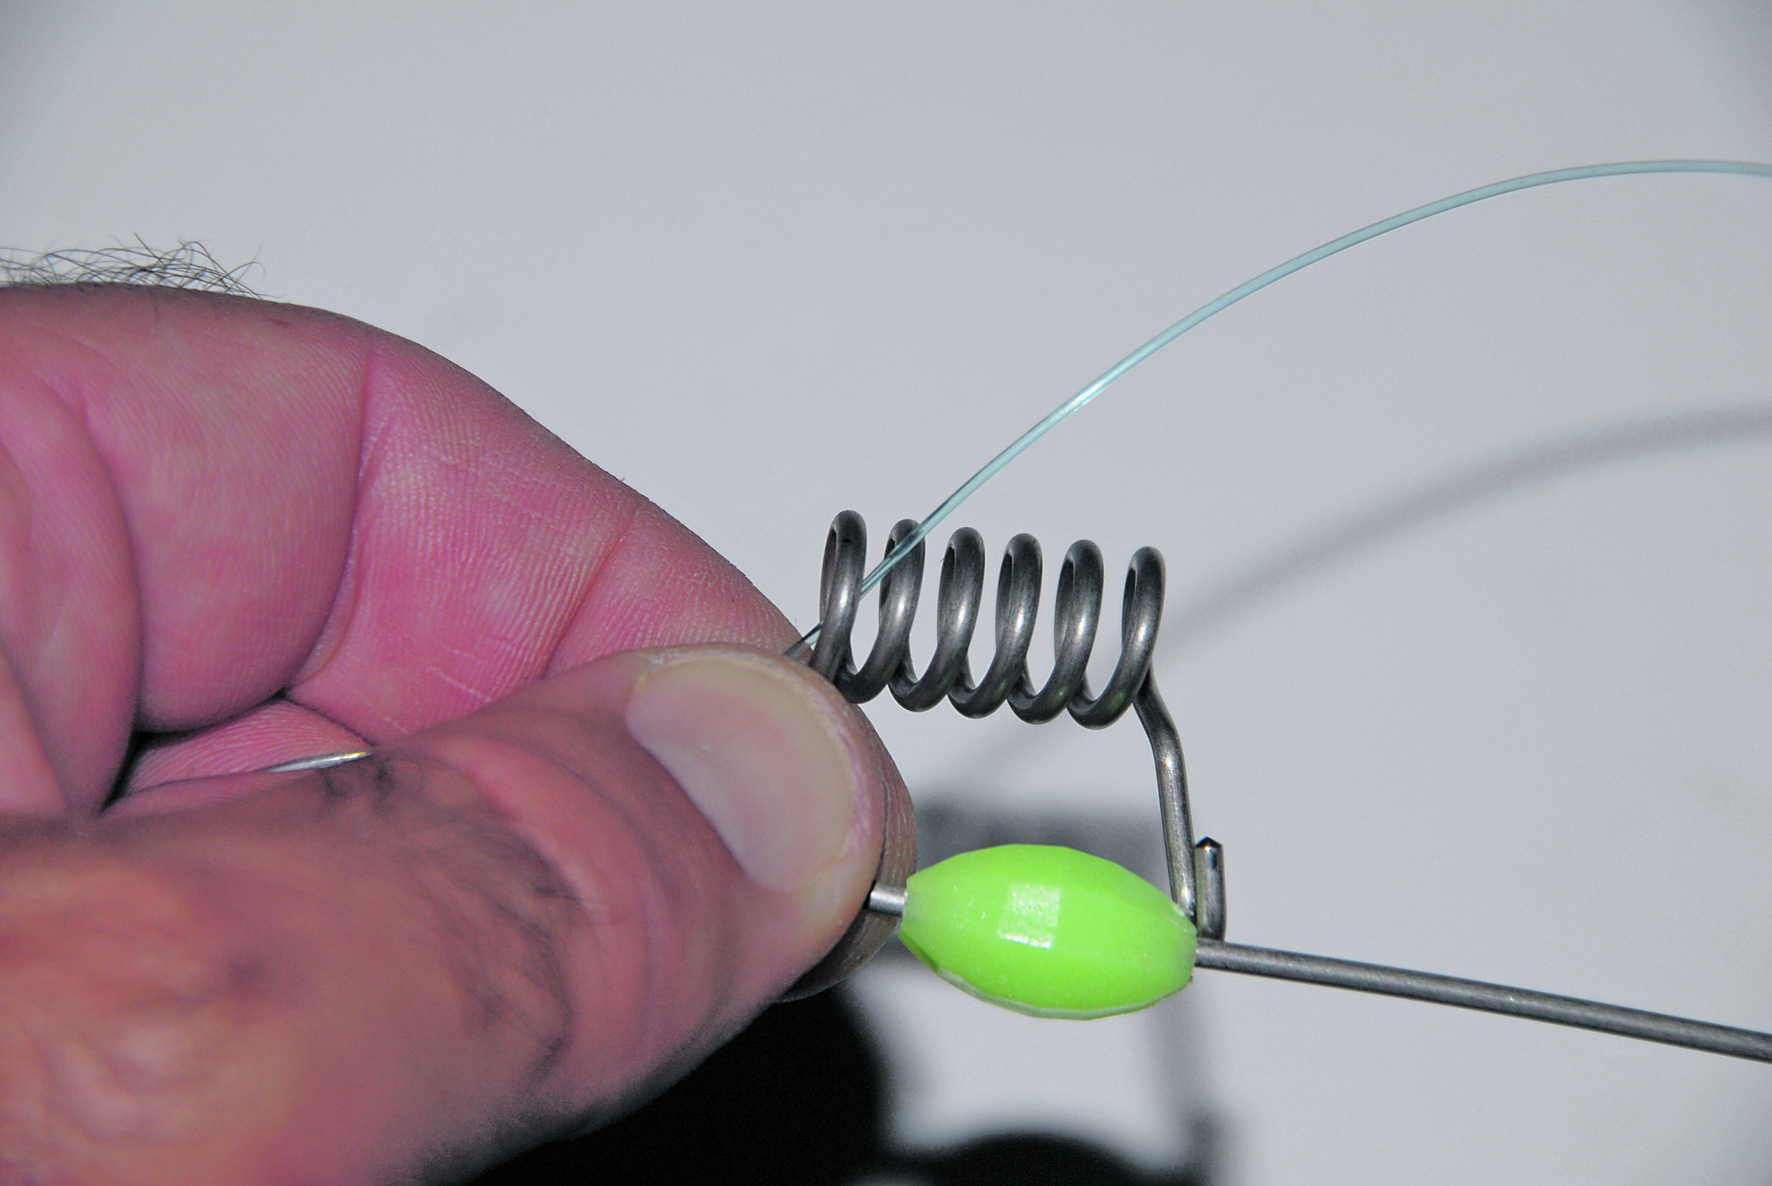
Repeat this process five or six times or until the main line is running straight through the wire spiral as shown. Close the clip, making sure that the lumo bead is still in position directly under the spiral. This is to ensure that the clip does not open under extreme pressure once the spiral is resting against the solid ring.

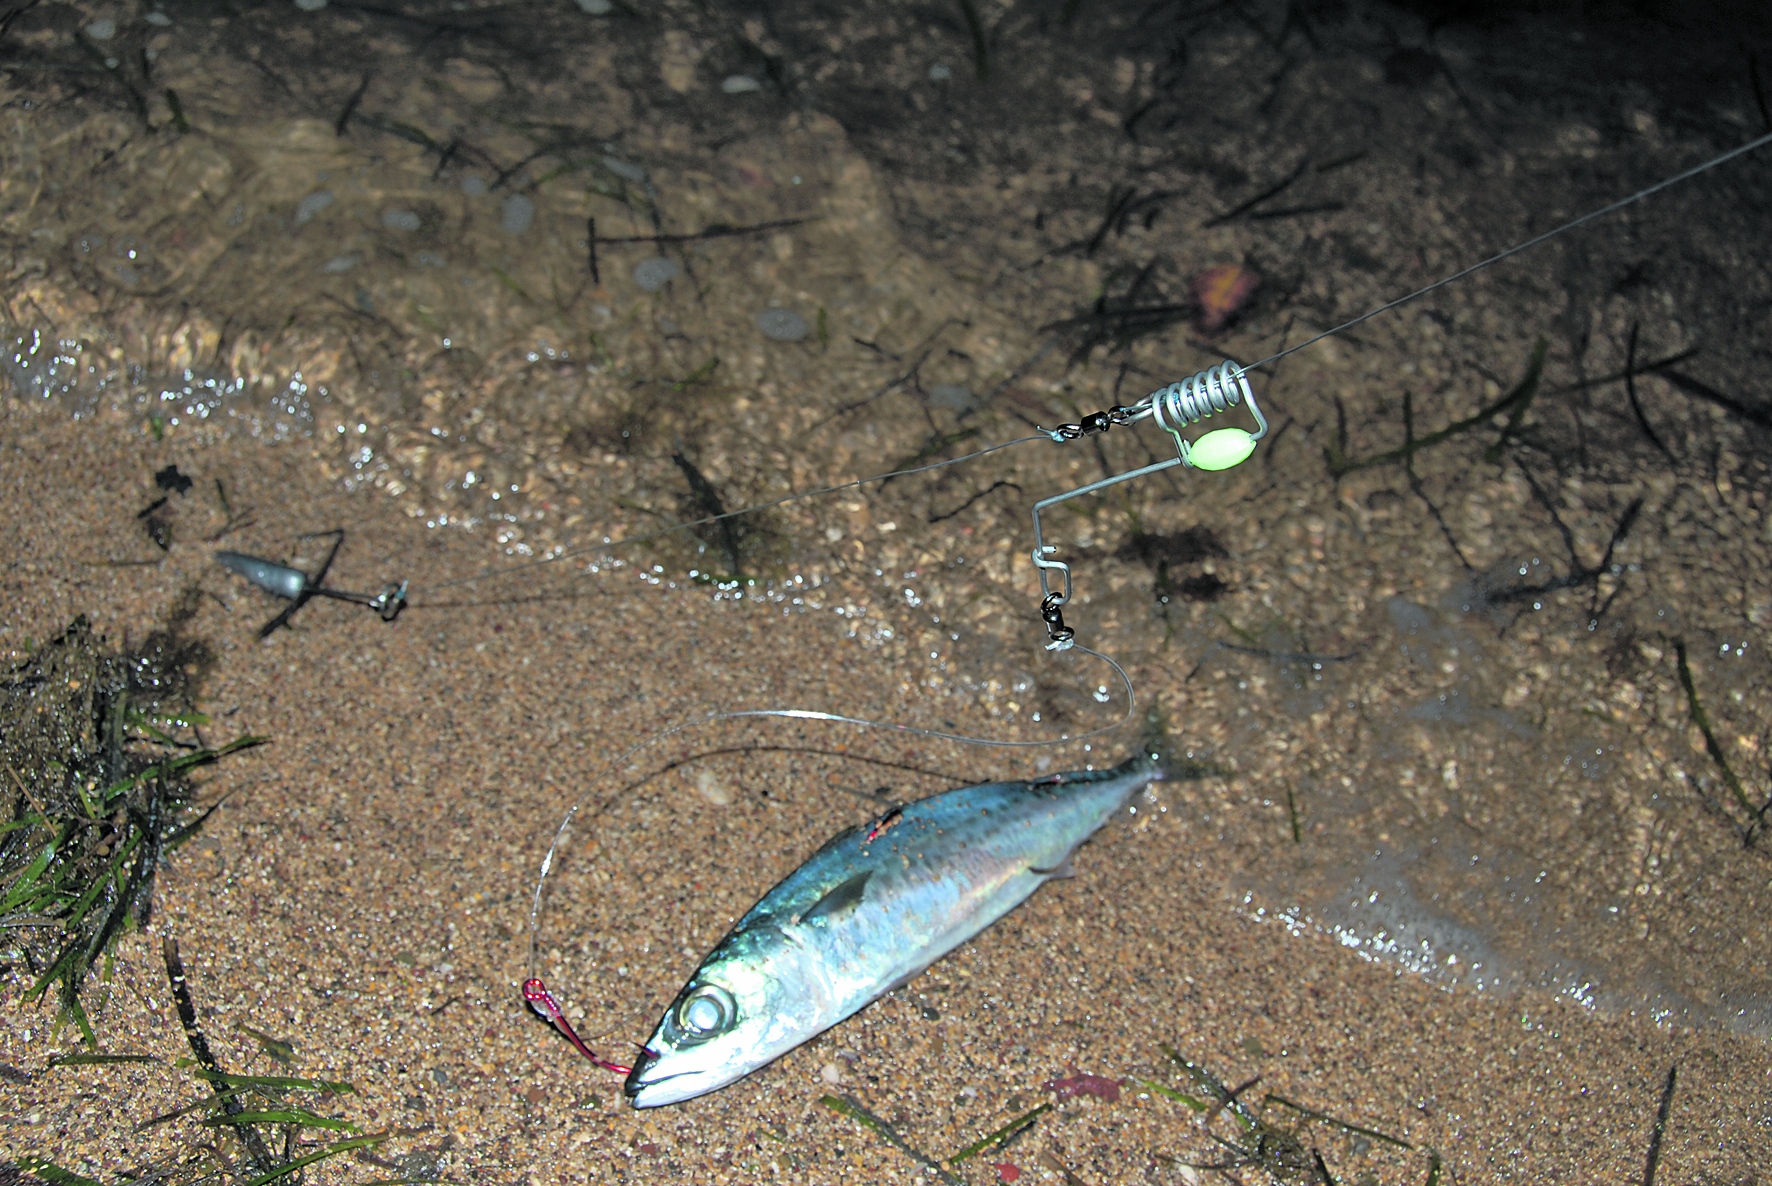
This is how your grapnel sinker will sit once it is set on a sandy bottom. Light lifting of the rod tip, and turbulence on the bottom, will help it to sink into the sandy bottom. A good purchase will allow you to keep the main line tight, which will aid the bait’s transit down the line. With the sinker set in the bottom and the rig on the main line now you just have to add the bait (dead or alive) to your hook rig and put the bait in the water. Tensioning and slacking of the line will help to coax the rig and bait out along the line until it reaches the solid ring. Sometimes you can use the current to your advantage to help drag the bait out.
Baits are generally left out in the water for a long period, especially large live offerings. A solid strike of the rod will lift the sinker from the sand when you want to wind in. Once retrieved, your rig will look somewhat like this, the same as it does when out in the water. You than unclip and remove the slide bait rig from the line so you can cast the sinker out again and repeat the process.