by Gordon Macdonald •
These days, soft plastics are commonly used for a broad array of species in salt and freshwater environments. Many good fishing areas contain heavy structure in the form of mangrove snags, weed beds, reef structure and rock walls. This kind of structure holds quality fish therefore it pays to be able to present your soft plastic in a manner that reduces snagging and allows you to fish it effectively.
Although called weedless rigging, the following method will reduce snagging on all manner of aquatic obstructions and will give you the confidence to fish your plastic closer to the structure than you normally would dare.
Many types of plastics are used to target species in fresh and saltwater environments. Larger offerings have many different rigging methods available to them such as TT Snakeheads, Owner Beast Hooks and Mustad Power Lock Hooks, just to name a few. For smaller plastics the range is extremely limited.
For my smaller plastics I commonly rig using a very simple method that allows a huge combination of different weighting and hook combinations because all the hooks and weights are interchangeable. This system is especially useful when fishing from a kayak, via Shank’s pony or when travelling as it reduces the number of hook rigs you require to rig a range of smaller plastic sizes.
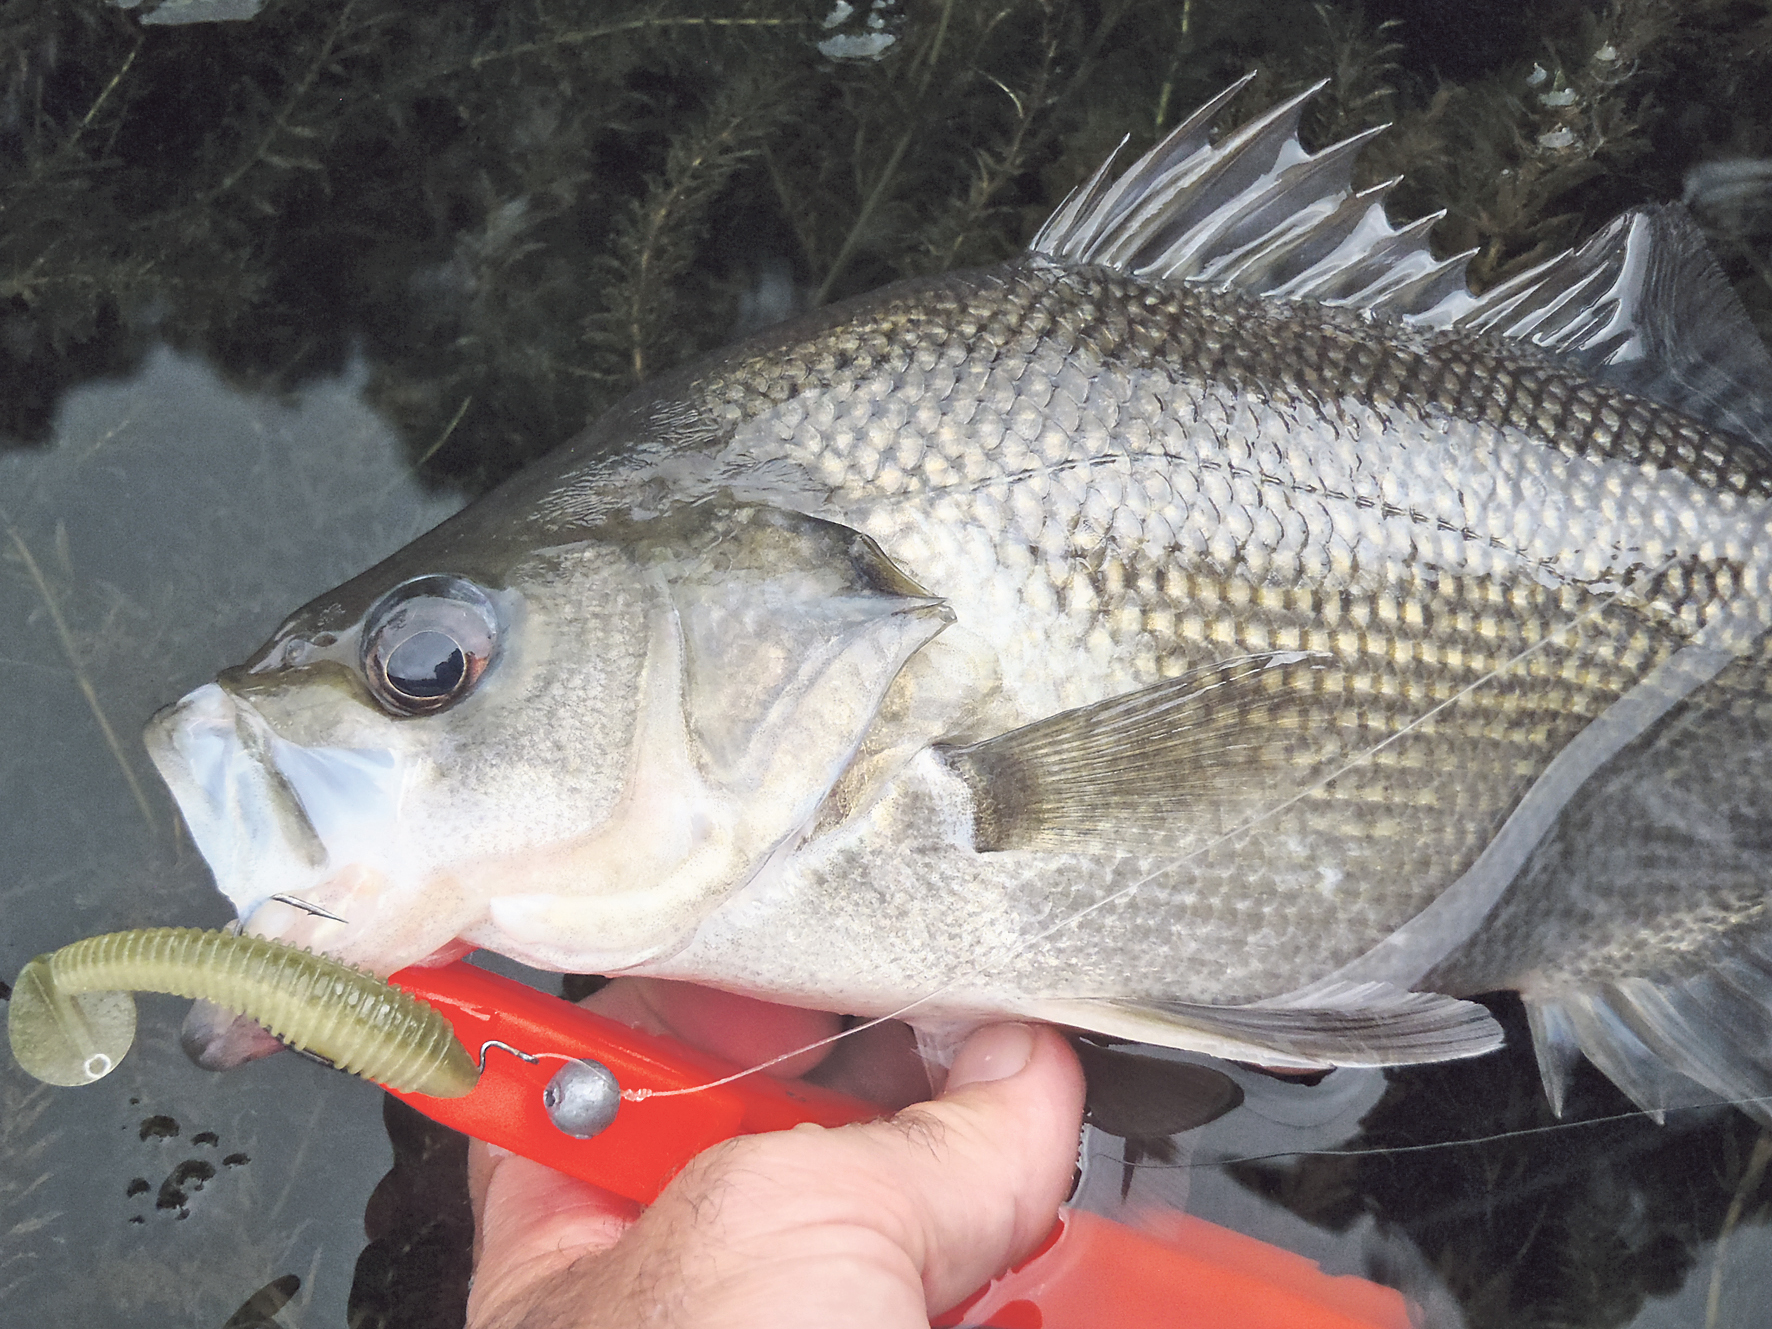
Plastics of 10cm or shorter are great for species such as bass, jungle perch, flathead, bream and a host of others. I commonly use plastics of this size when targeting bass, especially when the barometer is low and they are shut down, which often results in them hanging deeper in the water column.
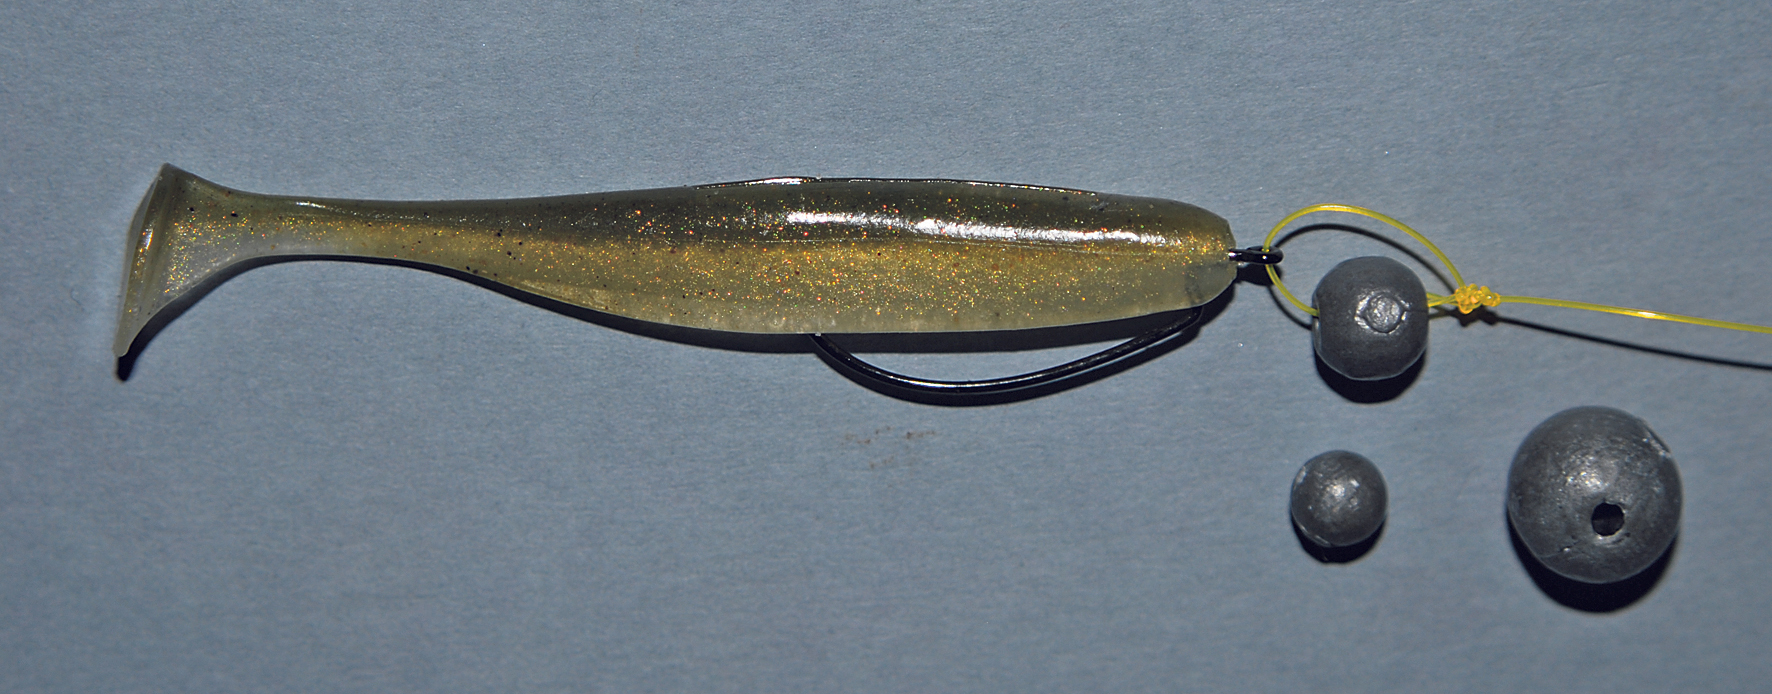
For this rigging method you will need an array of good quality small (size #4 to #1/0) worm hooks and small sinkers. Most of the larger hook companies make quality worm hooks including Gamakatsu (EWG Worm and G-Lock), Mustad (Ultra-Lock Light Wire and Ultra-Point), Owner (Wide Gap Plus), Daiichi (Worm 360) and numerous others. You will need a worm hook that has the point in line with the shank near the eyelet for the best weedless rigging. I mainly use the Gamakatsu’s as they are readily available and come in smaller sizes (down to a size #4) than many of the others and are made from a fine yet strong wire.
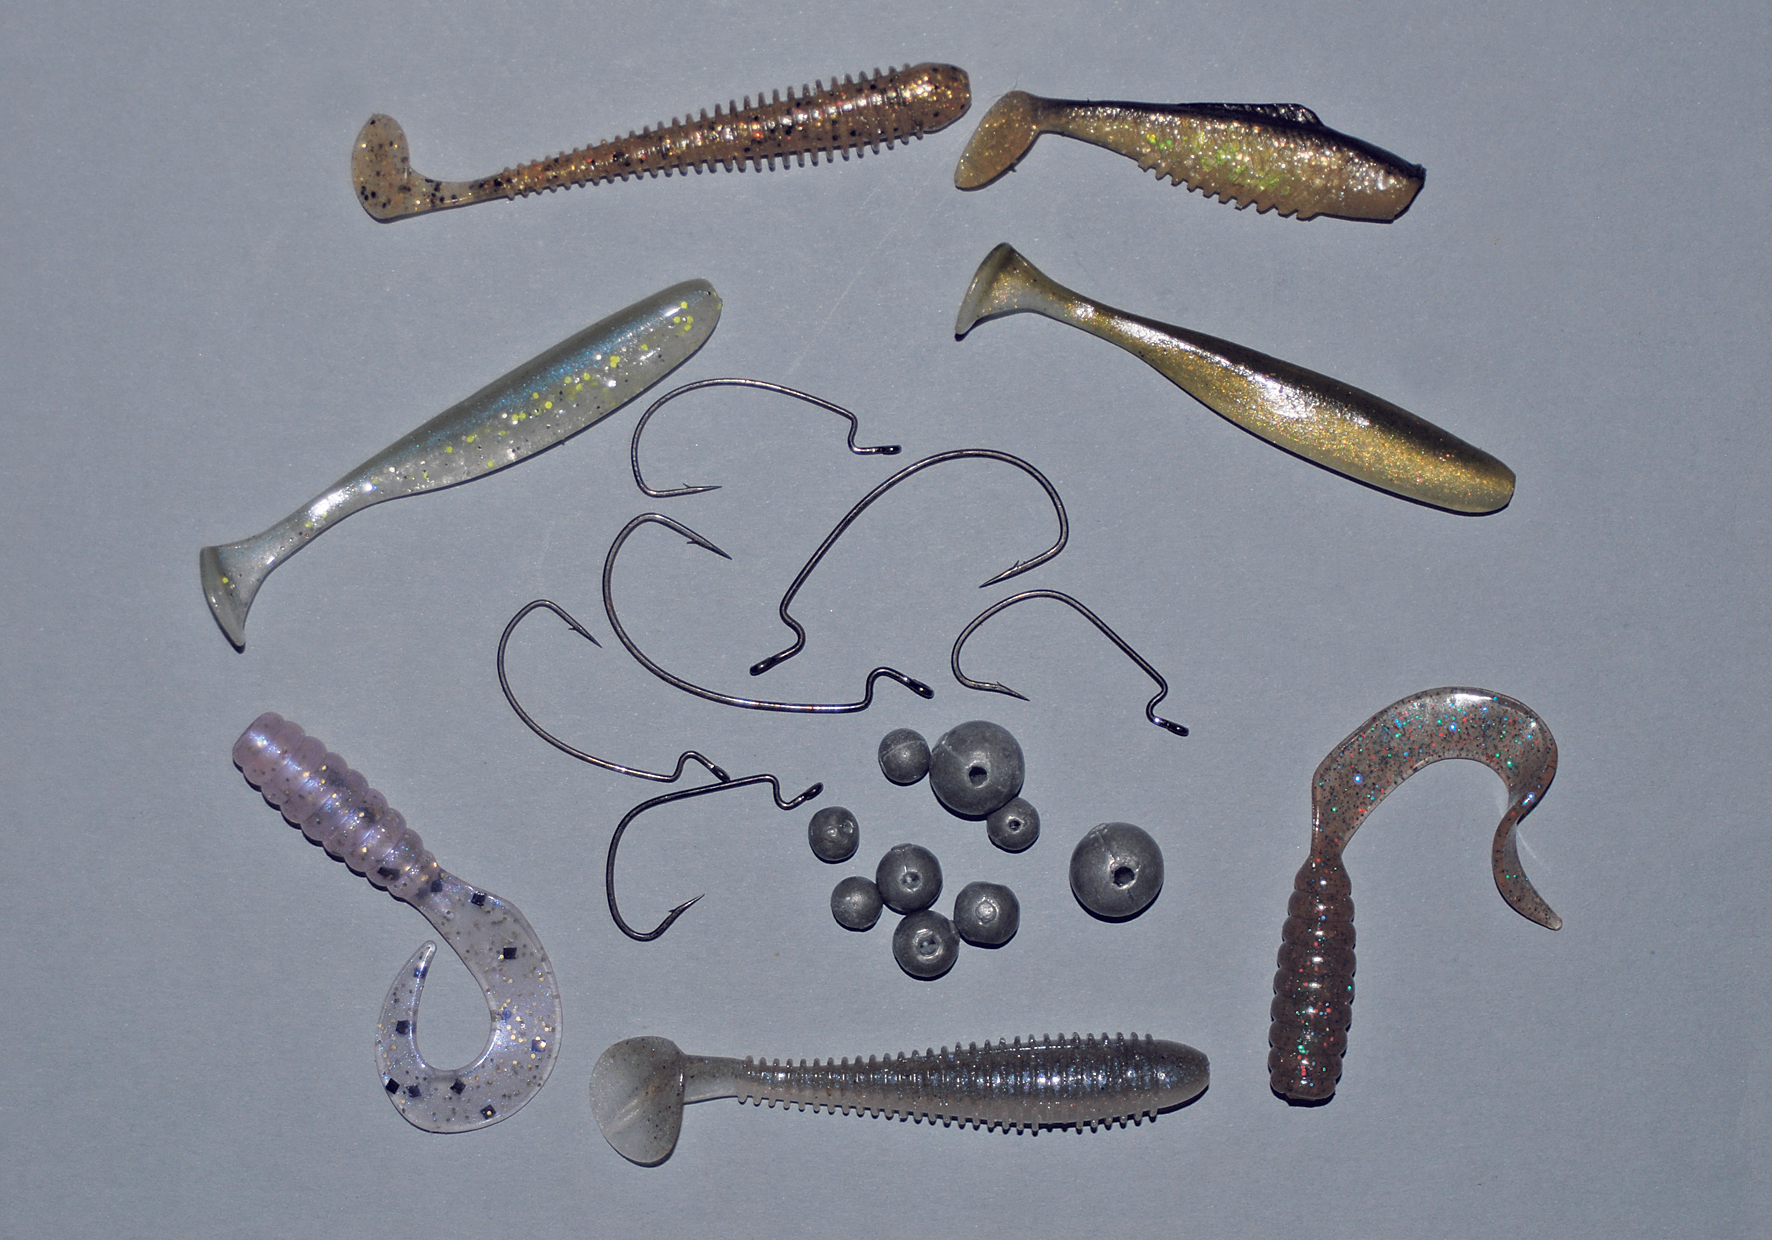
I generally use size #2 and #1 for many of the smaller plastics that I like to fish. These include paddle-tail grubs and shads, curl-tail grubs and jerk-shad styles however numerous other plastics can be rigged weedless as well. For the weighting I use small ball sinkers, generally from size #00 to #1, depending on the depth of water and current. These can be purchased in individual packets, however many companies have combination packs of different sizes, including L.Wilson and Co. under their Surecatch brand. With several sizes of sinkers and hooks you have a huge combination of weedless rigging options for your smaller plastics. Let’s look at setting up our weedless rig.
WEEDLESS RIGGING
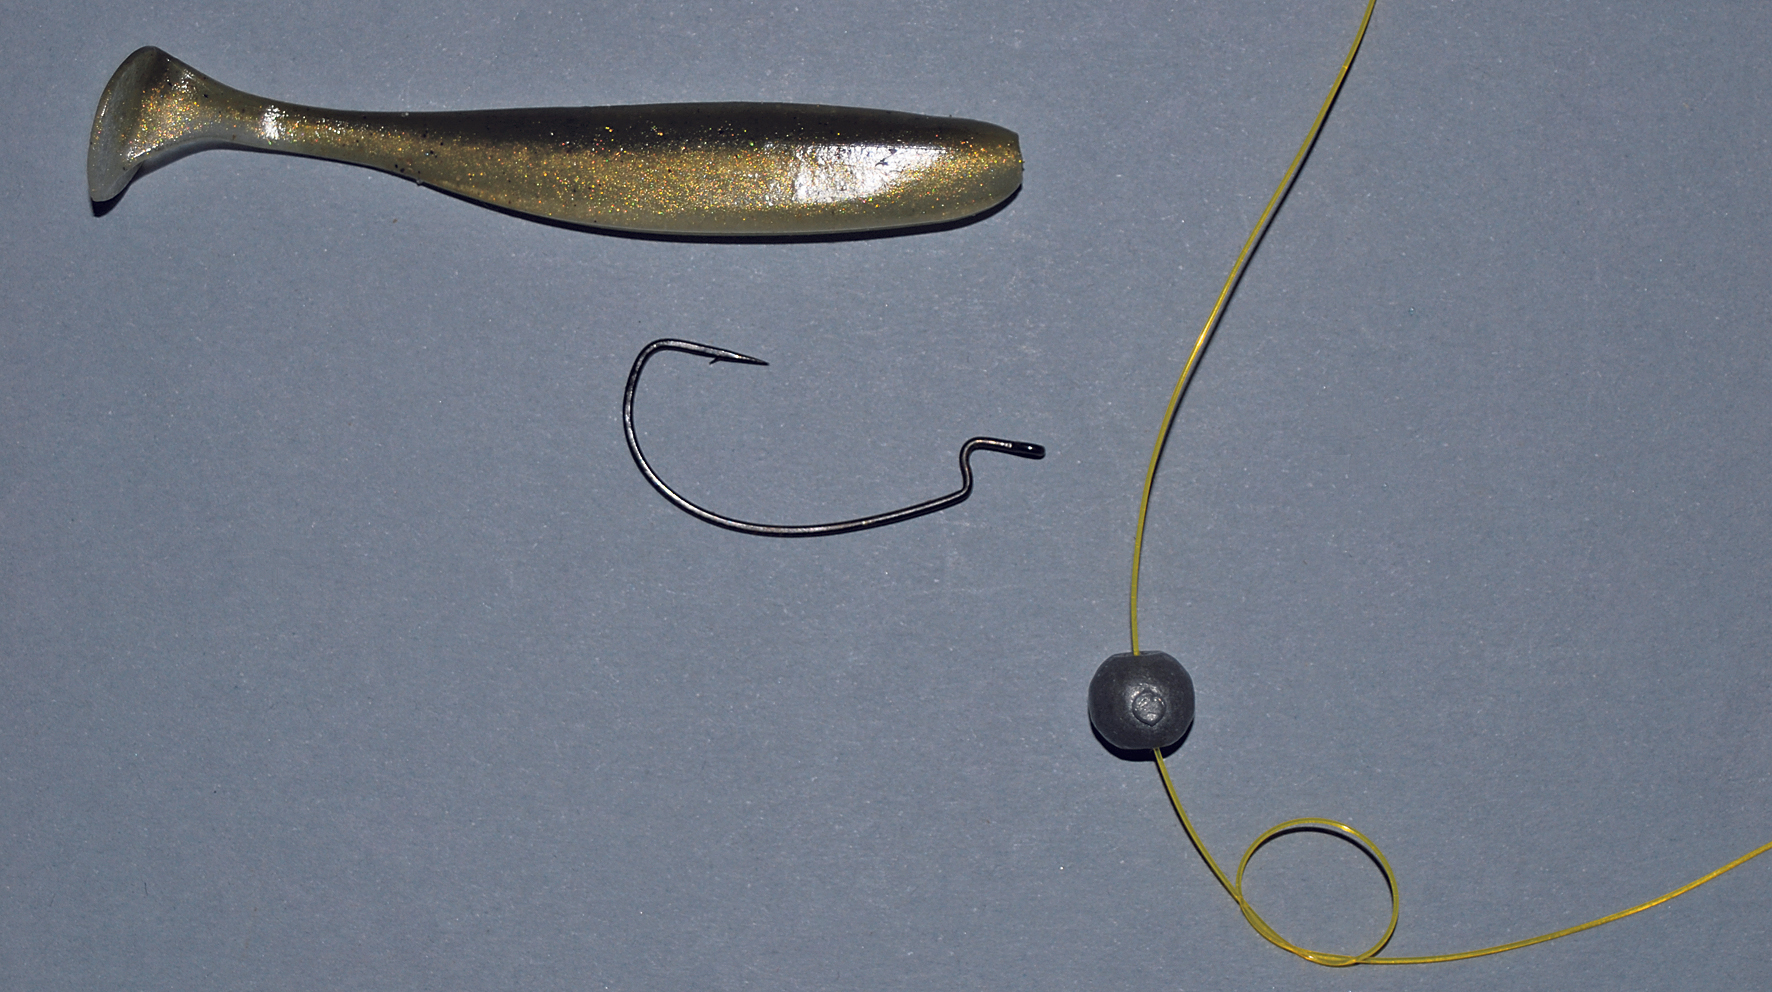
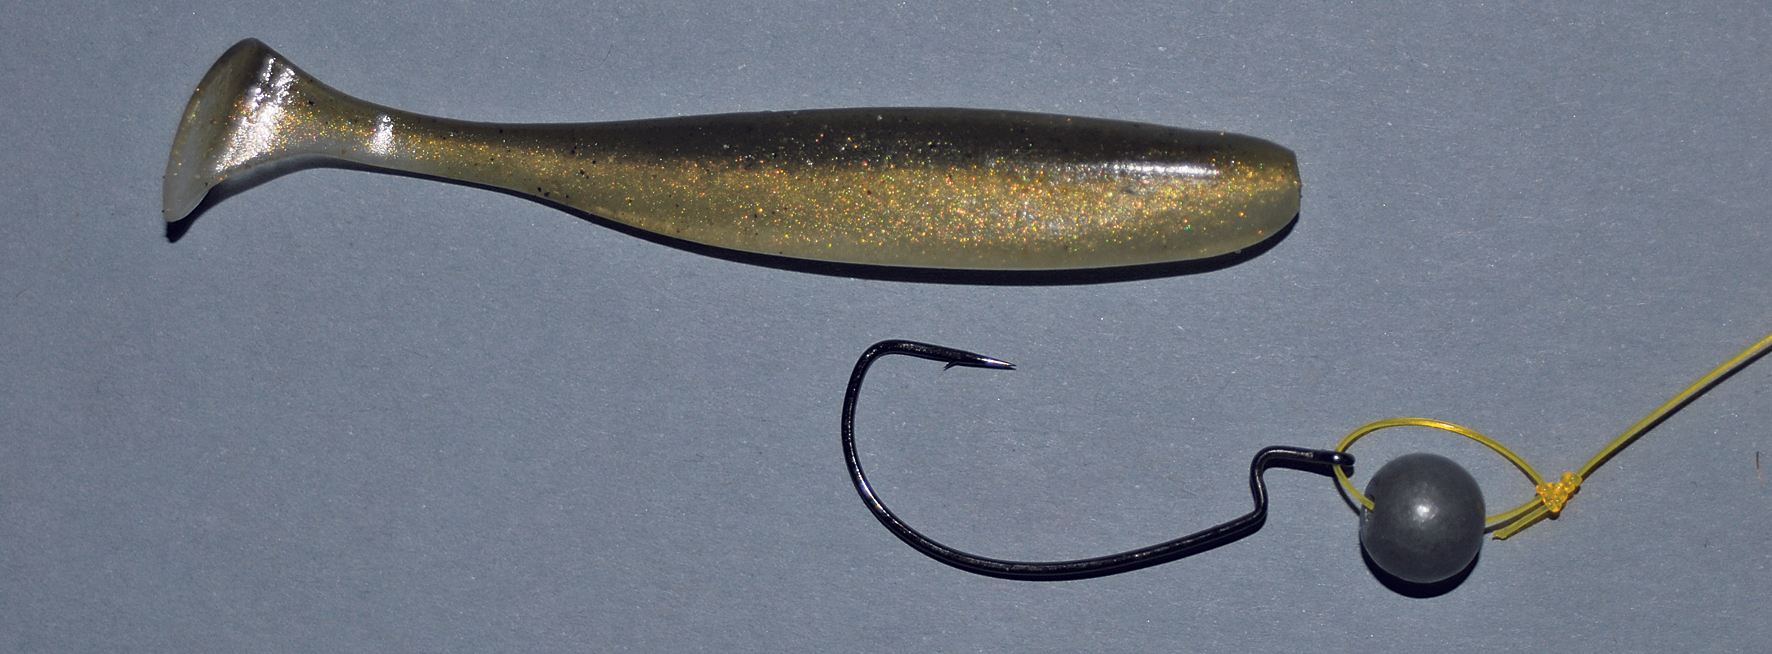
Step 1
Choose a suitable hook size for your plastic and the sinker weight that best suits the water depth and conditions you are fishing under. Generally I use a fluorocarbon leader however for the sake of this rigging demonstration I am using some high visibility monofilament, so that you can see it easier in the images. Cut a length of leader and do a simple overhand knot before placing the tag end through the sinker.
Step 2
Now pass the tag end through the eye of the hook and then back though the overhand knot from the same side that the tag end exited the knot.
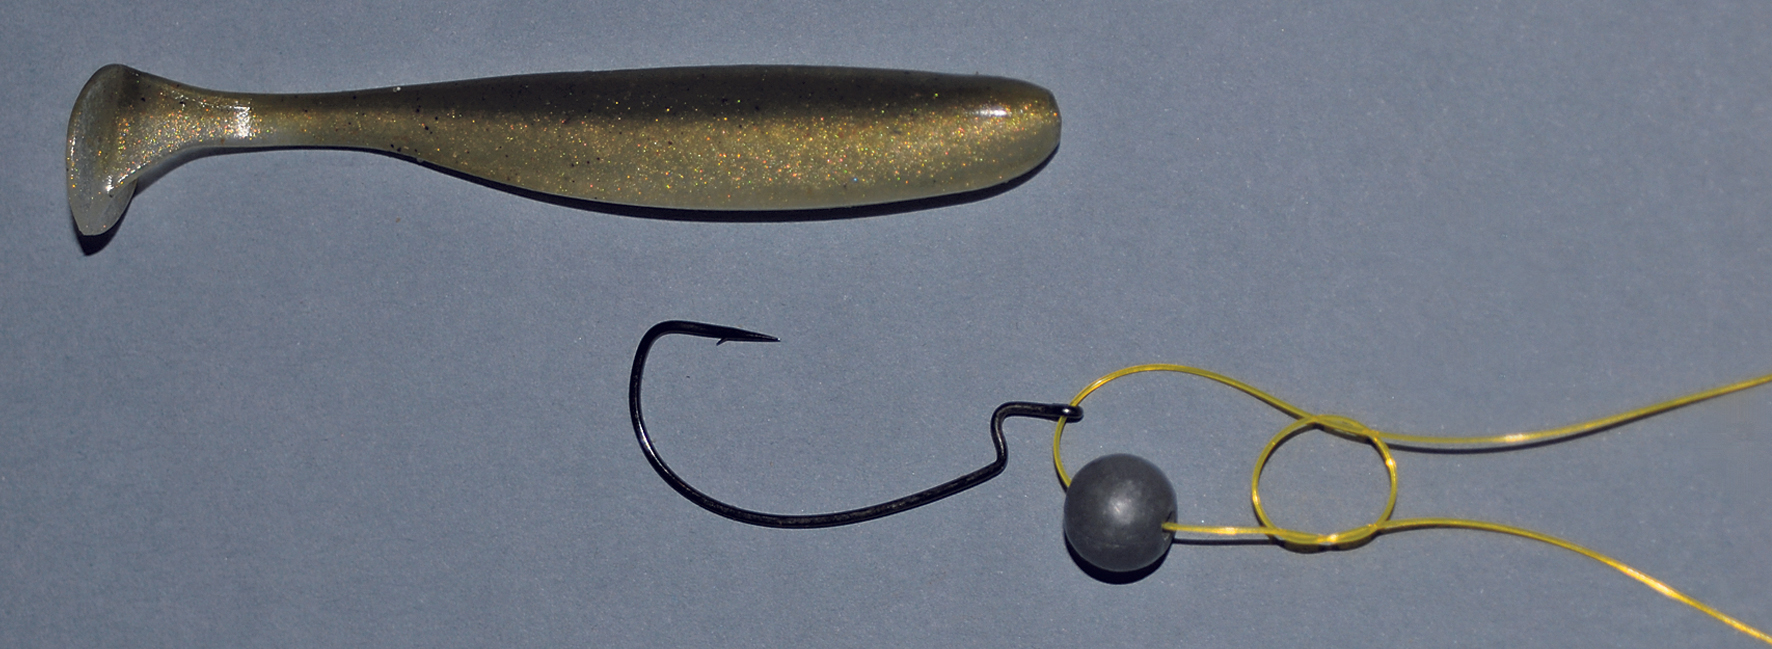
Step 3
Pull the overhand knot up tightly around the leader as shown.
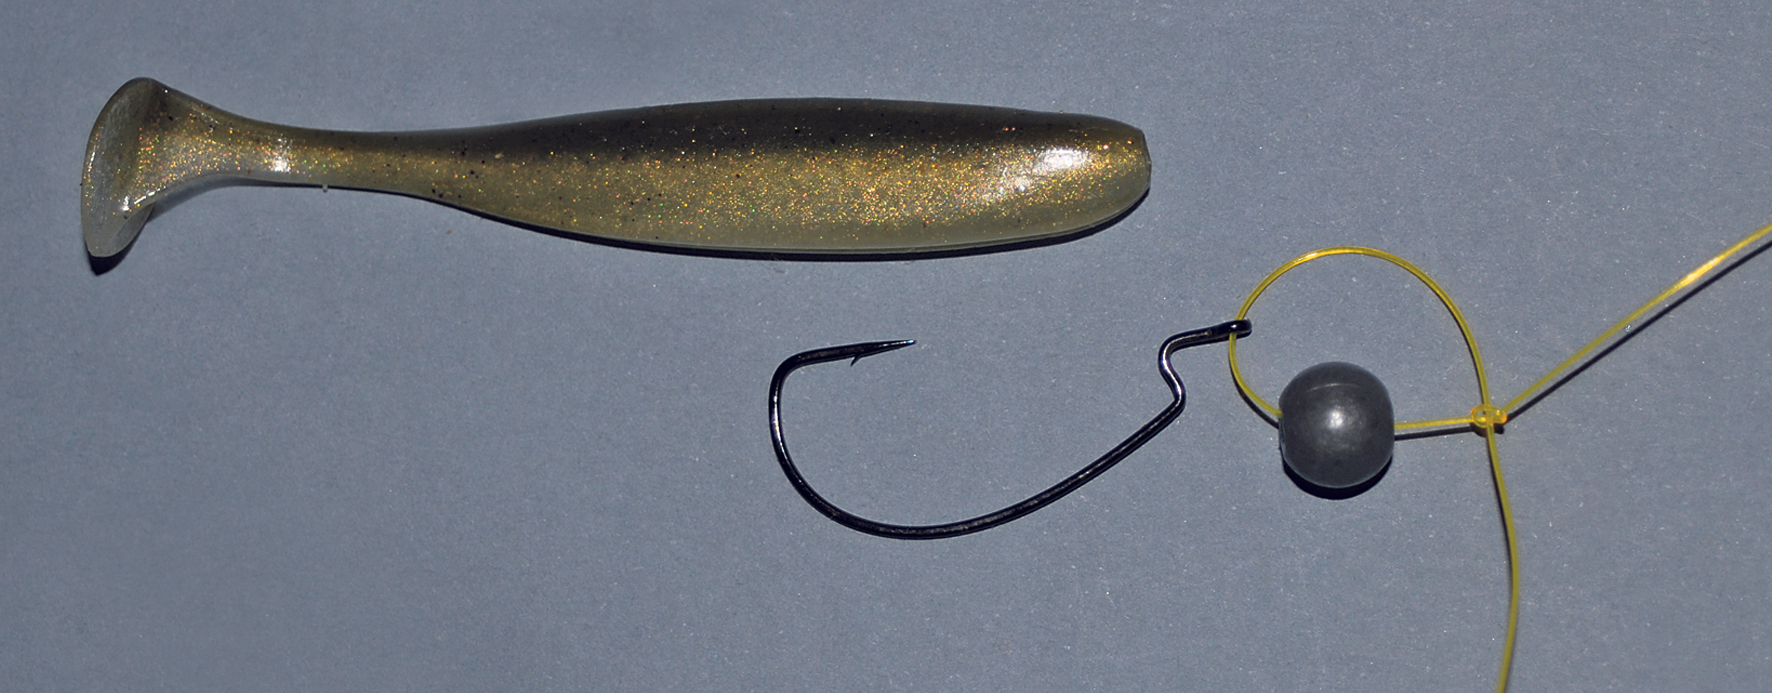
Step 4
Wrap the tag end around the main leader six or so times and then pass the tag end back through the loop that has now formed adjacent your overhand knot.
Step 5
Pull this knot up tightly but ensure that the loop is large enough so that the sinker can swing freely. This part of the rigging is complete but we still need to put our plastic on.
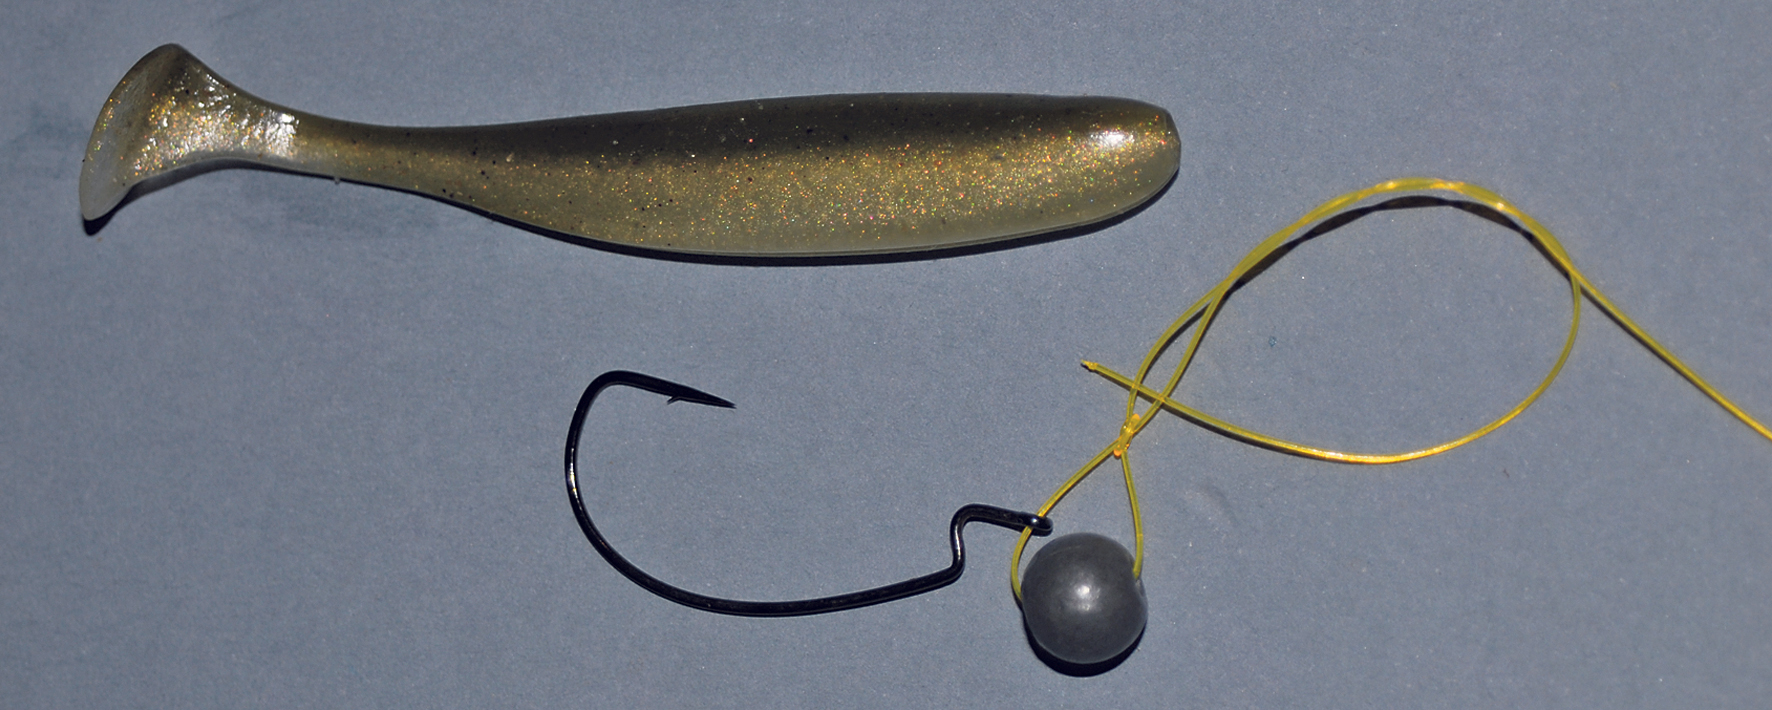
Step 6
Push the point of the hook into the centre at the head and then it pass out the chin area of the plastic as shown.
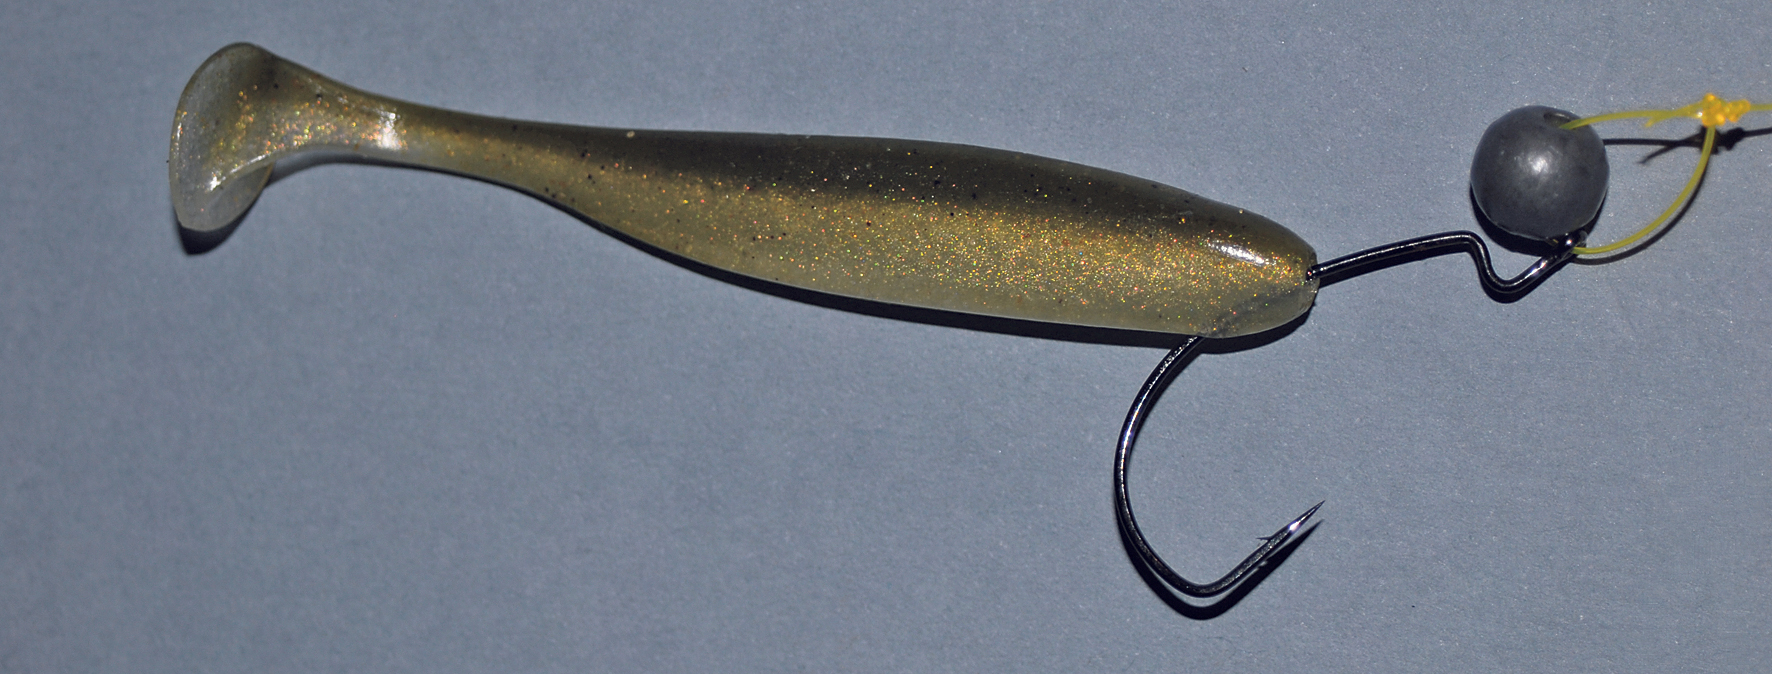
Step 7
Push the plastic right up the hook and turn it 180 degrees until the penetrated section sits on the kink near the eye of the hook. Work out the position at which the plastic coincides with the rear of the hook and then pass the point fully through the plastic so the point exits the back centrally.
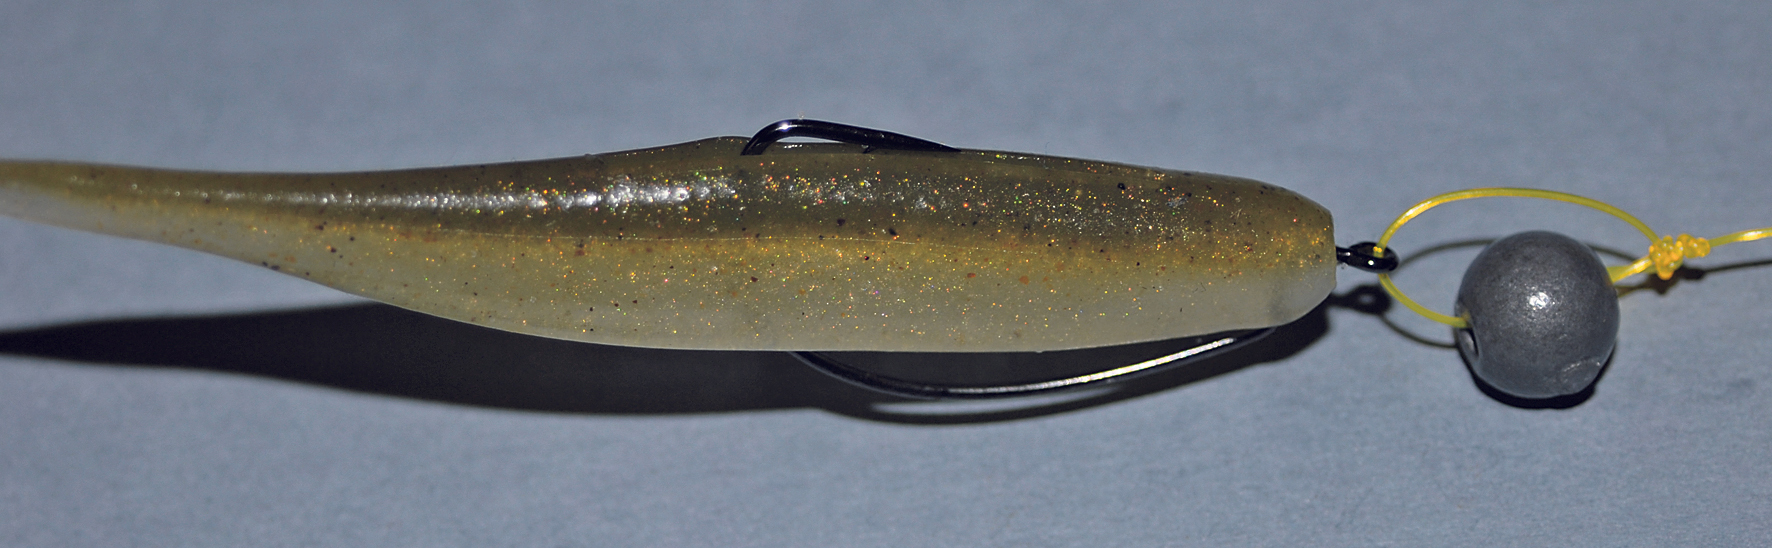
Step 8
When viewed from above, you will note that the hook sits flush along the back of the plastic. Many plastics (including this Keitech paddle tail) have a small groove for the hook point to sit in. This increases snag proofing but you can even push the hook point lightly into the plastic for increased snagging protection in heavy cover.
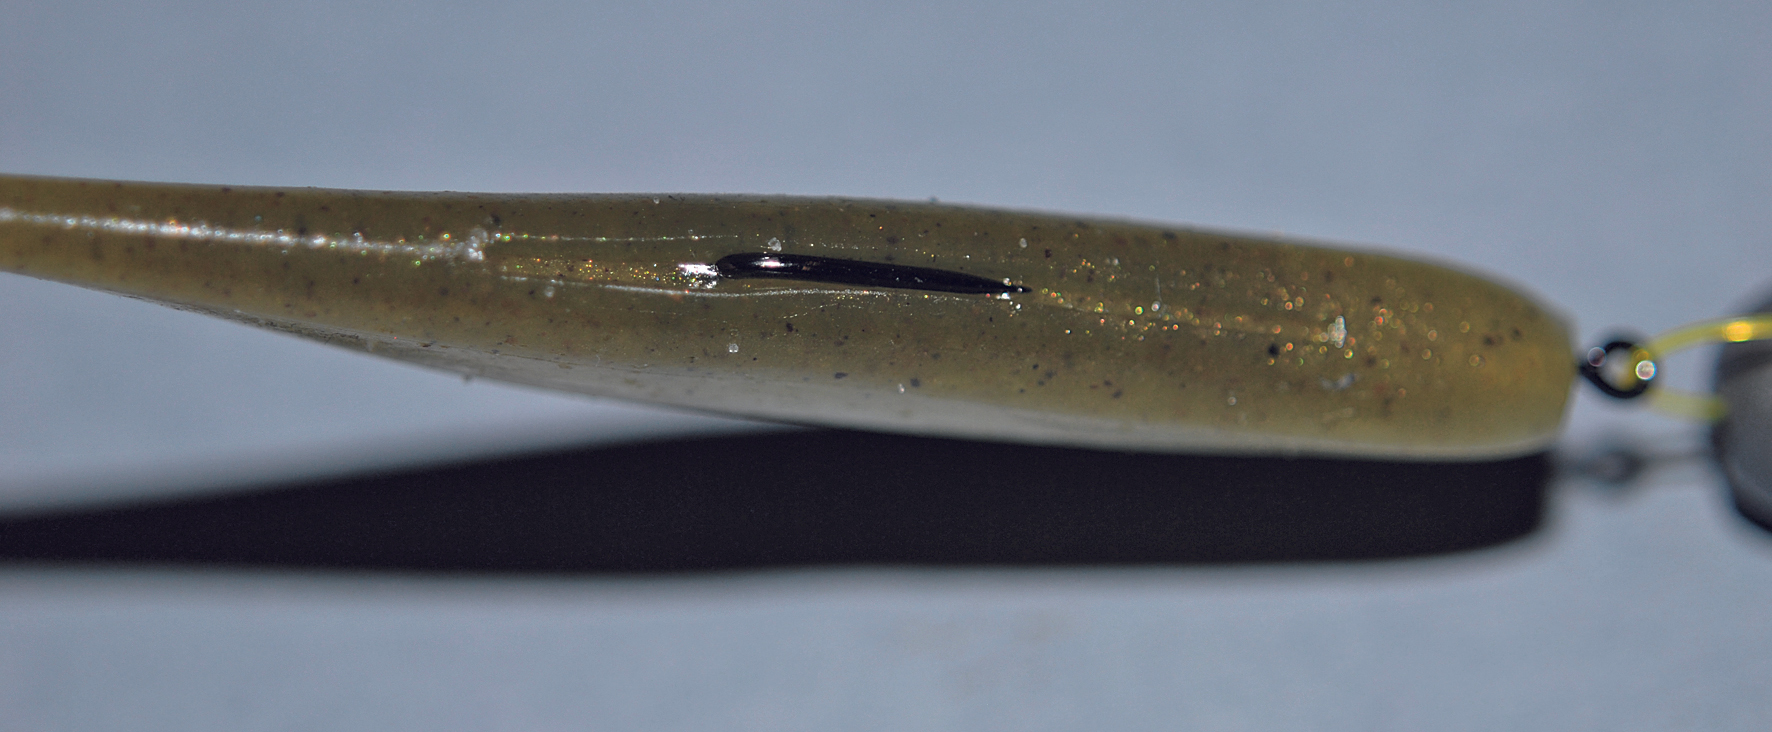
Step 9
With this basic rig you can fish your plastic in heavy cover with minimal chance of fouling. Additionally, it is easy to change the weight on the plastic when required by simply cutting the leader and re-tying the knot.
CONCLUSION
Weedless rigging makes a lot of sense when fishing around weed beds, timber or rocky areas. I use it a lot for bass fishing from the kayak as it decreases the amount of tackle I need to carry and is a convenient and cost effective way to fish your plastics. When a fish strikes, the hook point pushes outwards prominently and the hook is easily set.
This rigging can be done with larger plastics by upgrading the hook and sinker size and I even use it to lightly weight deceiver style flies when the need arises. You will find it suits virtually all your plastic styles and you will soon be confidently fishing your offerings closer to structure, which will increase the number of strikes you receive. From here a healthy drag setting and a bit of luck will be required to pry the assailant away from the structure.