by Gordon Macdonald •
Over the years an angler can amass a huge array of rods and reels, especially if they are into a broad range of fishing techniques. While first string or favourite rods are often stored in the boat, other second and third string rods, the kid’s rods or rods for different types of fishing are commonly left without a permanent home. While stashing these in a spare corner is a common practice, it’s not an ideal way to store them for longer periods and can lead to damage.
If lent up in a corner, hot weather can create a slight bend in your rod. Additionally, reels drain a lot better if they are left horizontal instead of vertical after washing. Water drains out of the drag wells and other drainage points more effectively, taking any salt residue with it. Many anglers use floor standing or wall mounted rod holders and racks, however, these require quite a bit of vacant space. One area that usually isn’t used for storage in sheds, garages or spare rooms is the ceiling. Generally, there are large expanses of spare space on the ceiling ,which you can put to good use for storing your rods.
After moving to a new residence, I needed to store a few spare rods and my kid’s rods so that they were out of the way, yet at hand when required. I have made rod racks for horizontal ceiling storage before, so I decided to whip another one up and show you how in the process. These racks are relatively cheap to make, can store a decent amount of rods and reels and if you shift they are easy to remove and take with you.
The main two pine studs on which the mounting hardware is attached can be screwed to the bearers or studs in your ceiling, or in my case, attached to the underside of a small hanging storage loft suspended from the roof in one of my sheds. You will probably only need two or three self-tapping 50mm+ screws to attach them to the ceiling, but make sure you know where any electrical wiring is located beforehand and ensure that you screw into the timber studs and bearers and not just the ceiling sheeting. You can make them any distance apart that you wish, however for most of my 1.6-2.4m baitcaster, spinning and overhead game rods, I generally space the two pine studs around 1.3m apart. If you make racking for surf rods then this space needs to be greater.
The rods must remain straight when on the racks, even with reels on them, to avoid them adopting a permanent curve. When tip-to-butting your rods, I find that spacing each rod about 11cm apart is ample, however if you had large overhead reels then you may want to increase this slightly. However, the reels could be staggered a bit so that they are not sitting directly in line with each other. This spacing can be a lot smaller if you are only storing rods without the reels attached. The holder I made here will hold twenty rods and reels and costs around $55 to make in materials.
STEP 1.
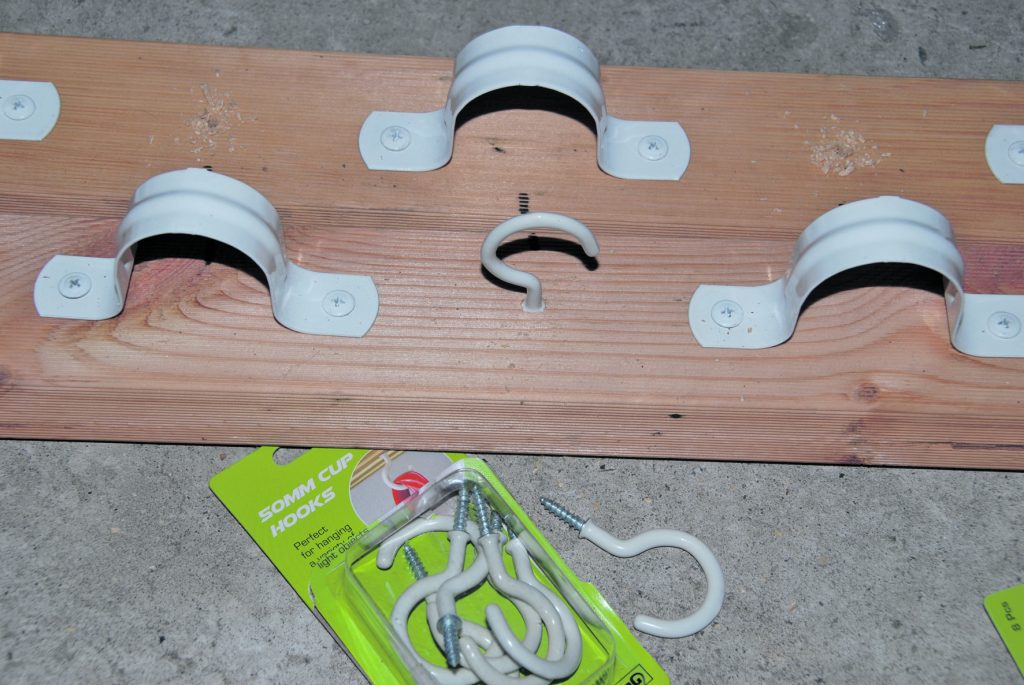
For this project you will need two pine studs (I used 2.4m ones), 40mm powder-coated metal saddles (20x) (used to hold piping in place), 50mm PVC coated cup hooks (20x), size 8-15x20mm needle point button screws (or similar) (40x), a 5/32″ drill bit, a No.2 Phillips screw bit and drill (preferably battery powered). You can get by without the drill, Phillips bit and drill bit and simply use a Phillips screwdriver and extra muscle power to get the job done. If you need to paint the stud to make it blend in with the ceiling then do this first before starting the task.

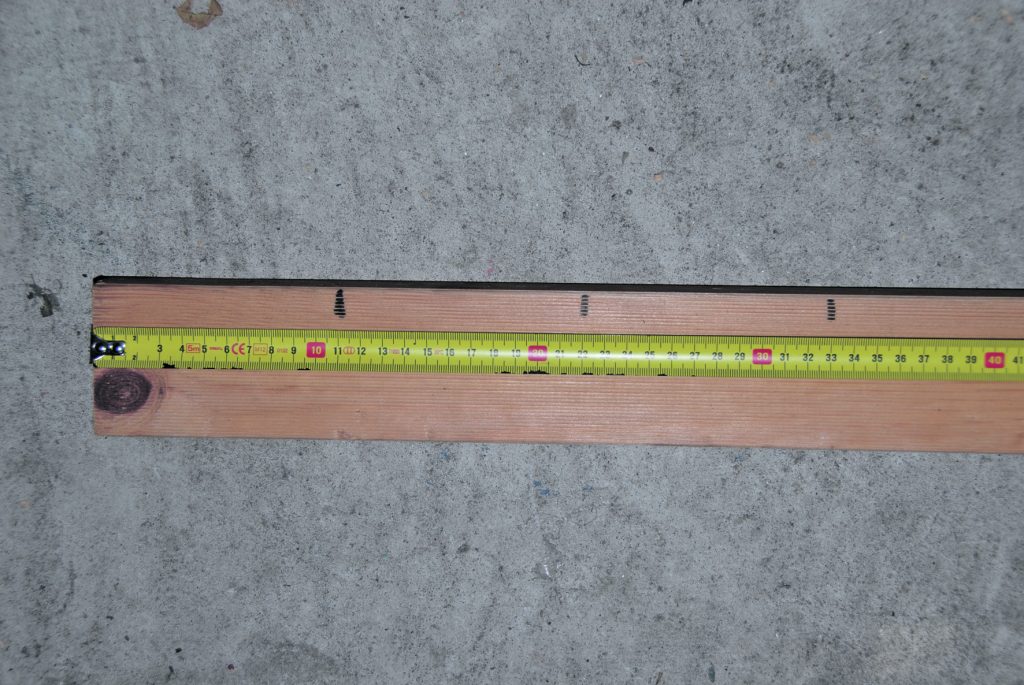
STEP 2.
Mark your first pine stud at 11cm intervals (or your chosen distance apart for each holder). On my 2.4m stud I was able to fit 20 holders with an extra 10cm at each end for affixing to the ceiling.
STEP 3.
At every second mark (every 22cm), centre a saddle and affix it to the pine stud with two screws using your drill and No.2 Phillips bit. I used button head screws, (which were already painted) but you can use whatever you have. It all depends on how neat you want it to look. If you don’t have a drill, just use a screwdriver and a little extra effort to get the job done.

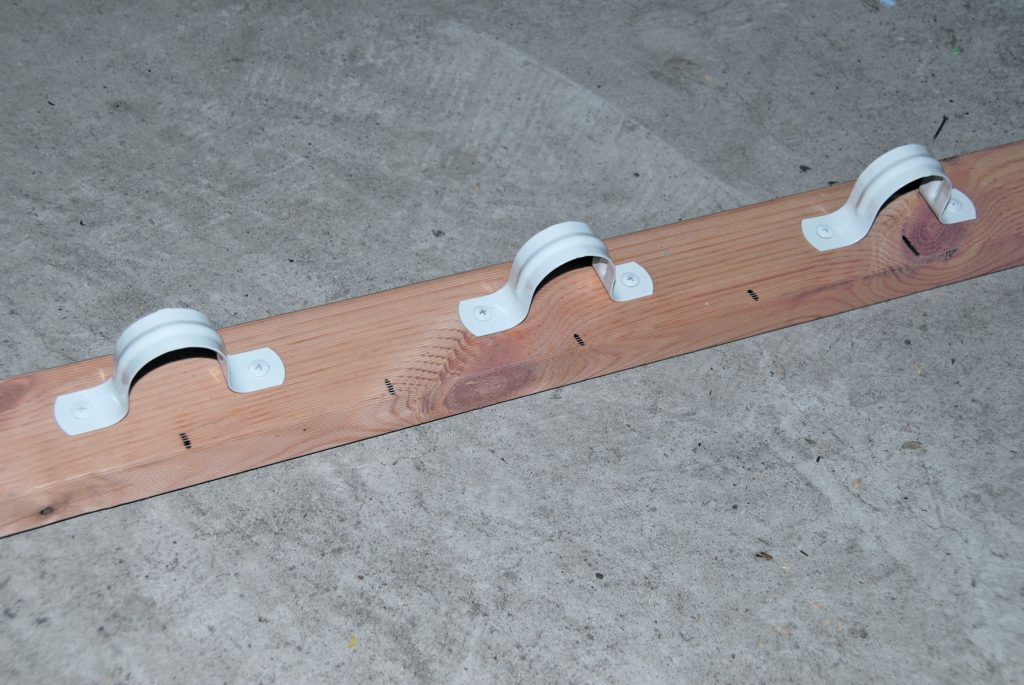
STEP 4.
Once finished, your first side should look like this with ten saddles in total, all positioned centrally at every second mark. Next lay your second pine stud evenly next to the first and copy the spacing for each holder that you made previously.
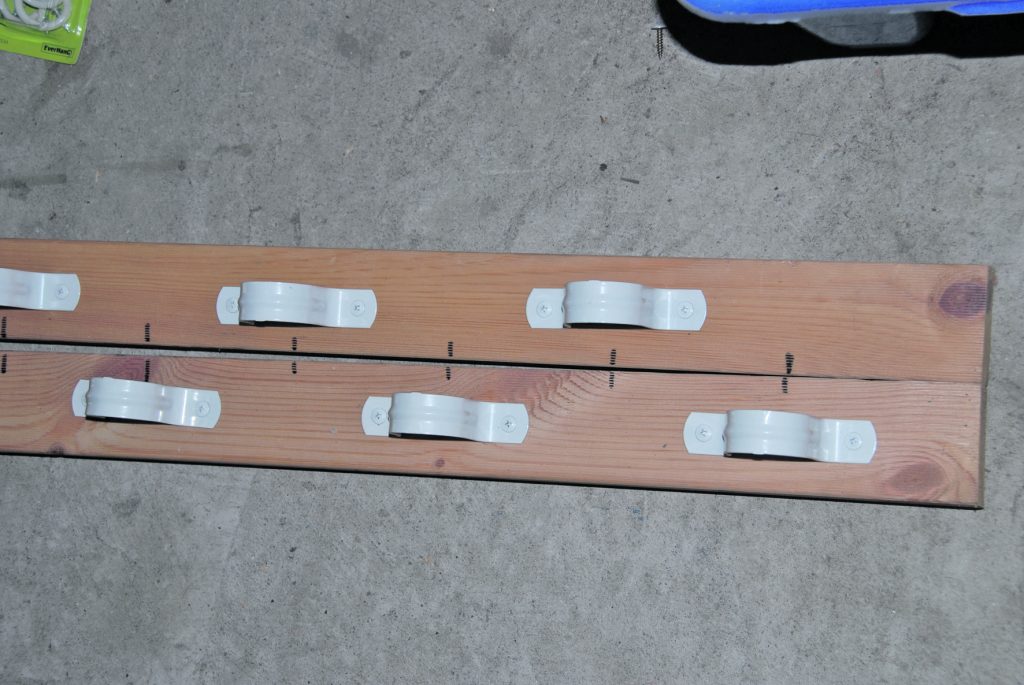
STEP 5.
Screw a saddle centrally at each alternate mark to the first side that you made. The spacings of your saddles do not have to be exact to the millimetre as this won’t affect the final product. Centred approximately over the mark and central on the width of the timber stud is sufficient.
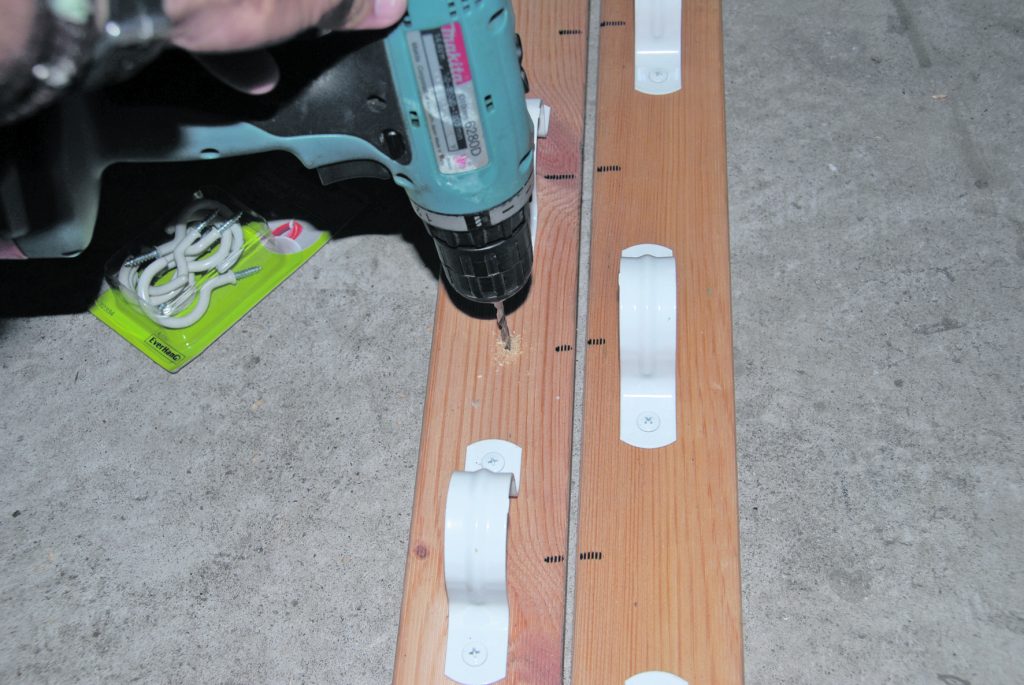
STEP 6.
With all ten alternatively spaced saddles on the second length of timber, it is now time to affix the cup hooks. Drill a hole around a centimetre deep centrally on the pine stud at every second (vacant) spot.
STEP 7.
Screw a cup hook into each hole, leaving the open sides of each hook facing the same way once screwed all the way in. If you don’t have a drill then just use extra downward pressure to get the thread started. I have used PVC coated cup hooks as they don’t rust or mark your rods.
STEP 8.
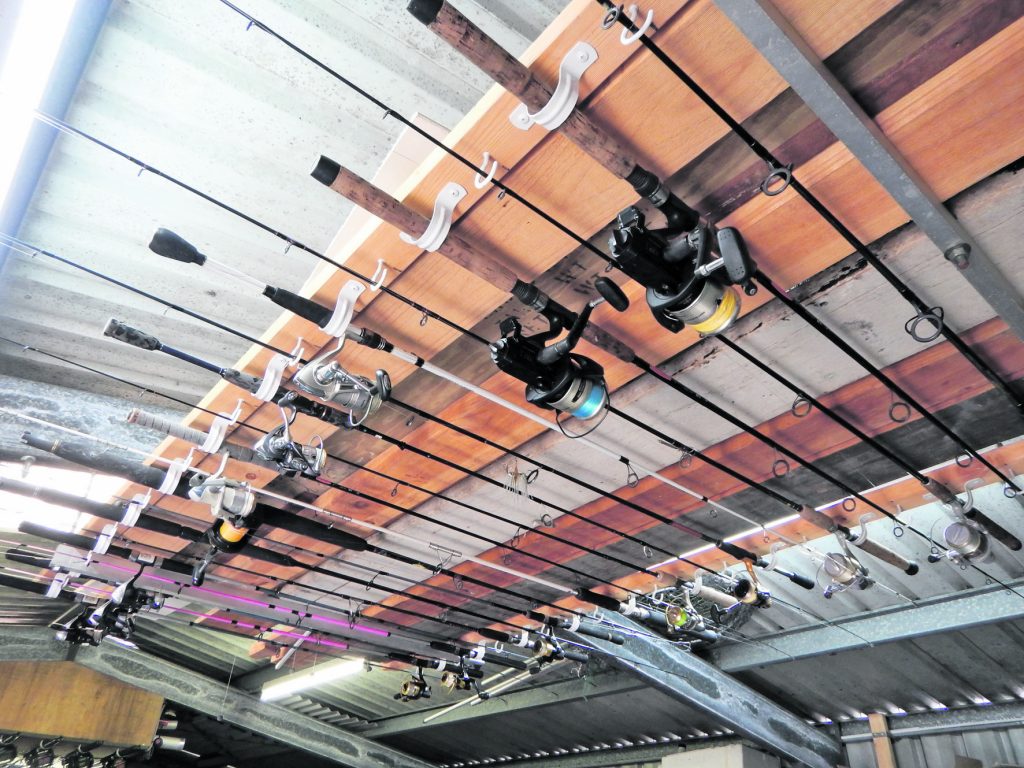
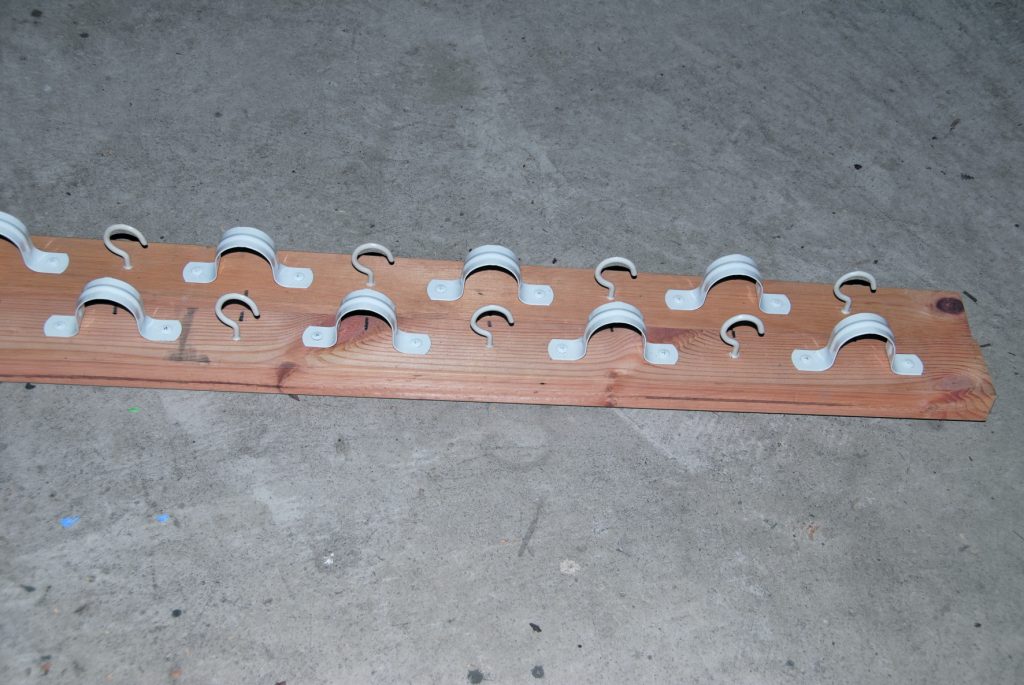
When all the cup hooks are in place, your two racks should look like this. This allows tip-to-butt spacing for your rods, which means more rods can be stored in a given area.
STEP 9.
Attaching the two sides of your rod rack to the ceiling will vary depending on where you are going to put it. Generally a couple of large screws or coach bolts will do the job. Ensure you affix it to load bearing materials and not just the ceiling sheets. Check for any concealed electrical wiring before you start screwing it on. If you decide to shift or move it then you only have a couple of holes to gap fill. Hope you enjoy your new storage racks. And if you have any vacant spots left on your rack then now is a great opportunity to head down to the tackle shop and buy yourself another outfit.